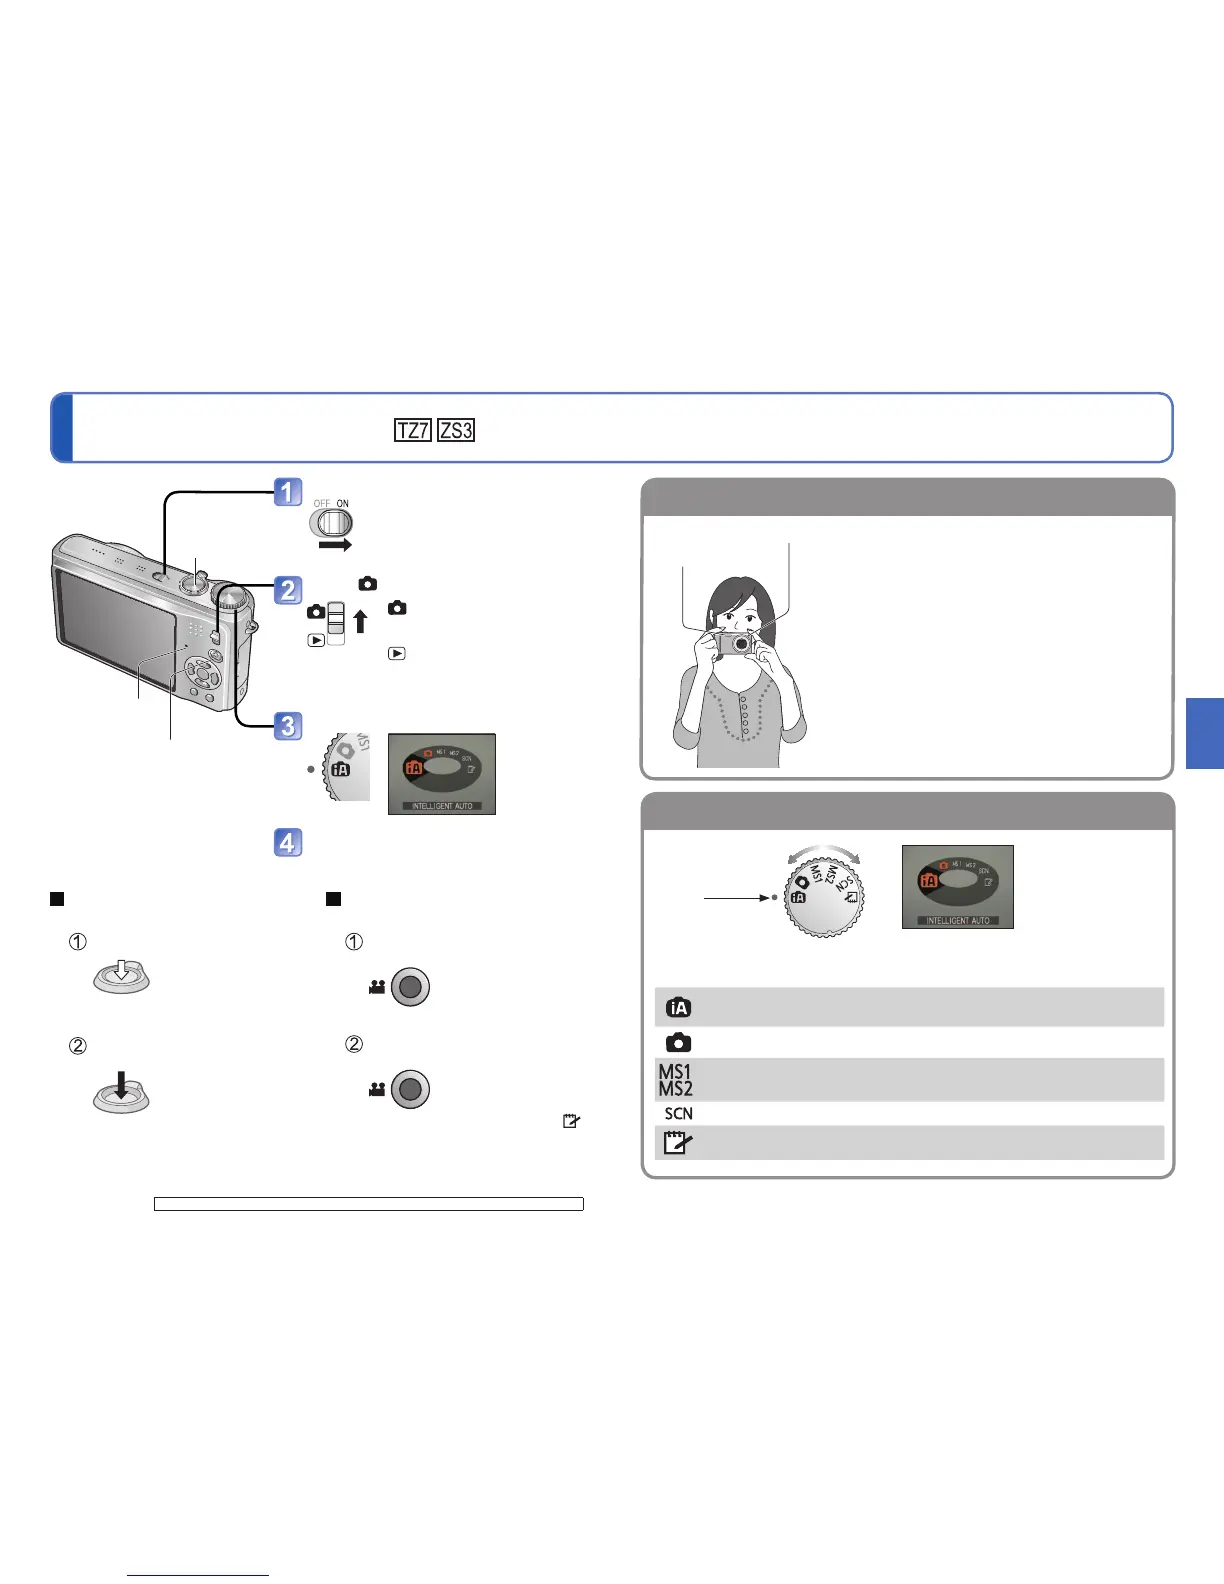
Turn on the power
Status indicator illuminated for
approx. 1 second.
Set to
: Pictures and motion
pictures can be taken.
: The captured pictures and
motion pictures can be
played back.
Set to the desired recording mode
Aim the camera and shoot
Status indicator
Shutter button
Motion picture button
• Motion pictures can be recorded
immediately by pressing the
motion picture button.
Taking still pictures
Press the shutter button
Gently press the shutter button
Press halfway
(Adjust the focus)
Press and hold the shutter
button to take picture
Press fully
Recording motion pictures
Press the motion picture button
Press the motion picture button
to start recording
Press the motion picture button
again to finish recording
• Motion pictures cannot be recorded in
(CLIPBOARD mode). (P.59)
For the operating procedures for the DMC-TZ6/DMC-ZS1, see P.28.
Flash
AF assist lamp
• Stand with your arms close to your body and with
your legs apart.
• Do not touch the lens.
• Do not block the microphone when recording audio.
(P.10)
• Do not block the flash or the lamp. Do not look at it
from close range.
• Pictures taken with camera held vertically can
automatically be displayed vertically in playback.
(Only when ‘ROTATE DISP.’ (P.92) is set to ‘ON’)
Pictures may not be able to be displayed vertically
if taken with camera facing upwards or downwards.
Motion pictures cannot be displayed vertically during
playback.
Align to
correct mode
The current mode will be displayed on the
LCD monitor when the mode dial is turned.
INTELLIGENT AUTO
Mode
Take images with automatic settings (P.30).
NORMAL PICTURE Mode
Take images with customized settings (P.33).
MY SCN MODE
Taking images in frequently-used scene
modes (P.58).
SCENE MODE
Take images according to scene (P.49).
CLIPBOARD Mode
Take pictures as memos (P.79).
 Loading...