To restore default settings
‘RESET’ (P.22)
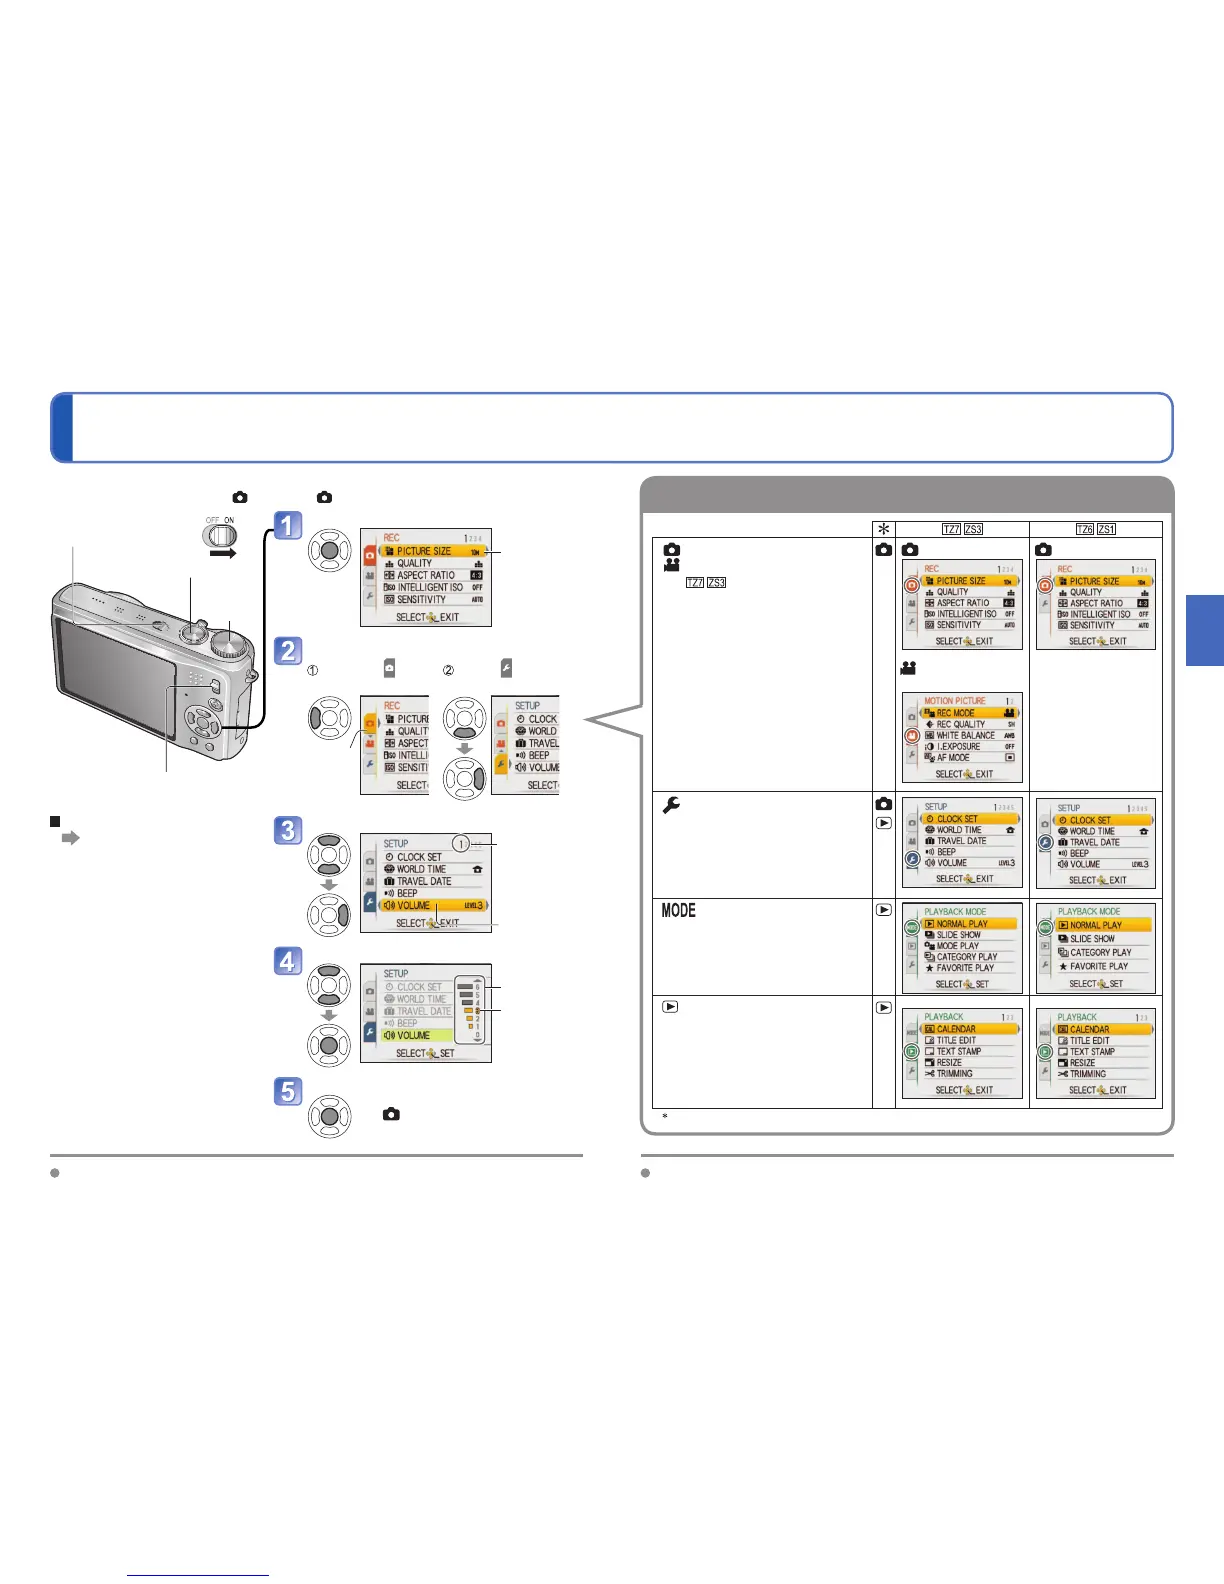
Bring up the menu
The selected
item is
displayed with
an orange
background.
Select SETUP menu
Highlight Select and return
to menu items
Turns
orange
Select the item
Page
(Zoom lever can
be used to switch
to next screen.)
Item
Select the setting
Settings
Selected
setting
Finish
• When the REC/PLAY switch is set
to , menu can be closed with a
half-press of the shutter button.
Shutter button
Settings display may vary according to items.
REC/PLAY switch
Camera ON/OFF switch
(Example) Change ‘VOLUME’ in SETUP menu when in NORMAL PICTURE mode.
(REC/PLAY switch
, Mode dial )
Mode dial
Menu items displayed vary according to mode dial setting.
REC menu
MOTION PICTURE menu
Changing image preferences
(P.67 - 78)
• Make settings such as white
balance, sensitivity, aspect
ratio, and picture size.
REC menu
REC menu
MOTION
PICTURE menu
SETUP menu
Making the camera more
convenient to use (P.19 - 25)
• Make settings for ease of use
such as adjusting the clock and
changing the beep sounds.
PLAYBACK MODE menu
Viewing recorded pictures
(P.83 - 86)
• Choose a playback type to see
slideshows or just your favourite
pictures.
PLAYBACK menu
Using your pictures (P.87 - 96)
• Make settings for using the
images you have taken,
including protecting, trimming,
and handy settings for printing
your pictures (DPOF).
REC/PLAY switch
 Loading...