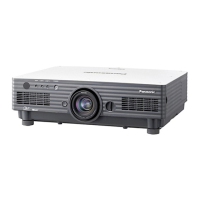
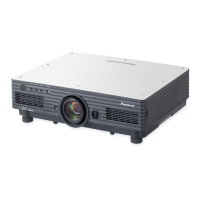
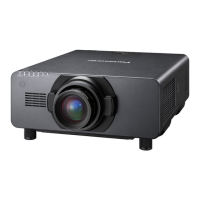
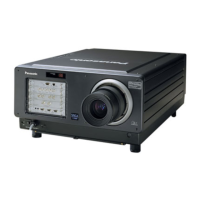
Do you have a question about the Panasonic PT-D4000 and is the answer not in the manual?
Precautions against electric shock, water ingress, foreign objects, and wet handling.
Guidelines for qualified technicians, secure mounting, and avoiding unstable surfaces.
Warnings about smoke, overloading, looking into the lens, and projector modification.
Instructions on using, securing, and maintaining the power cord.
Precautions for humid, dusty, or hot environments and air outlet obstruction.
Guidelines for battery use, preventing leaks, and handling empty batteries.
Warnings regarding lamp cooling time and disassembly precautions.
Description of the remote control, batteries, and lens cover.
Details on the power cord, wire cable, and M6 screw.
Ensuring lens cap is on during transport and proper product disposal.
Avoiding vibrations, high voltage, unstable surfaces, and ensuring proper ceiling mount.
Ensuring clear images, avoiding touching the lens, lamp safety, and cleaning.
Overview of remote buttons for power, navigation, input, and settings.
Using focus, zoom, and shift buttons on the remote control.
Function 1, default settings, ID setup, and wired remote control terminal.
Identification of AC IN, air filter, security lock, and lens controls on the front.
Explanation of TEMP, LAMP1, LAMP2, and Power indicator lamps.
Notes on using the lens cap and air intake vents.
Description of power, input selection, menu, and adjustment buttons on the rear.
General guidelines for connecting video/audio equipment and PCs.
Details for S-VIDEO IN, DVI-D IN, and RGB2 input terminal pinouts.
Diagrams showing how to connect AV devices like DVD players and video decks.
Diagrams illustrating connections from PCs via RGB or DVI terminals.
Step-by-step instructions for turning on the projector.
Adjusting focus, zoom, shift, input signals, and projector tilt.
Steps to properly turn off the projector and remove main power.
Understanding the function that allows immediate power cut.
Procedures for attaching and detaching the projection lens.
How to adjust focus, zoom, and lens position using projector or remote controls.
Adjusting lens position and using automatic setup for image correction.
Monitoring projector status and using the shutter function.
Diagram illustrating the hierarchy of the projector's on-screen menus.
Accessing and adjusting picture quality settings for various signals.
Network, Option, Security, Position, Language, and Test Pattern settings.
Steps for selecting, adjusting items, and returning to previous menus.
Understanding item status and restoring factory default settings.
Selecting picture modes and adjusting contrast, brightness, color, and tint.
Adjusting image vividness for use in bright lighting conditions.
Adjusting image crispness and reducing video noise.
Enabling AI compensation and selecting the input signal system.
Moving image position horizontally/vertically and changing aspect ratio.
Adjusting image size, minimizing noise, and correcting keystone distortion.
Using Digital Cinema Reality and Blanking for image processing.
Optimizing image quality by adjusting resolution and raster position.
Selecting XGA/SXGA modes and changing the on-screen display language.
Adjusting individual colors and contrast based on the environment.
Configuring automatic signal detection and screen background color.
Setting startup logos and managing image adjustment data sets.
Optimizing DVI signal compatibility with external equipment.
Configuring FUNC1 button, OSD position, and saving OSD settings.
Adjusting fan control for altitude and projection direction.
Setting projector ID for multi-unit control and selecting installation method.
Choosing lamp modes (single/dual) and enabling automatic lamp switching.
Setting communication parameters for serial control.
Viewing system status and configuring auto power off, date, time, and password.
Displaying and cycling through internal test patterns for image checks.
Configuring network settings like host name, IP address, and DHCP.
PC system requirements and example connection for network control.
Steps to connect to and access the projector's web interface.
Procedure for updating the password for web browser control.
Overview of controls available on the basic control page.
Accessing and using the detailed control options via the web interface.
Viewing projector status, temperature, runtime, and self-diagnosis.
Displaying detailed error messages and their causes.
Configuring mail server, sender, recipient, and temperature warning thresholds.
Setting up multiple email recipients and periodic report schedules.
Configuring authentication servers and DNS server addresses.
Using the ping test to check network connectivity.
Examples of email notifications for projector reports and errors.
Adjusting the projector's internal clock via the Adjust Clock page.
Settings for DHCP client, IP address, subnet mask, and gateway.
Displaying network module version, IP address, MAC address, and status.
List of commands for controlling projector settings and status via PJLink™.
Security measures for PJLink control, including password usage.
Enabling, disabling, and changing the projector's security password.
Customizing on-screen text or user-registered pictures.
Restricting operation of projector controls via panel or remote.
Diagrams for connecting single and plural projectors via serial terminals.
Details of D-Sub 9-pin connector pinouts and signal names.
Structure of serial commands, including STX, ID, command, and ETX.
Available commands for controlling the projector from a distant location.
Requirements for cables connecting to the REMOTE 2 terminal.
Explanation of the TEMP indicator for warm-up and high temperature status.
Explanation of LAMP1 and LAMP2 indicators for replacement and errors.
Step-by-step guide for removing, cleaning, and refitting air filters.
Guidance on when to replace the air filter, typically with lamp replacement.
Safety warnings before replacement and indicators showing when to replace lamps.
Step-by-step instructions for safely replacing the projector lamp units.
Listing of the wire cable and wire fastening screw included for mounting.
Step-by-step guide for safely installing the ceiling mount bracket.
Checks for power, no image, blurred image, and color tone problems.
Checks for remote control, abnormal image, and PC connection issues.
Model, power, display, scanning frequencies, and interface port details.
Cabinet dimensions, mass, operating conditions, and optional accessories.
Table of supported display modes, resolutions, and signal formats.
Diagrams showing the overall physical size of the projector.
Recommended clearances for ventilation and installation.
Restrictions regarding the use and modification of the built-in software.
List of registered trademarks and their owners.
Information on product disposal for countries outside the European Union.
Note regarding the CR Coin Cell Lithium Battery and special handling.
Contact details for Panasonic Projector Systems Company and Canada Inc.
| Brightness | 4000 lumens |
|---|---|
| Contrast Ratio | 2000:1 |
| Resolution | 1024 x 768 pixels (XGA) |
| Lamp Life | 2000 hours (normal mode), 3000 hours (eco mode) |
| Projection Size | 40 - 300 inches |
| Input Connectors | S-Video, Composite, Component |
| Display Technology | 3LCD |
