Chapter 5 Operations — Content Manager
ENGLISH - 181
5) Select a file you want to cancel upload, click [Delete].
f You can select multiple les.
6) Click the [Upload] button.
f The upload target schedule is registered in the SD card.
Note
f When the upload destination SD card contains the same day of the week schedule, or the same date schedule, the schedule is overwritten
with the uploaded schedule.
f Backup les are saved in tar format.
f If the size of the original backup data is large, several backup les may have been created to save the data. Make sure to add all the
relevant les before upload.
f Upload of schedules is supported only in Windows computers or Mac.
f The timetable ID registered when a schedule has been uploaded may vary depending on the schedule registration situation of the upload
destination.
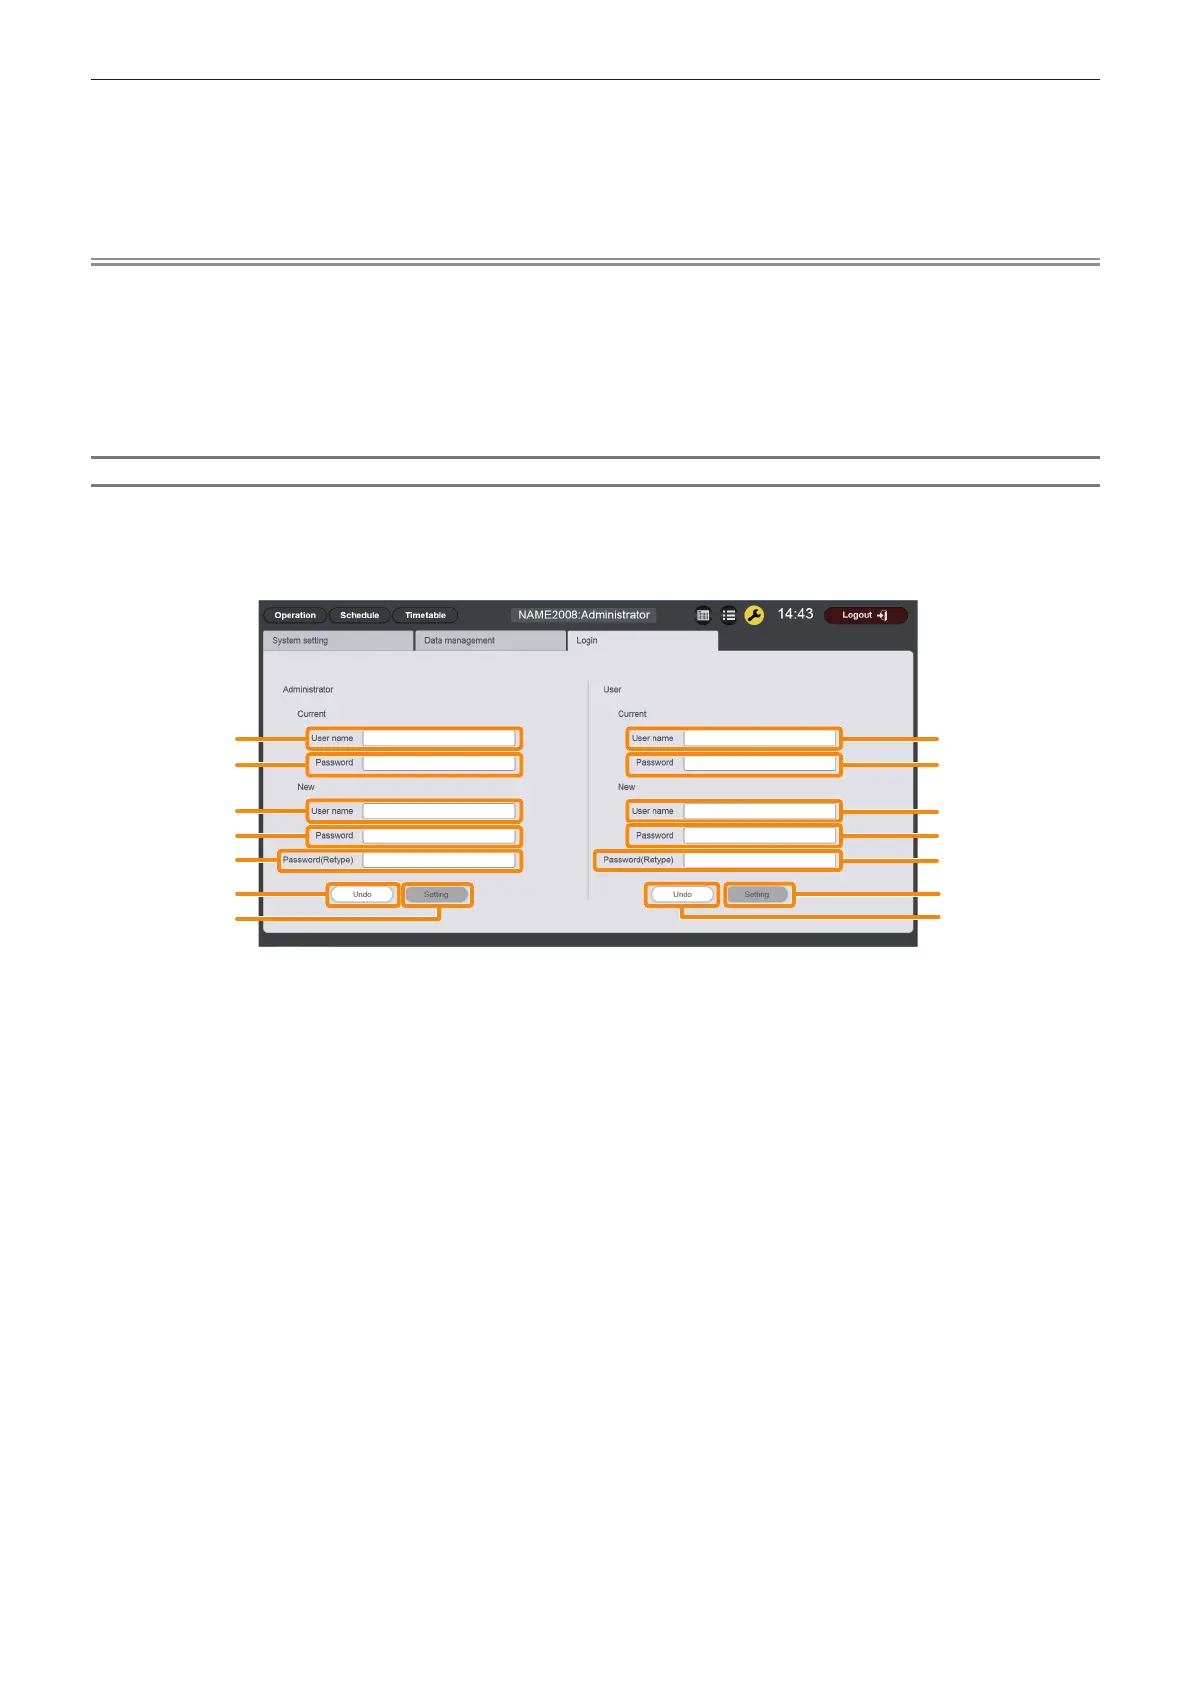
Changing login information
Set the user name and password for logging in to the Content Manager for administrator rights/user rights
respectively.
r [Login] page
1
2
3
4
5
1
2
3
4
5
6
7
7
6
1 [Current] - [User name]
Enter the current user name. (Up to 8 alphanumeric characters
in single byte)
2 [Current] - [Password]
Enter the current password. (Up to 16 alphanumeric characters
in single byte)
3 [New] - [User name]
Enter the desired new user name. (Up to 8 alphanumeric
characters in single byte)
4 [New] - [Password]
Enter the desired new password. (Up to 16 alphanumeric
characters in single byte)
5 [New] - [Password(Retype)]
Enter the desired new password again.
6 [Undo] button
Click this to clear the entered information.
7 [Setting] button
Click this to conrm the settings.
r Procedure
1) Click the [Login] tab.
f The [Login] page is displayed.
2) Enter the current user name and password.
3) Enter the desired new user name and password.
4) Enter the desired new password again.
5) Click the [Setting] button.
f Set contents are registered in the projector.

 Loading...