About Your Projector
Preparation
14 -
E
NGLISH
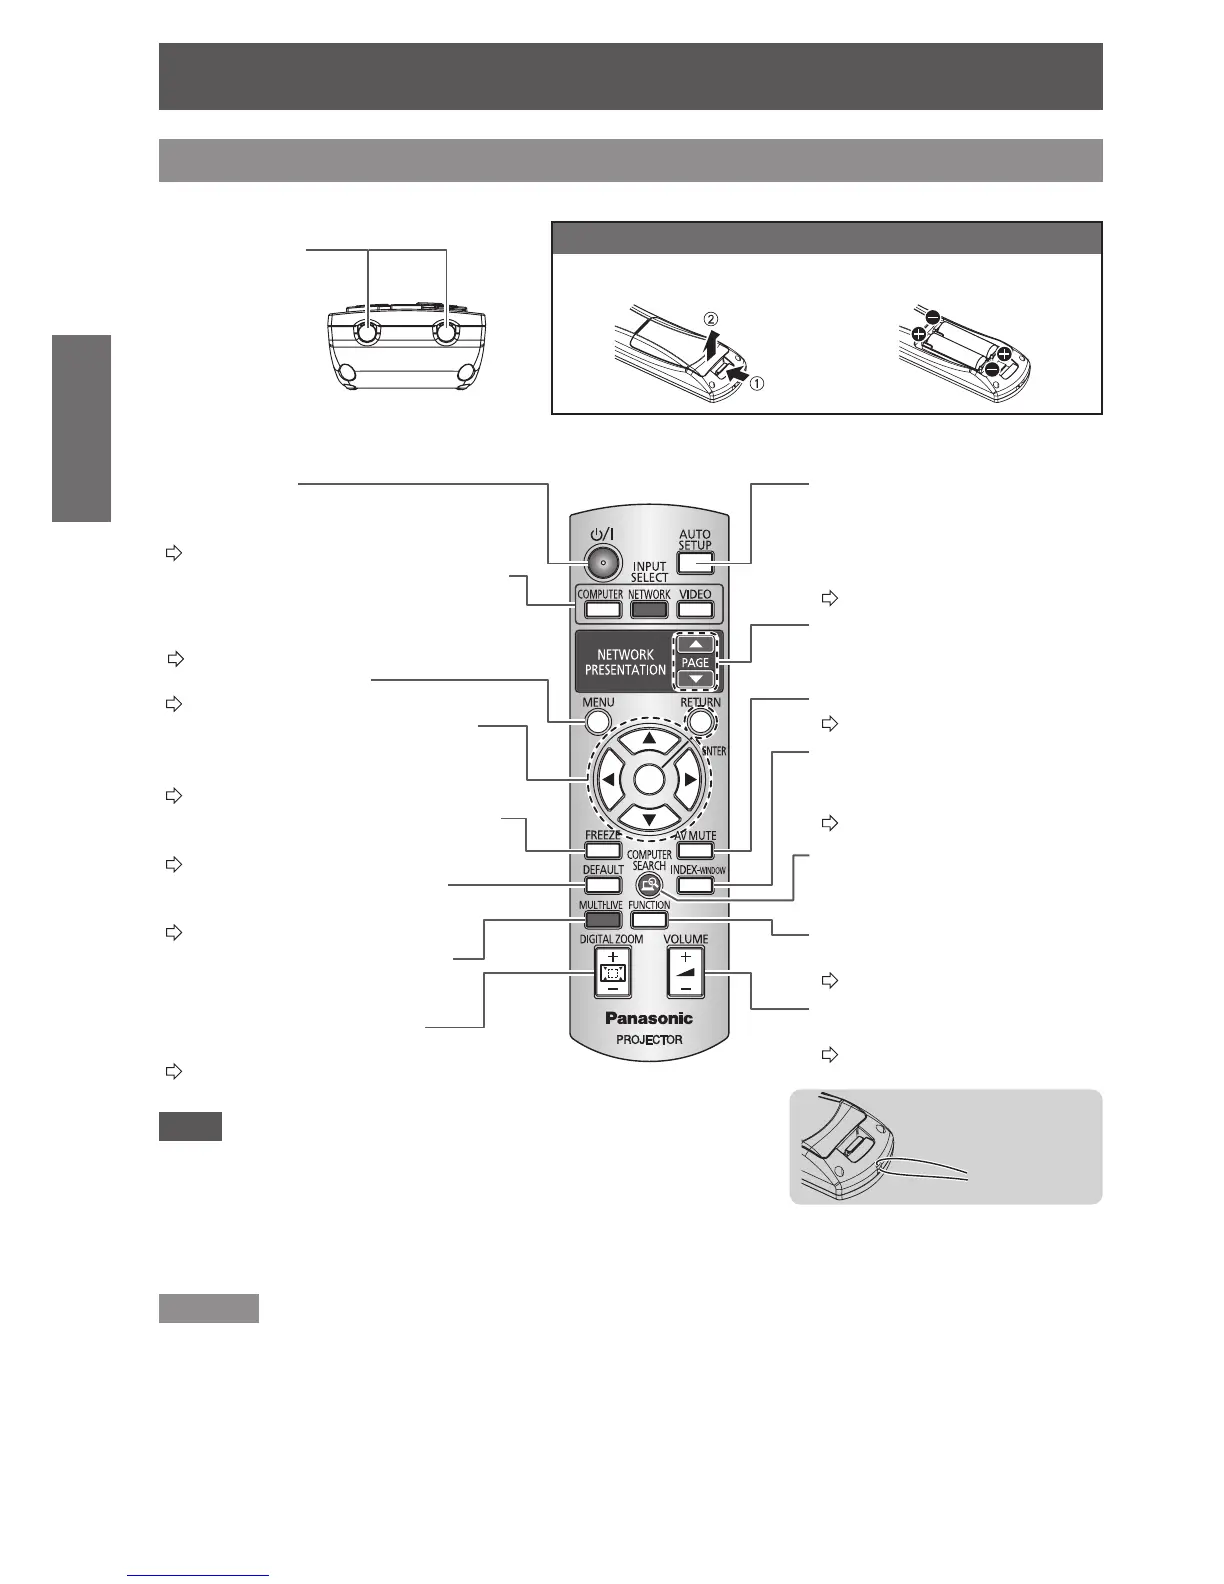
Remote control
J
Top view
Remote control
signal emitters
Front view
J
POWER button
Switch between stand-by
mode and projection mode.
(
Æ
page 21, 22)
Switch the required input signal button to
select.
(The
NETWORK
button is only for PT-LB90NTU)
(See CD-ROM contents.)
(
Æ
page 24)
Display the main menu.
(
Æ
page 28)
Navigate through the menus with the
▲▼◄►buttons, and activate the menu
item with ENTER button.
(
Æ
page 27)
Capture the projected image as a frozen
picture.
(
Æ
page 24)
Reset some of the settings to the
factory default settings.
(
Æ
page 25)
The MULTI-LIVE button is only for
PT-LB90NTU.
(See CD-ROM contents.)
Control to change the scale by
means of digital zoom.
(
Æ
page 26)
Detect the input signal and the
setting of SHIFT, DOT CLOCK
and CLOCK PHASE in POSITION
menu will be adjusted automati-
cally for COMPUTER signals.
(
Æ
page 25)
The PAGE buttons are only for
PT-LB90NTU.
(See CD-ROM contents.)
Turn off the projection temporarily.
(
Æ
page 24)
Display the frozen image while
the display of subsequent images
continues.
(
Æ
page 25)
The COMPUTER SEARCH button
is only for PT-LB90NTU.
(See CD-ROM contents.)
Assign a useful function for a
shortcut.
(
Æ
page 26, 41)
Control to adjust the volume of the
speaker.
(
Æ
page 25)
Note
Do not drop the remote control.
z
Avoid contact with liquids or moisture.
z
Do not attempt to modify or disassemble the remote control.
z
Do not mix old and new batteries or batteries of different types.
z
Use only manganese batteries or alkaline batteries with the remote control.
Do not swing the strapped remote control.
z
Remarks
z
Do not let strong light shine onto the signal receptor.
The remote control may malfunction under strong light such as uorescent.
z
You can operate the projector with the remote control within the remote range of 15 m (49'2"), approximately
±30 ° vertically and horizontally.
If there are any obstacles between the remote control emitter and the remote control signal receptor, the remote
z
control may not operate correctly.
The operating range may differ due to the screen material, and this function may not be effective with a translu-
cent screen.
Battery compartment
Press the tab and lift up the cover.
Insert the batteries according to the
polarity diagram indicated inside.
Attaching a hand strap
You can attach a favourite
strap onto the remote control.
 Loading...