be used for resetting the incidence polarizer
position.
3. Unscrew the 1 screw and remove the incidence polarizer
(G).
4. Attach a new incidence polarizer (G) and align it with the
mark.
5. Tighten the 1 screw with care not to move the incidence
polarizer position.
7.15. Replacement of Incidence
Polarizer (R and B)
1. Remove the A-P.C.Board block according to the steps 1
through 5 in the section 7.3. "Removal of A-P.C.Board".
2. Unscrew the 2 screws and remove the LCD block.
Note:
·
Be careful not to touch the surface of prism and LCD
panel.
3. Unscrew the 3 screws and remove the analysis case
(upper) .
Note:
·
The incidence polarizer (G) is installed in the
analysis case (upper). Handle with care not to apply
external force to the incidence polarizer (G).
4. Replace the incidence polarizer.
Note:
·
Do not touch the incidence polarizer directly by the
hand.
Must use a fingerstall or clean gloves.
7.16. Replacement of Projection
Polarizer
·
The procedure is described as an example of projection
polarizer (B).
1. Remove the LCD block according to the section 7.12.
"Removal of LCD Block".
Note:
·
Be careful not to touch the surface of prism and LCD
panel.
2. Remove the projection polarizer which requires replacing.
(The projection polarizer is secured with adhesive tape.)
Notes:
·
Be careful not to damage peripheral components
(prism, LCD panel, etc.).
·
Use tweezers.
3. Install new projection polarizer.
a. Put adhesive tape on the projection polarizer.
b. Stick the projection polarizer on the specified position.
Notes:
·
Align the projection polarizer with the guides
(lower, side) of LCD block.
·
Be careful not to touch the surface of projection
polarizer.
·
Use tweezers.
19
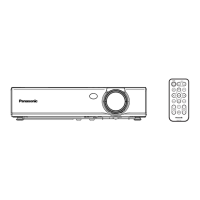
PT-LB80NTU / PT-LB80NTE / PT-LB80NTEA / PT-LB80U / PT-LB80E / PT-LB80EA / PT-LB75NTU / PT-LB75NTE / PT-LB75NTEA / PT-LB75U / PT-LB75E / PT-LB75EA
 Loading...


