11.6. Checking & Repairing CD
Servo P.C.B.
Step 1 : Remove Top Panel.
Step 2 : Remove Front Panel.
Step 3 : Remove Rear Panel.
Step 4 : Remove Inner Chassis
Step 5 : Remove Mechanism Unit
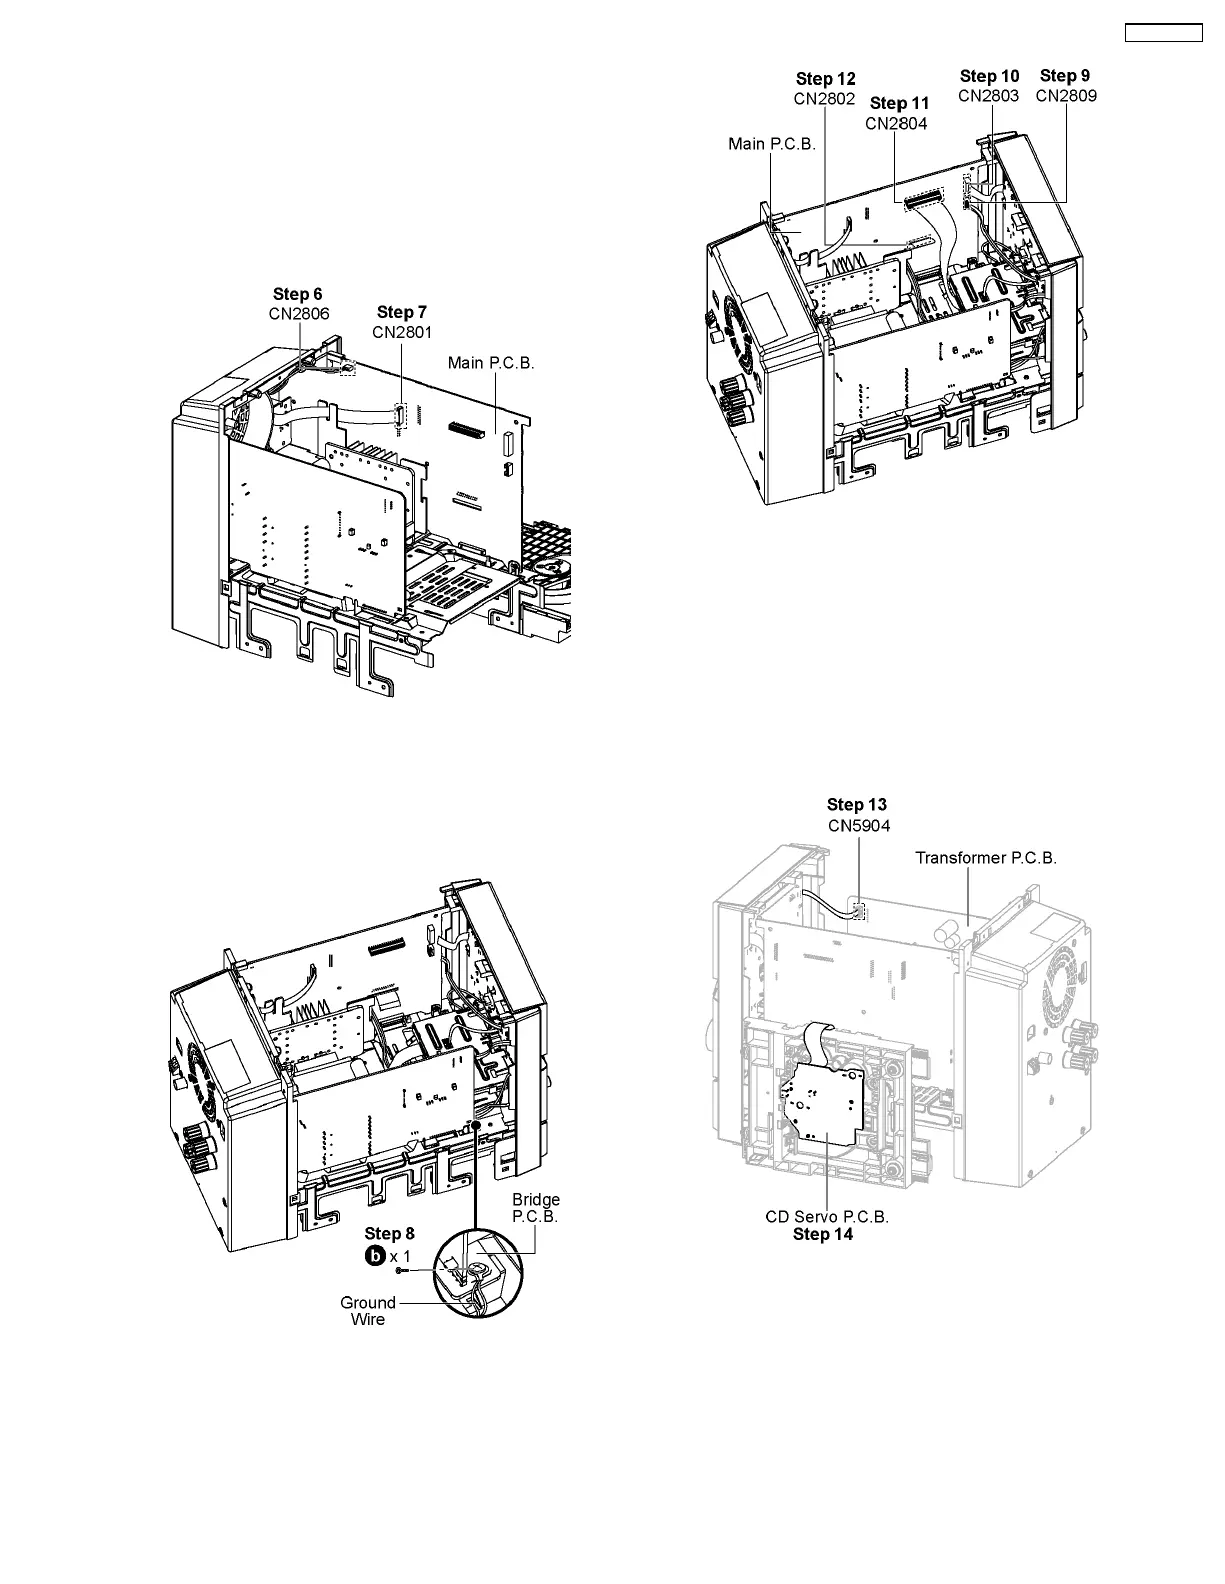
Step 6 : Connect 2P cable at the connector (CN2806) on Main
P.C.B..
Step 7 : Connect 14P FFC cable at the connector (CN2801) on
Main P.C.B..
Step 8 : Screw the Ground Wire Bridge P.C.B..
Step 9 : Connect 4P cable at the connector (CN2809) on Main
P.C.B..
Step 10 : Connect 17P FFC cable at the connector (CN2803)
on Main P.C.B..
Step 11 : Connect 20P FFC cable at the connector (CN2804)
on Main P.C.B..
Step 12 : Connect 22P FFC cable at the connector (CN2802)
on Main P.C.B..
Step 13 : Connect 4P cable at the connector (CN5904) on
Transformer P.C.B..
Step 14 : Check and Repair CD Servo P.C.B..
47
SA-PMX3GN