5
RQT0A83
24 Set the programme function / Delete a
programmed track
25 Set the play menu item
26 Change the displayed information
27 Clock and timer operation
28 Set favourite play (l 15)
29 Mute the sound
Press again to cancel. “Mute” is also cancelled when the
volume is adjusted or the unit is turned off.
30 Select recording mode (l 20)
31 Enter sound menu
32 Enter setup menu
33 Selection/OK
34 Dim the display panel and indicators
Press again to cancel.
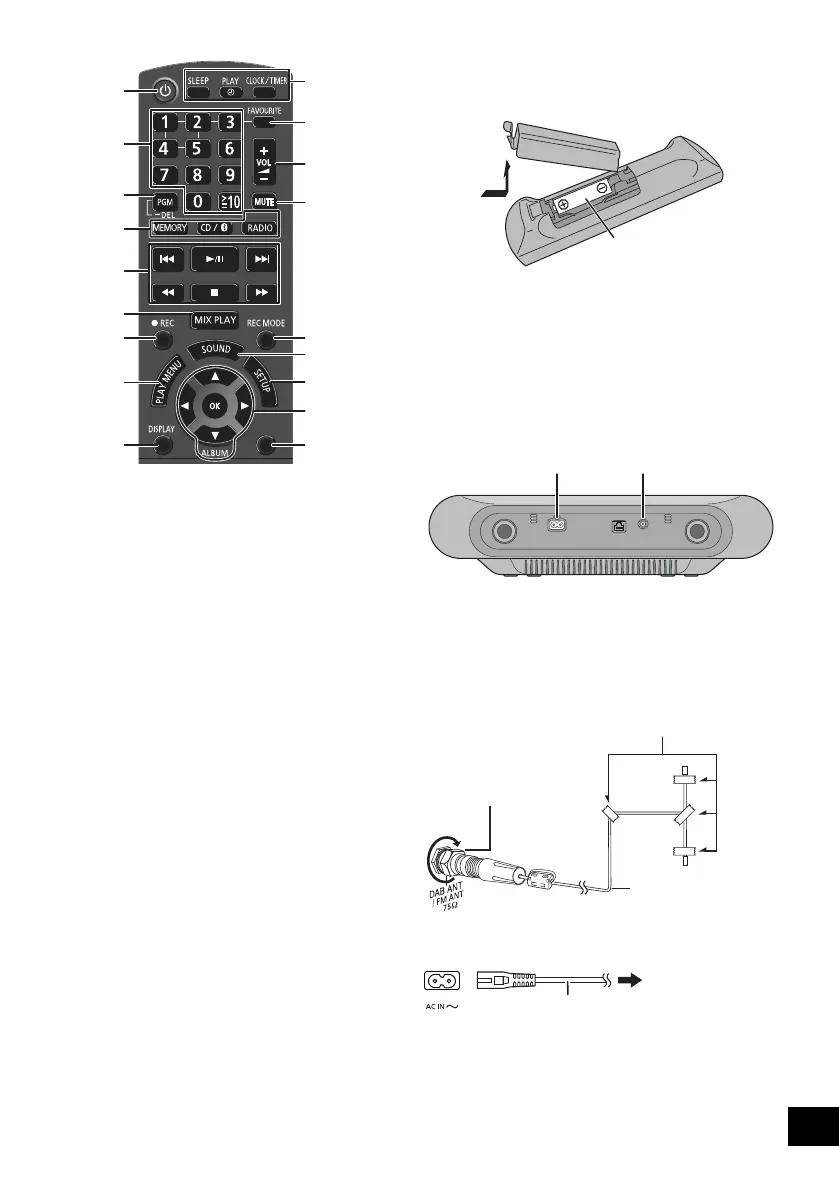
Using the remote control
Insert the battery so the terminals (i and j) match
those in the remote control.
Point it at the remote control signal sensor on this unit.
≥ To avoid interference, please do not put any objects in front
of signal sensor.
Connections
Connect the AC mains lead after all other
connections are completed.
1 Connect the antenna.
This unit can receive DAB/DAB+ and FM stations
with the DAB antenna.
≥ Tape the antenna to a wall or column in a position with
the least amount of interference.
≥ If radio reception is poor, use a DAB outdoor antenna
(not supplied).
2 Connect the AC mains lead.
This unit consumes a small amount of AC power
(l 30) even when turned off.
≥ In the interest of energy conservation, if you will not be using
this unit for an extended period of time, unplug it from the
mains socket.
≥ Some settings will be lost after you disconnect the system.
You have to set them again.
§ These switches work just by touching the marks. Each
time you touch the switch, there will be a beep sound. The
beep sound can be set to off. (l 24)
≥ To avoid operating these switches unintentionally when
moving the unit, turn the unit off before moving it.
22
23
24
2
11
4
25
5
26
27
28
12
29
31
32
30
33
34
DIMMER
EXT-IN
(Alkaline or manganese
battery)
Adhesive tape (not supplied)
DAB indoor antenna
(supplied)
Be sure to tighten
the nut fully.
To a mains socket
AC mains lead (supplied)
SC-ALL7CD_EGEBGN_RQT0A83-B.book 5 ページ 2016年3月1日 火曜日 午後4時19分