© Panasonic Corporation 2015.
ORDER NO. MTV1505395CE
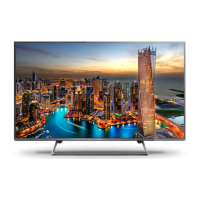
LED TV
Model No. TH-55CX700M
TH-60CX700M
Chassis: LA59
Destination: MIDDLE EAST
TABLE OF CONTENTS
PAGE PAGE
1 Safety Precautions----------------------------------------------- 3
1.1. General Guidelines---------------------------------------- 3
1.1.1. Leakage Current Cold Check---------------------- 3
1.1.2. Leakage Current Hot Check (See Figure
1.) --------------------------------------------------------- 3
2 Warning -------------------------------------------------------------- 4
2.1. Prevention of Electrostatic Discharge (ESD)
to Electrostatically Sensitive (ES) Devices---------- 4
2.2. About lead free solder (PbF)---------------------------- 5
3 Service Navigation ----------------------------------------------- 6
3.1. Service Hint
(TH-55CX700M / TH-60CX700M)--------------------- 6
4 Specifications ----------------------------------------------------- 7
5 CS Maintenance Menu ------------------------------------------ 9
5.1. How to enter into CS Maintenance Menu ----------- 9
5.1.1. Purpose ------------------------------------------------- 9
5.1.2. Key command ----------------------------------------- 9
5.1.3. How to exit---------------------------------------------- 9
5.2. Repack ------------------------------------------------------- 9
5.3. EDID Clock-------------------------------------------------10
5.4. USB HDD Drive Check --------------------------------- 10
5.5. System Information-------------------------------------- 11
5.5.1. How to access --------------------------------------- 11
5.5.2. How to exit -------------------------------------------- 11
5.6. Hotel mode ------------------------------------------------ 12
5.6.1. Purpose------------------------------------------------ 12
5.6.2. Access command to the Hotel mode setup
menu --------------------------------------------------- 12
5.6.3. To exit the Hotel mode setup menu------------- 12
5.6.4. Explain the Hotel mode setup menu ----------- 12
5.7. Data Copy by USB Memory --------------------------- 13
5.7.1. Purpose------------------------------------------------ 13
5.7.2. Preparation-------------------------------------------- 13
5.7.3. Data copy from TV set to USB Memory ------- 14
5.7.4. Data copy from USB Memory to TV set ------- 15
6 Troubleshooting Guide --------------------------------------- 16
6.1. Check of the IIC bus lines------------------------------ 16
6.1.1. How to access --------------------------------------- 16
6.1.2. Self-check indication only ------------------------- 16