7
2-4 Introduction to installation
Note: If any of the below operation is incorrect, turn off the power immediately and check the
scanner for any improper connections. Go through all steps again.
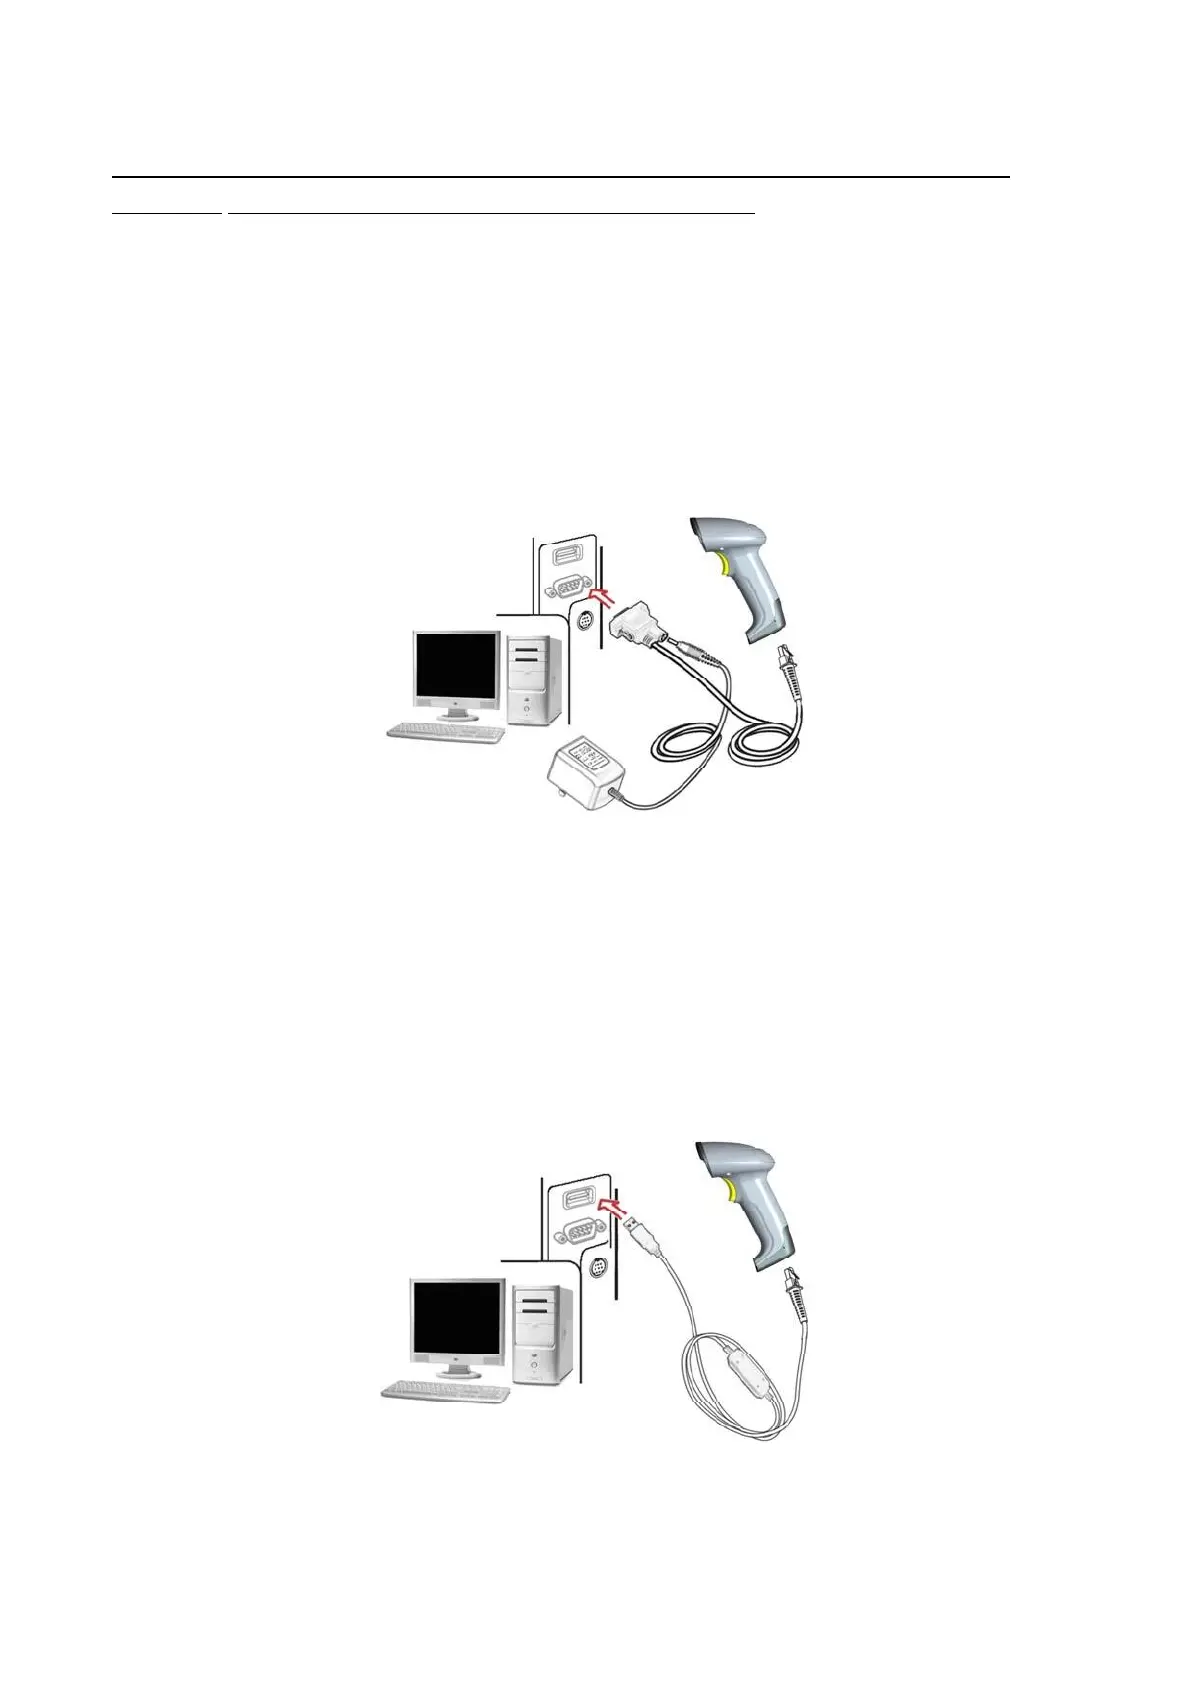
2-4-1 Installation - RS-232
1. Connect the RS-232 interface cable to the bottom of the scanner.
2. Connect the other end of the interface cable to the serial port on the host. Tighten the two screws to
secure the connector to the port.
3. If the host does not have power supply (on PIN 9), connect the external power supply (DC 5V adapter)
to the RS-232 cable.
Figure 2-4 Installation - RS-232
2-4-2 Installation - USB
The scanner attaches directly to a USB host, and is powered by it. No additional power supply is required.
1. Refer to Figure 2-5, connect the USB interface cable to the bottom of the scanner.
2. Plug the series A connector in the USB host, or an available port of the terminal.
3. Windows will automatically detect the USB device.
Figure 2-5 Installation - USB
2-4-3 Remove the interface cable