EMBROIDERY BASICS
19
Hoopless Frame Technique
Hoopless window frames are the perfect solution for those hard to hoop items such as pockets, cuffs, collars
and bags or anything that would be difcult to place in a hoop. They come with several different size window
frames that are interchangeable.
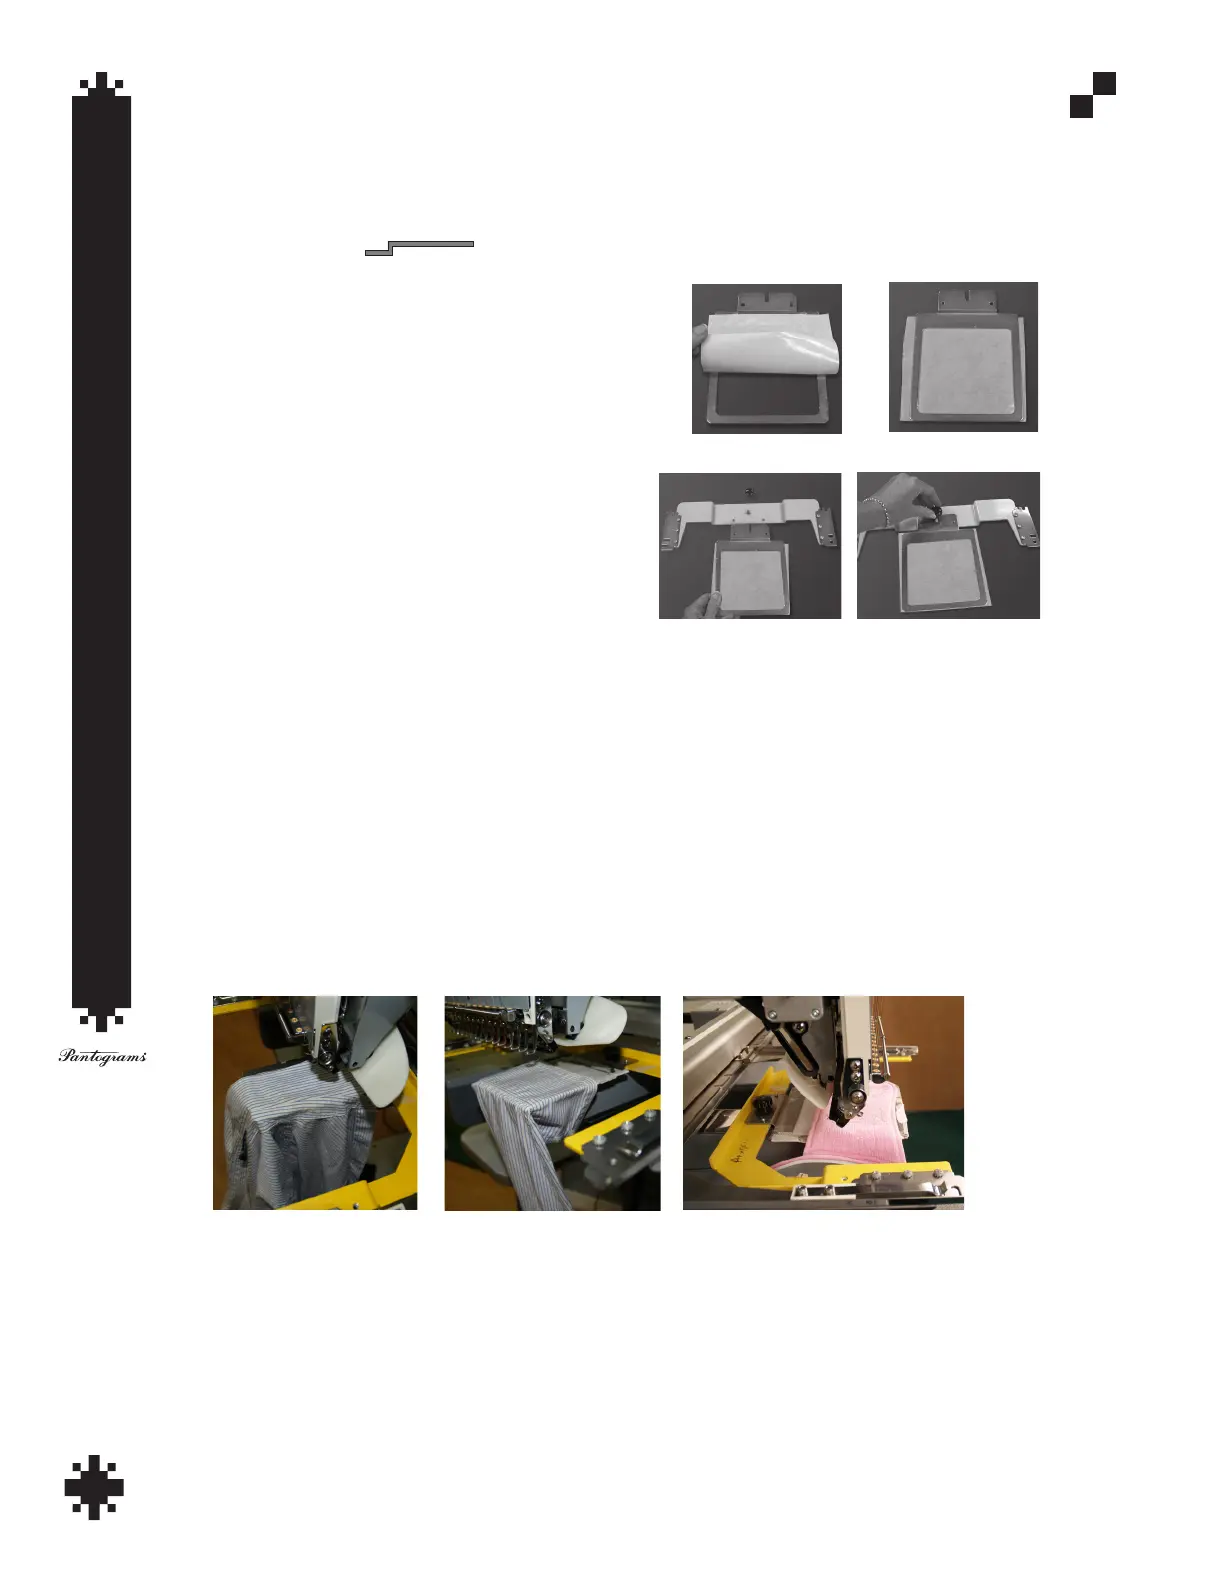
To hoop an item on a hoopless frame, rst cut a piece of adhesive sticky-back tear-away slightly larger than
the frame. Flip the frame over with the back side up. (The back side has the attachment part stepping down
from the frame like so, .) Peel the paper off the back side of the frame. (Fig. 1)
Turn the frame over; the backing is sticky. The tacky backing
will hold the material to be embroidered in place. (Fig. 2)
Take the hoopless frame holder and lay it on a at surface.
Take the frame and place the holes in the frame into the
pegs on the holder. (Fig.3)
With the black screw cap tighten the frame to the holder.
(Fig. 4) Take the item to be embroidered and adhere it to
the sticky back tear away. Press down and smooth out
any wrinkles. Snap the holder into place just like tubular
hoops.
Note: Heavy or very stiff items may need to be clamped
with binders (ofce binders found at ofce supply stores)
to better secure the item to the frame.
Collar
The picture in (Fig. 5) shows how to hoop a collar.
Depending on the location of the embroidery design
the collar might need to be positioned differently or the
design rotated (in software or machine) until it is in the
right location.
Cuff
In order to have the embroidery design showing in the right direction it needs to be rotated 180° (in software
or machine) when positioned in the hoop as shown in (Fig. 6). If the cuff was ipped with the buttonhole
towards the front of the hoop you would not have to rotate the design.
Slipper
Hoopless frames are great for embroidering on slippers. (Fig. 7)
Fig. 1
Fig. 2
Fig. 3 Fig. 4
Fig. 5
Fig. 6
Fig. 7
 Loading...