20
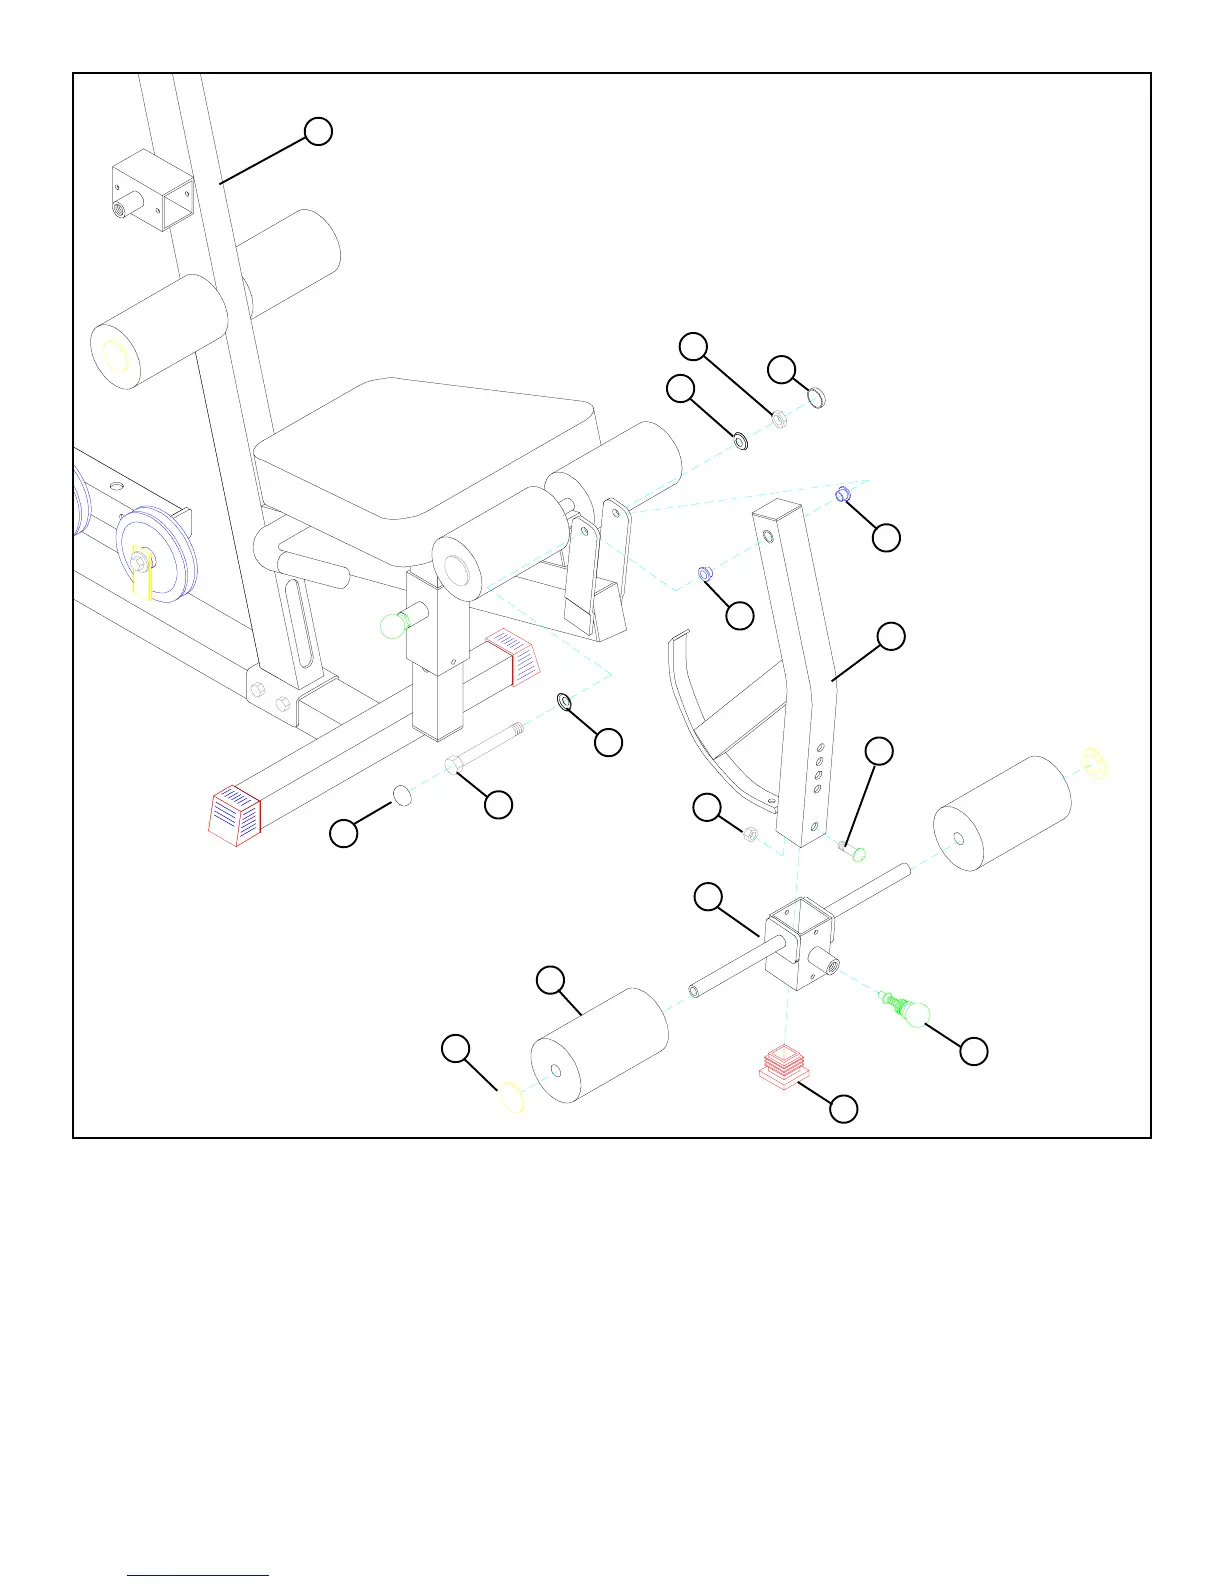
FIGURE 19
STEP 19
• SECURELY assemble one 3/8” SPRING PIN (51) to the ROLLER PAD ADJUST (11) as shown in FIGURE 19.
• Insert two 1/2” FLANGE BEARINGS (78) into the LEG CURL/EXT (15) as shown on FIGURE 19.
• Slide ROLLER PAD ADJUST (11) over the LEG CURL/EXT (15) until the spring pin pops into the holes. See FIGURE 19.
• SECURELY assemble one 3/8 X 1” BUTTON HEAD CAP SCREW (96) and one 3/8” LOCK NUT (92) to the last hole in the LEG
CURL/EXT (15) as shown in FIGURE 19.
• Insert one 2” SQ. END CAP (46) into the end of the LEG CURL/EXT (15) as shown in FIGURE 19.
• Assemble two ROLLER PADS (37) to the ROLLER PAD ADJUST (11) using two STARLOCK COLLARS (50).
• Assemble the LEG CURL/EXT (15) to the FRONT UPRIGHT (25) using one 1/2 X 3” BOLT (87), two BOLT COVER CAPS (110), two
BOLT COVER WASHERS (111), and one 1/2” LOW HEIGHT NUT (95). (NOTE: Tighten the connection enough to remove play, yet
allowing the LEG CURL/EXT to rotate freely.)
96 3/8 X 1”
87 1/2 X 3”
95 LOW HEIGHT NUT
78
78
15
92
11
37
50
46
51
25
BUTTON
HEAD
110
111
110
111