STEP 9-B
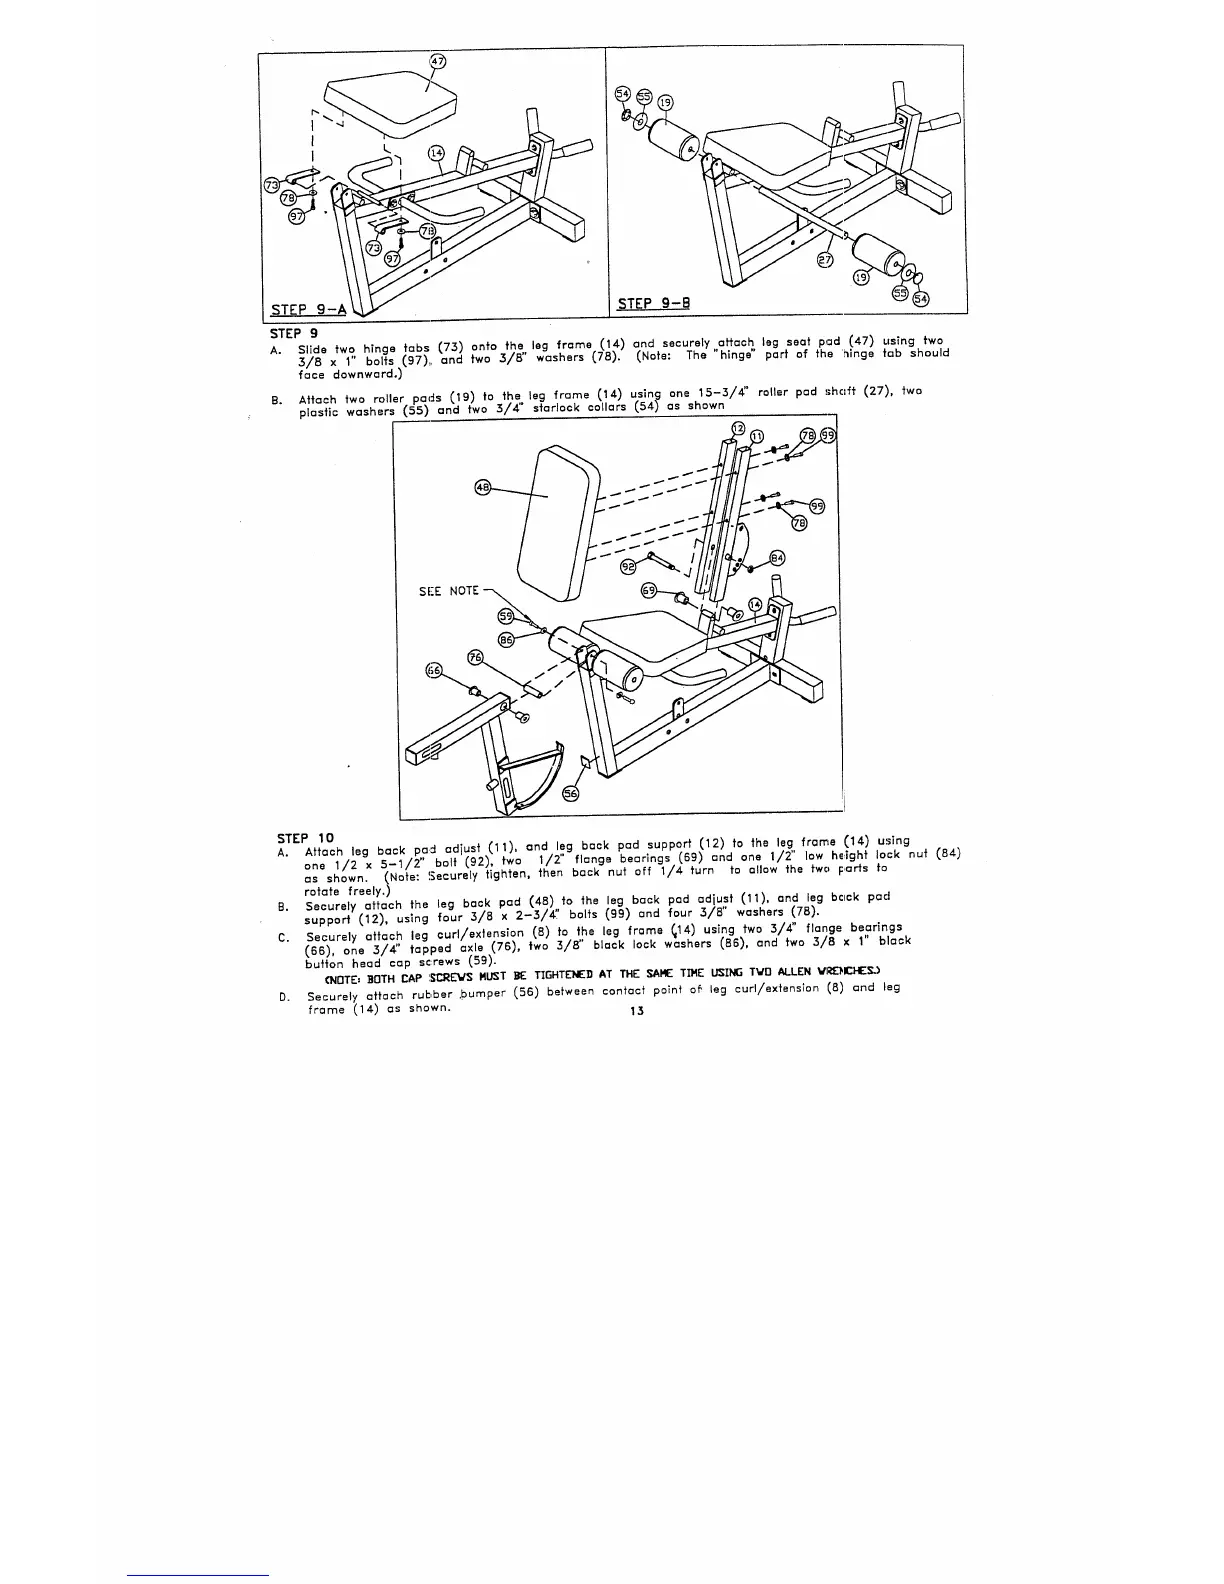
STEP 9
A. Slide fwlo,, hinge tabs (73) onto the leg frame (14) and securely ah~ach leg seat pad (47) using
3/8 x
bolts (97), and two 3/B" washers (78). (Note: The "hinge" part of the ’hinge tab should
face downward.)
B.
Attach two roller peels (19) to the leg frame (14) using one 15-3/4" roller pad shc, ff (27),
plastic washers (55) and two 3/4" starlock collars (54) as shown
SE"E NOT ’
STEP 10
A.
Attach leg back pad adjust (11), and leg back pad support (12) to the leg frame (14)
one 1/2 x 5-1/2" bolt (92), two 1/2" flange bearings (69) and one 1/2" low he,ighf lock
back nut off 1/4 turn
to allow the two F,ar~s to
as shown. (Note: ~.ecurely tighten, then
rotate freely.)
B.
Securely attach the leg back pad (48) to the leg back pad adjust (11), and leg bc~ck pad
support (12), using four 3/8 x 2-3/4’.’ bolts (99) and four 3/8" washers (78).
C. Securely attach leg curl/extension (8) to the leg frame (~14) using two 3/4" flange bearings
(S6), one 3/4" tapped axle (76), two 3/8" black lock washers (86), and two 3/8 x 1" black
button head cap screws (59).
~OTE: BOTH CAP :S~S M~T ~ TIGHT~D AT THE ~ T~E ~I~ TVO ~LEN V~~
D. Securely attach rubber bumper (56) between :ontac~ point o~ leg curl/extenslon (8) ~nd
frome (14) as shown.
I$
 Loading...