EasyManua.ls Logo

ParaBody 950 st - User Manual

ParaBody 950 st
26 pages
Print Icon
To Next Page IconTo Next Page
Loading...
Serious Steel
950 ST
ASSEMBLY INSTRUCTIONS
Pa.rt # 6639601
R~vision: 10/10/96
Question and Answer IconNeed help?

Do you have a question about the ParaBody 950 st and is the answer not in the manual?

Summary

Important Assembly Information

Assembly Surface and Personnel Safety

Assemble on a flat, level surface with two people to avoid injury.

Frame Connection Tightening Procedure

Keep frame connections loose until instructed to tighten them securely.

Troubleshooting and Customer Support

Contact dealer or customer service for assembly issues at 1-800-328-9714.

Tools Required for Assembly

List of tools needed, including wrenches, Allen wrenches, level, and mallet.

Assembly Connection Standards

Standard Connection Components

All connections use one bolt, two washers, and one lock nut unless otherwise specified.

950 ST Parts Identification

Frame Assembly: Step 1

Attaching Base Frames and Uprights

Loosely assemble weight stack bases and uprights to the main base, then attach top boom.

Frame Assembly: Step 2

Installing Seat Support and Roller Pads

Assemble seat support, attach seat and back pads, and install roller pads.

Frame Assembly: Step 3

Mounting Bearing Housing and Pec Arms

Assemble bearing housing, attach pec arms, pads, and glides.

Frame Assembly: Step 4

Connecting Press Base and Wolff Sleeve

Attach press base and slide wolff sleeve onto press frame.

Frame Assembly: Step 5

Securing the Press Frame

Securely attach the press frame to the press base using specified hardware.

Frame Assembly: Step 6

Attaching Hinge Tabs, Seat, and Back Pads

Slide hinge tabs, attach seat and back pads, and install support tubes.

Frame Assembly: Step 7

Installing Press Arm Adjust and Calf;Low Row

Attach press arm adjust, calf/low row, and swivel pulley bracket.

Frame Assembly: Step 8

Assembling the Leg Frame Components

Attach rear leg base, leg curl handle, extension handles, and plate to leg frame.

Frame Assembly: Step 9

Connecting Leg Frame Parts

Attach hinge tabs, leg seat pad, and roller pads to the leg frame.

Frame Assembly: Step 10

Installing Leg Back Pads and Curl;Extension

Attach leg back pad adjust/support, pad, and leg curl/extension.

Frame Assembly: Step 11

Assembling Leg Curl;Extension and Pads

Assemble spring pins, glides, and attach roller pads to leg curl/extension.

Frame Assembly: Step 12

Weight Stack Assembly and Guide Rods

Insert bushings, guide rods, slide plates, assemble selector shaft, and apply labels.

Frame Assembly: Step 13

Mounting Guide Rod Supports

Slide and attach pec, press, and leg guide rod supports onto guide rods.

Cable Guide Specifications

Pec Dec Cable Assembly: Step 1

Routing Lat Cable and Assembling Pulleys

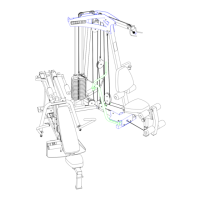
Route lat cable through boom, base, and support; assemble pulleys to boom.

Pec Dec Cable Assembly: Step 2

Connecting Pec Dec Cables to Cams

Connect pec dec cable ends to the right and left pec cams.

Pec Dec Cable Assembly: Step 3

Attaching U-Bracket and Ab Crunch Cable

Assemble U-bracket for ab crunch cable and attach pec dec cable to U-bracket.

Pec Dec Cable Assembly: Step 4

Connecting Ab Crunch Cable and Pulleys

Assemble ab crunch cable and pulleys to front upright and floating pulley.

Press Station Cable Assembly: Step 1

Routing Press Cable and Attaching Pulleys

Route press cable through frame and attach pulleys to swivel bracket and press arm.

Press Station Cable Assembly: Step 2

Securing Press Cable and Adjusting Tension

Attach press cable to base/support, screw to selector shaft, and adjust tension.

Leg Station Cable Assembly: Step 1

Routing Leg Cable and Attaching to Cam

Route leg cable through base and attach loop end to leg curl/extension cam.

Leg Station Cable Assembly: Step 2

Securing Leg Cable and Adjusting Tension

Secure leg cable to frame/base, screw to selector shaft, and adjust tension.

Shroud Assembly Instructions

Pec Station Shroud Installation

Secure the pec station shroud to the pec guide rod support and base.

Shroud Assembly Continued

Press Station Shroud Installation

Secure the press station shroud to the press guide rod support and base.

Leg Station Shroud Installation

Secure the leg station shroud to the leg guide rod support and base.

ParaBody 950 st Specifications

General IconGeneral
BrandParaBody
Model950 st
CategoryHome Gym
LanguageEnglish

Related product manuals