Section 3
6
REMOVAL AND INSTALLATION
1. At the power switch, turn off the unit and
unplug the power cord at the wall outlet.
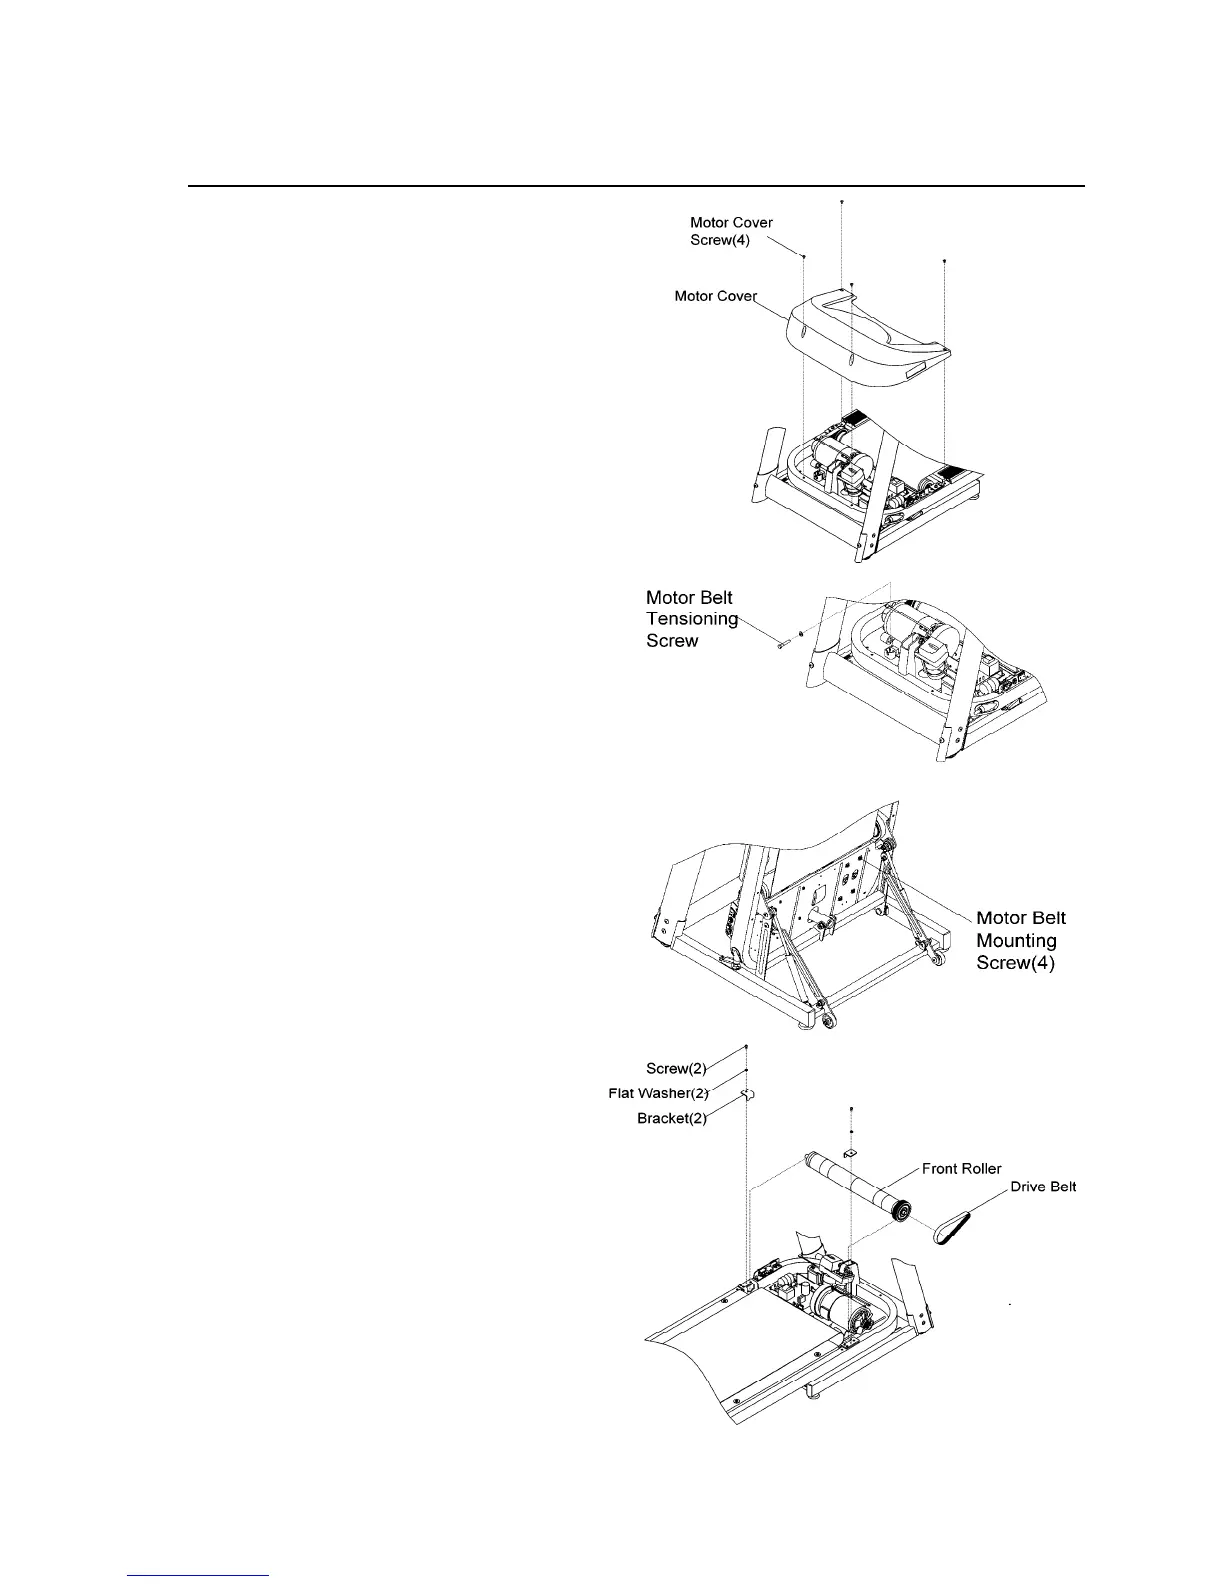
2. Remove the motor cover front screws(4) of
the motor cover, lift off the motor cover.
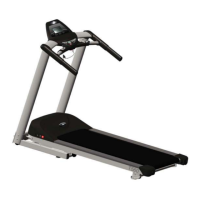
3. Loosen the motor belt tensioning screws(1),
Fold the treadmill, loosen the four mounting
screws(4) securing the motor to the bottom
of the frame.
NOTE: To remove front roller easily,
release motor belt via loosen motor belt
tensioning screws(1) and the four
mounting screws.
4. Unfold the treadmill. Move the motor
mounting plate in the slotted holes towards
the rear roller to relieve belt tension.
Remove the motor drive belt from the end of
the motor drive pulley.
5. Loosen the rear roller tensioning bolts
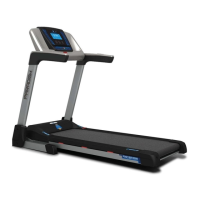
6. Remove the flat washers(2), bracket(2) and
screw(2) from the front roller mounting
brackets and main frame.
7. Lift the front roller out of its frame mount,
slip off the motor drive belt from the pulley,
and discard the belt.
8. Install new motor drive belt in reverse order.
Tension the belt to 85~95 lbs.(See section 3
page 3)
9. Re-tension the running belt and reset its
tracking. Refer back to running belt
tension and tracking procedure in this
section.