Chapter 5: Tactile Navigation with Whiskers · Page 167
Parts List:
(2) Whisker wires
(2)
7
/
8
″ pan head 4-40
Phillips screws
(2) ½″ round spacer
(2) Nylon washers – size #4
(2) 3-pin m/m headers
(2) Resistors, 220 Ω
(red-red-brown)
(2) Resistors, 10 kΩ
(brown-black-orange)
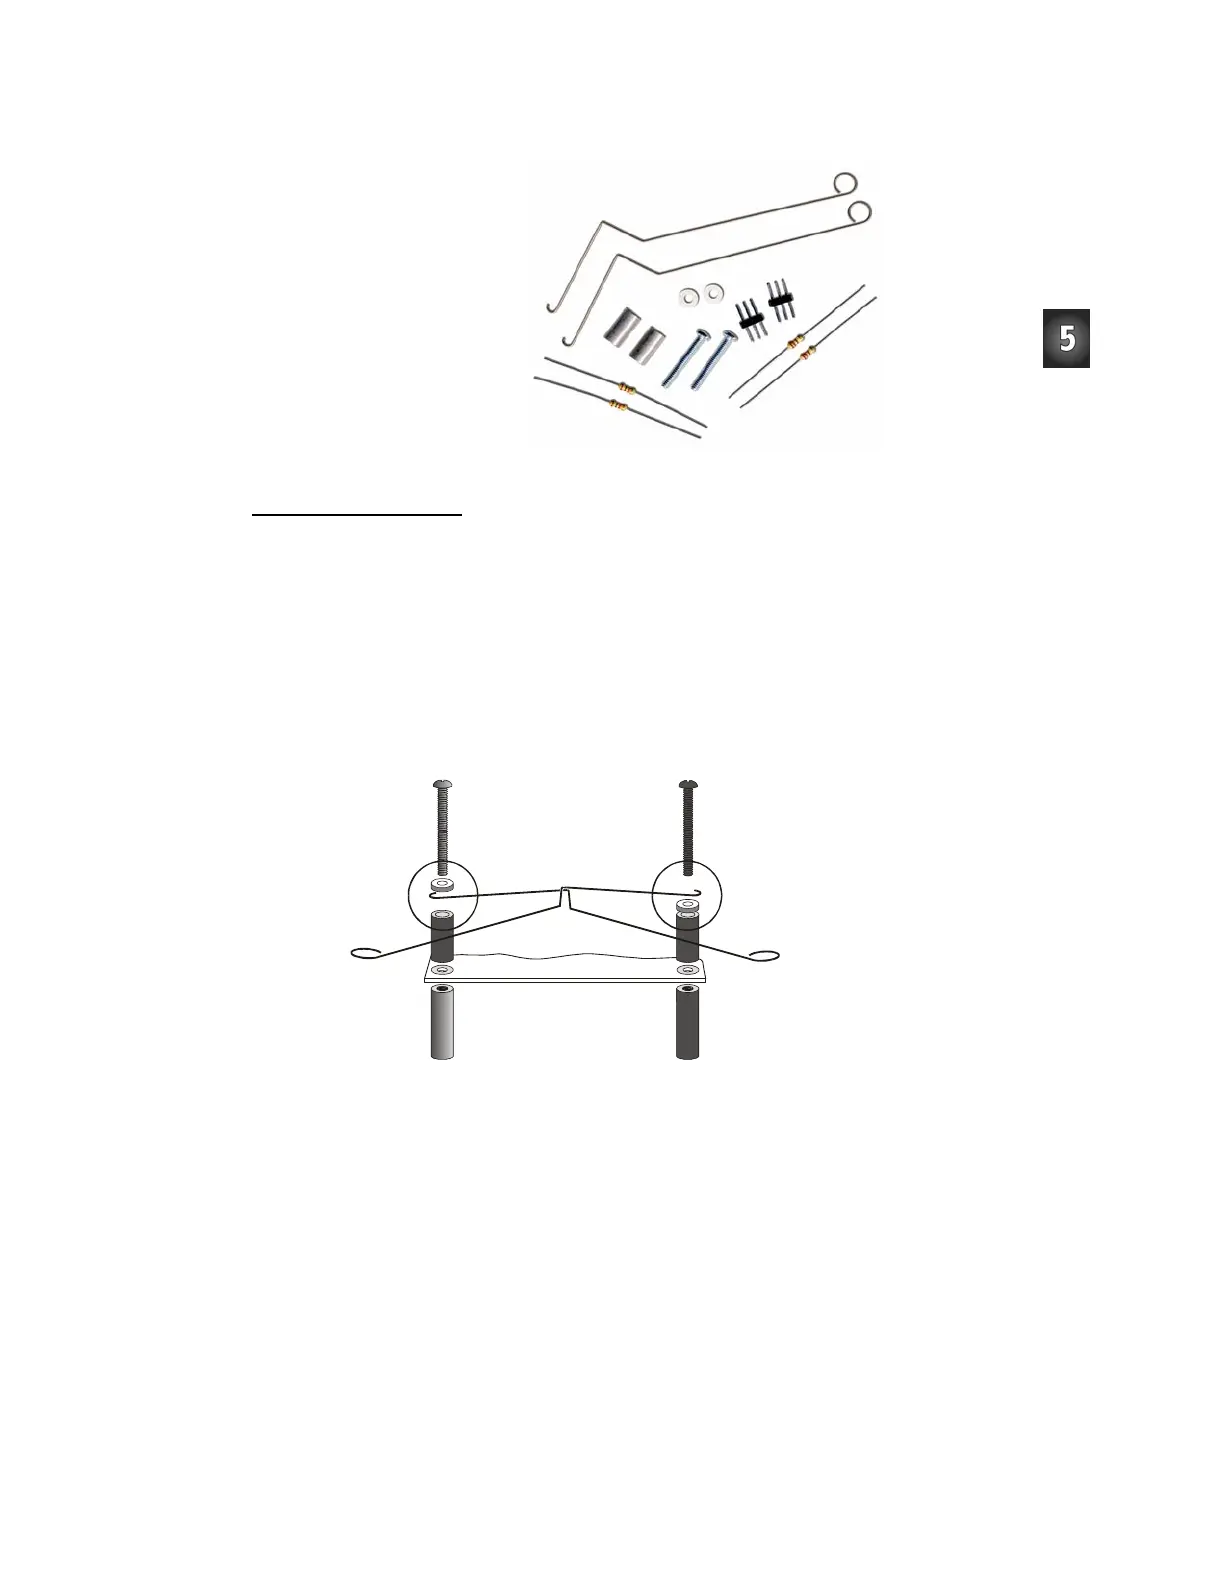
Figure 5-2
Whiskers
Hardware
Building the Whiskers
√ Remove the two front screws that hold your board to the front standoffs.
√ Refer to Figure 5-3 while following the remaining instructions.
√ Thread a nylon washer and then a ½″ round spacer on each of the
7
/
8
″ screws.
√ Attach the screws through the holes in your board and into the standoffs below,
but do not tighten them all the way yet.
√ Slip the hooked ends of the whisker wires around the screws, one above the
washer and the other below the washer, positioning them so they cross over each
other without touching.
√ Tighten the screws into the standoffs.
Board of Education / HomeWork Board
Figure 5-3
Mounting the
Whiskers