English
6 / 8ICEP007-024 (60Hz)
7. Press the button “
esc
” three times to exit.
4.5.3 Differential setting (see fi g.1/2)
1.Turn the main swicth (QS) to “ON” and wait for the “OFF” visualiza-
tion.
2.Press the buttons “
esc
” “
set
” together to enter on the parameter
type “D”
3.Select the parameter “PAr”using “
”and “ ” buttons and
press the button “
set
” to enter.
4. Select the parameter “tEr”using “
”and “ ” buttons and
press the button “
set
” to enter.
5. Select the parameter “dIFI”using “
”and “ ” buttons and
press the button “
set
” to enter.
6. Change the value using “
”and “ ” buttons and press the but-
ton “
set
” to con rm and exit.
7. Press the button “
esc
” three times to exit.
4.5.4 Restore default parameters (see fi g.1/2)
1.Turn the main swicth (QS) to “ON” and wait for the “OFF” visualiza-
tion.
2.Press the buttons “
esc
” “
set
” together to enter on the parameter
type “D”
3.Select the parameter “PAr”using “
”and “ ” buttons and
press the button “
set
” to enter.
4. Select the parameter “P_nA”using “
”and “ ” buttons and
press the button “
set
” to enter.
5. Select the parameter “dEF”using “
”and “ ” buttons and
press the button “
set
” to enter.
6. Change the value “OFF” to “On” using “
”and “ ” buttons
and press the button “
set
” to con rm and exit.
7. Press the button “
esc
” three times to exit.
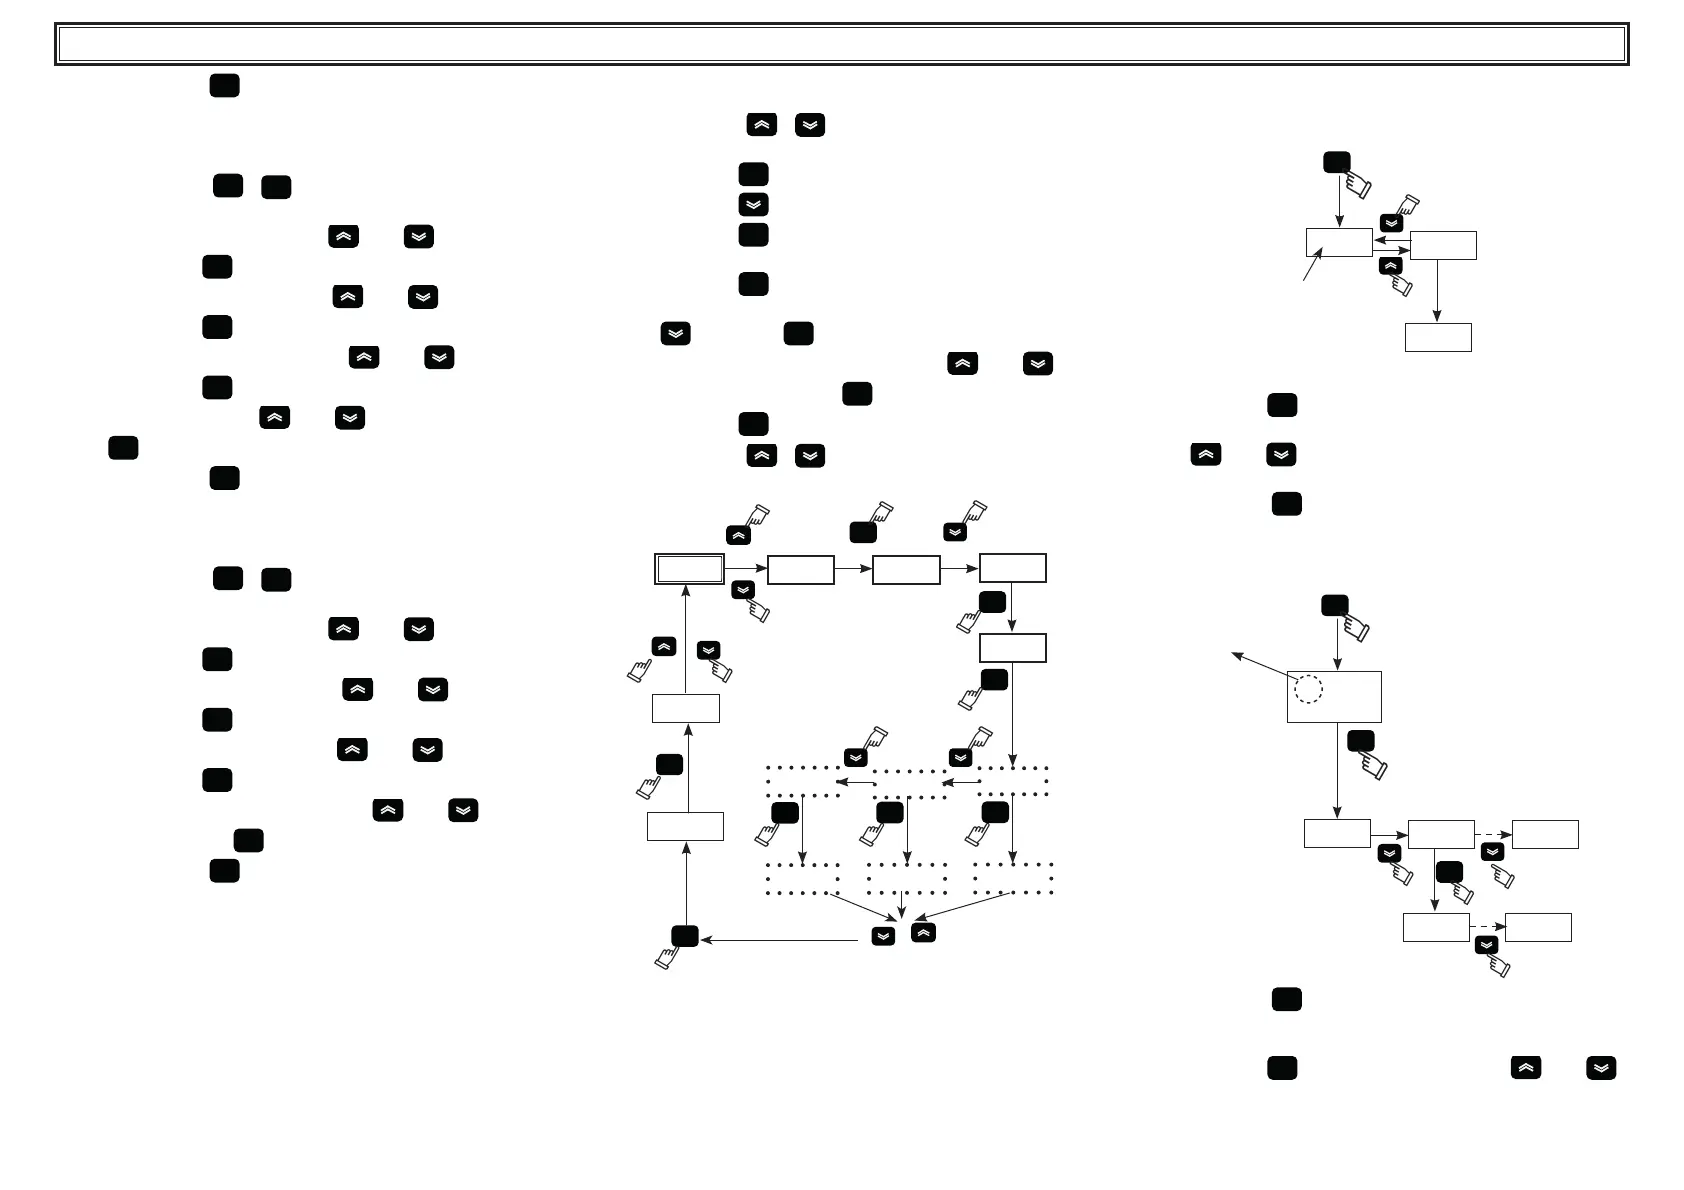
4.6 Setting clock/date.
(see g. 1/3)
1. Press the buttons “
” “ ”, together to enter in the menu
“FrEE”.
2. Press the button “
set
” to enter in the menu “Ai”.
3. Press the button “
” to enter in the il menu “CL”.
4. Press the button “
set
” to enter and visualize the parameter
“HOUr”.
5. Press the button “
set
” until the ashes of the parameter “HOUr”.
6. Select the ashing parameter “HOUr”/“dAtE”/“4EAr” using the
button “
” and press “
set
” to enter.
7. Change the ashing value using the buttons “
”and “ ” (up
and down) and press the button “
set
” to con rm.
8. Press the button “
esc
” to return to the menu “FrEE”.
9. Press the buttons “
” “ ” together to exit.
Fig.3
set
dr4
FrEE
Ai
CL
set
HOUr
4EAr
set
set
01.09
set
2015
17.15
set
FrEE
HOUr
dAtE
set
3 sec.
18.20
esc
! The memory of the “clock / date” has a maximum duration of
three days, so if the controller is left without power for more than
three days, the data set hour / month / year are lost.
Adjust the clock at the start up of the machine, and whenever
necessary.
4.7 Visualization of temperature probes B1,B2
(see g.1/4)
Fig.4
set
12.5
b1
b2
3
sec.
5.0
1. Turn the main swicth (QS) to “ON” and wait for the “OFF” visualiza-
tion.
2. Press the button “
set
” to start up.
3. The display shows the temperature of the probe B1.
4. Using “
”and “ ” buttons select the probe (B2), wait for 3
seconds to see the temperature value.
5. Press the button “
esc
” to exit
4.8 Alarms management
(see g.1/5)
Fig.5
set
set
!
23.5
Pb
AL
set
Er__ Er__
ALARM
1. Press the button “
set
” to start up.
2.
! Alarm ON (led on: red).
3. Press the button “
set
” to enter in the menu, using “ ”and “ ”
buttons select the parameter “ AL” .