1
3
2
22
4
6
5
23
ASSEMBLY
TIGHTEN BOLTSFINGER TIGHTEN BOLTSALIGN CLUTCH CONE TO BODY
Tighten all the bolts with the allen key provided in
the tool kit.
The clutch cone is now secured in place.
Finger tighten a bolt in one of the top bolt holes,
then one in the diagonal opposing bottom hole.
Repeat this proces with the other two bolts.
Align the Clutch Cone and main body ensuring the
bolt holes line up.
It may be easier if you lay the main body on its rear
side whilst doing this.
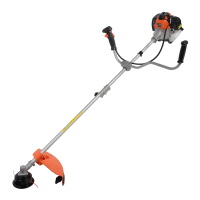
Locate the Main Body of the machine and the clutch
cone from your PGBC-5200 box.
The clutch cone comes with the lower shaft
attached.
First remove the clutch cone protector. This is placed
on to the clutch cone to protect it during shipping.
You can not attach the clutch cone to the main body
of the machine with it in place.
Everything required to carry out the following
proceedure can be found in your PGBC-5200 tool
kit, Including the 4 clutch cone bolts.
ASSEMBLY
MAIN BODY & CLUTCH CONEREMOVE PROTECTORTOOL KIT
• To prevent damage to the product in transit the clutch cone has been removed from the machine.
• Please follow the instructions provided carefully for successful installation of the clutch cone assembly.
• Only use the bolts provided for the clutch cone. These are located in the PGBC-5200 toolkit.
• Do not use the bolts from the handle clamp, these are too long and will damage the clutch.
• Using the brush cutter with the wrong bolts attached may damage the clutch beyond repair.
WARNING!
 Loading...