www.parweld.com
14
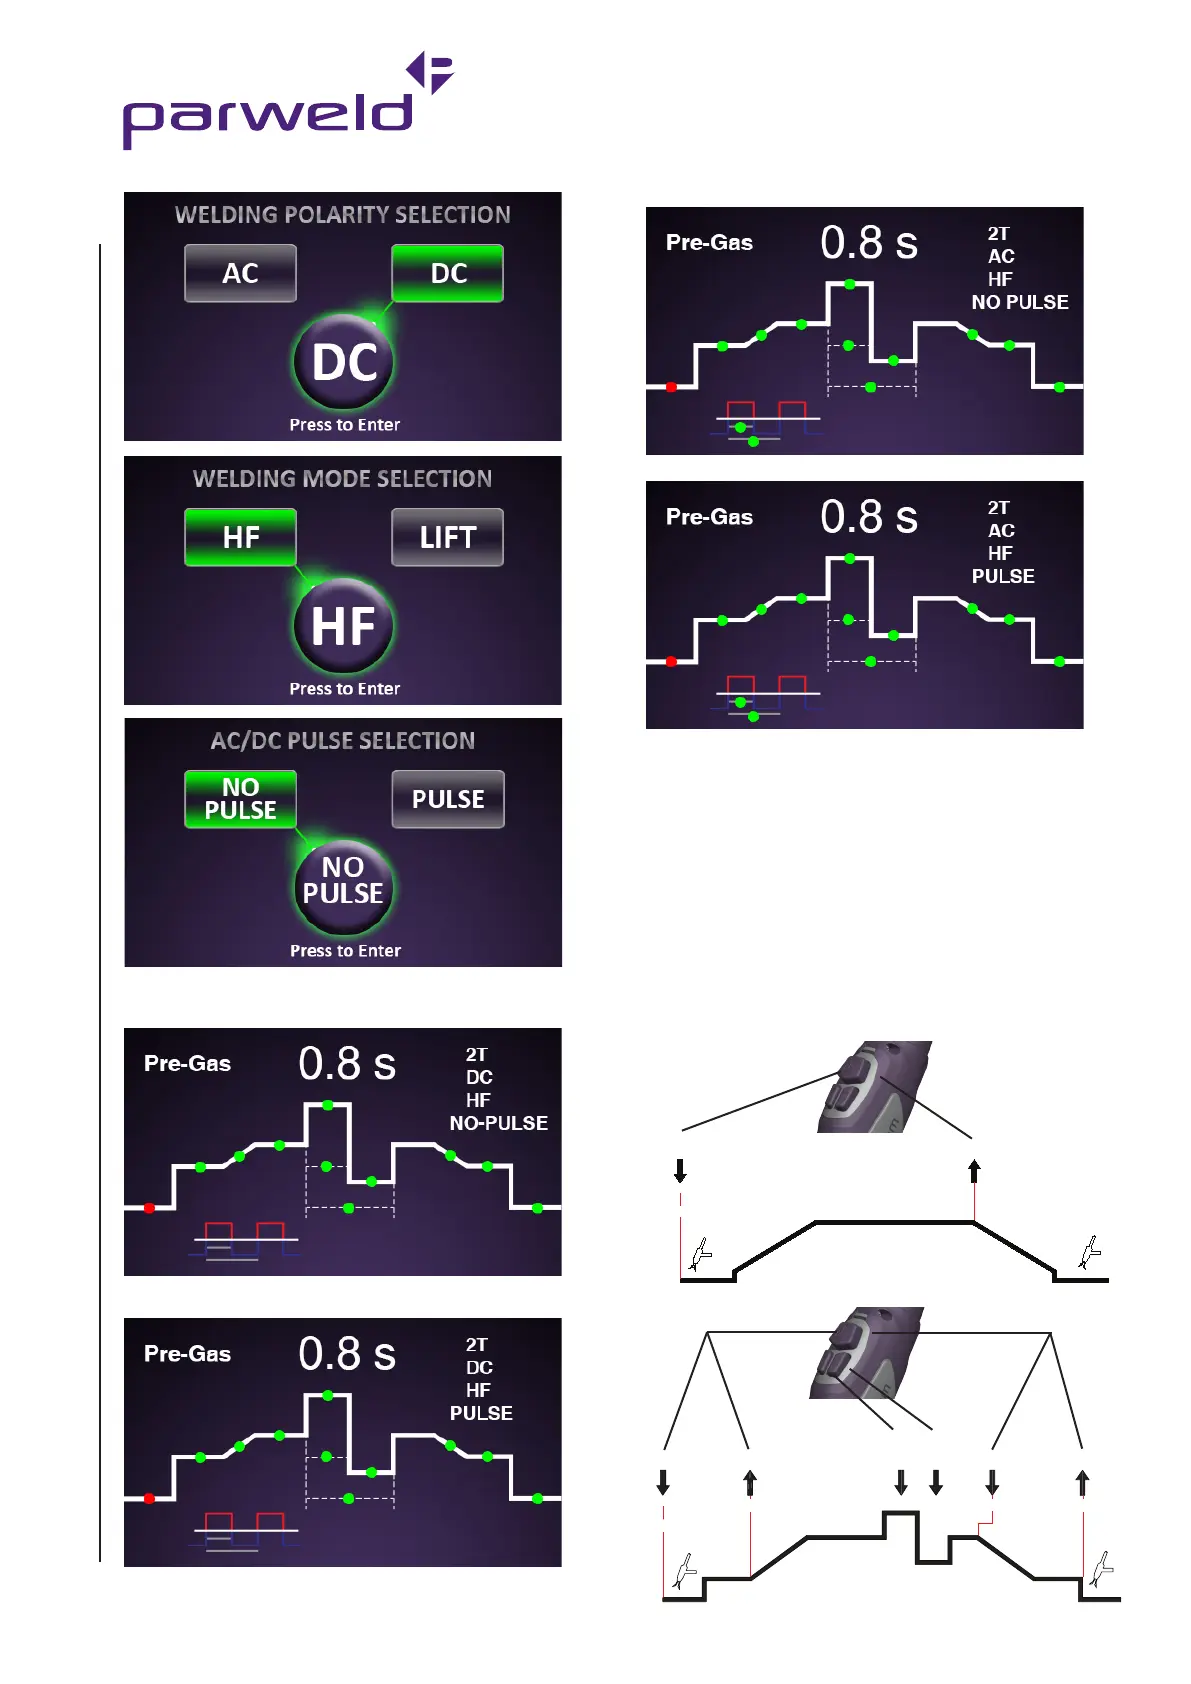
Welding Screens
DC Without Pulse.
DC With Pulse.
AC Without Pulse.
AC With Pulse.
To Select and adjust Pre-Gas, Slope Up, Welding
Current, Slope Down, or Post Gas do the following:
Rotate control knob to move red dot
Press to select (ashing)
Rotate control knob to adjust
Press control knob to deselect (stops ashing)
TIG Welding Trigger Operation
-2T -4T
This toggles between 2 step and 4 step operation of the torch
trigger. In 2 step mode the trigger should be pressed and held down
until the end of the weld. In 4 step mode (lower led) the trigger is
pressed and released to start and pressed and released to nish
the weld. In order to TIG weld one of these functions must be
illuminated. Not all functions are available in 2T mode.
Release
Press
Release
Initial
Current
Final
Current
Post Gas
Current
Adjustment
Pre Gas
Press
Press
Pre Gas
Post Gas
Release
2T mode


 To Next Page