www.parweld.com
18
4) Rotate the control knob to move the LED to the Peak duration
(L) This can be adjusted from 5 to 100% Peak duration is the
percentage of time the peak current is on relative to the background
current. 30% is a good starting point.
5) Rotate the control knob to move the LED to the Background
current (N) This can be adjusted from 5 to 200A (10-200A for
AC welding). The value is displayed on the digital display (B).
Background current is the minimum amperage that will be output.
It cannot be higher than the peak current and generally will be set
withing 50 to 70% Amps of the peak current.
6) Rotate the control knob to move the LED to the Pulse Frequency
(M) This can be adjusted from 0.5 to 200Hz. The value is displayed
on the digital display (B). Pulse Frequency is the number of pulses
per second generally a range of 50 to 150 hz will be used with
100Hz being a good base setting.
30-40Hz will help agitate the weld puddle and allow you to weld at a
lower amperage than without pulse.
50-150Hz really stien the arc and let you pinpoint the arc more than
without pulse.
0.5-10Hz reduce heat input the most.
The selected amperage and the consistency of travel speed can
negate some of the eects of Power pulsing.
7.8 Saving to Memory
In any welding screen press the memory button.
From here you can see the last weld setting used (O) or select one
of the memory locations (P) to save the job to.
Memory button
After selecting a memory location, the following screen loads and
gives the option to save to memory.
To recall from memory location, from main menu, press the memory
button.
Select job to recall by rotating the control knob to the required
memory location and pressing the knob to select.
7.9 Process Switch
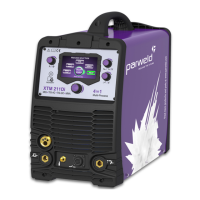
The XTM211Di allows instant swapping between the TIG and MIG
processes which is ideal for pipe applications or multi process
workshops.
Connect the MIG and TIG torches as previously described. Ensure
both gas types are connected to the rear of the machine.
Set the machine from the main menu for the MIG and TIG
parameters as required.
Switching the process. Press the torch trigger briey to select the
process.
Memory button


 To Next Page