PATON ECO DC MMA - 8 -
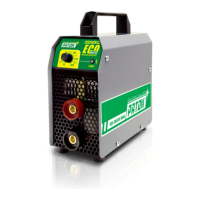
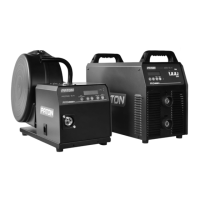
1 – Digital seven-segment display
2 – Regulator of welding current, allowing to smoothly adjust the welding current.
3 – Power supply status indicator:
a) solid green – the unit is ready for operation;
b) off – no power supply or low voltage in the mains;
4 – Unit operation indicator:
a) off (green light for ECO-315-400V) – the unit is in a normal state;
b) red light (yellow light for ECO-315-400V) – overheating;
5 – Mains breaker (for ECO-315-400V) / switch (does not light up, the colour is adopted for
design purposes).
А – Bayonet-type power current socket "+";
B – Bayonet-type power current socket "-".
2. START-UP
CAUTION! Please, read Section 11 "Safety instructions" before starting-up.
2.1 INTENDED USE
The welding unit is intended exclusively for: MMA welding.
Any other use of the unit is inappropriate. The manufacturer bears no liability for
damage caused by using the unit for other purposes.
Proper use implies following the instructions in this operating manual.
2.2 SPACE REQUIREMENTS
The welding unit is protected against penetration of foreign particles with a diameter
of more than 5.5 mm.
The welding unit can be located and operated outdoors. The internal electrical parts of
the unit are protected from direct exposure to moisture.
CAUTION! After finishing welding in hot weather, or intensive welding in any weather,
do not turn off the unit immediately! Wait 5 minutes to let the electronic components to cool
down.
CAUTION! After an operation in the cold season, after switching off and subsequent
cooling of the unit, condensation forms inside – do not switch the unit in less than 3 to 4
hours!!!
Therefore, do not turn off the unit during the cold season if you plan to turn it on in less
than 4 hours.
CAUTION! The unit can be life-threatening after being dropped. Place the unit on a
stable solid surface.
Place the unit so that cooling air can enter and exit freely through the vents on the
front and rear panels. Make sure that no metal dust (e.g. when sanding) is sucked into the
unit directly by the cooling fan.