Installing the Patton SmartNode Gateway 26
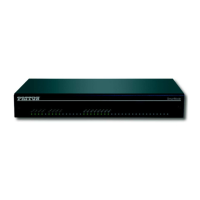
SmartNode 4131 User Manual 3 • SmartNode Installation
Installing cables
Connect the cables in the following order:
1. Connect the ISDN terminals and NT to the BRI ports (see section “Connecting ISDN terminals and NT
to the SmartNode’s ISDN BRI ports”)
2. Connect the 10/100/1000Base-T Ethernet WAN (see section “Connecting the 10/100/1000Base-T Ether-
net WAN cable”)
3. Connect the power mains cable (see section , “Connecting the Power Supply” on page 27)
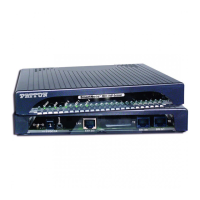
Connecting ISDN terminals and NT to the SmartNode’s ISDN BRI ports
The SmartNode comes with two or four ISDN BRI ports located on the rear panel (see figure 2 on page 16). All
port can be connected to the PSTN (ISDN NT) or terminals.
Note On Lifeline Relay models (/R option) the PSTN line should be connected to
BRI 0/0 and a terminal to BRI 0/1 to benefit from the lifeline function
(requires /R option, see the full list of models on www.patton.com).
For details on the BRI port pinout and ISDN cables, refer to Appendix C, “Cabling” on page 45 and Appendix
D, “Port pin-outs” on page 49.
Connecting the 10/100/1000Base-T Ethernet WAN cable
The SmartNode 4131 has automatic MDX (auto-cross-over) detection and configuration on the Ethernet port.
The port can be connected to a host or hub/switch with a straight-through wired cable.
• Connect to the subscriber port of the broadband access modem (DSL, cable, WLL) to ETH 0/0.
For details on the Ethernet port pinout and cables, refer to Appendix C, “Cabling” on page 45 and Appendix
D, “Port pin-outs” on page 49.
Do not work on the system or connect or disconnect
cables during periods of lightning activity.
The Interconnecting cables shall be acceptable for external
use and shall be rated for the proper application with
respect to voltage, current, anticipated temperature, flam
-
mability, and mechanical serviceability.
For the ISDN connection to a carrier Network, it shall be con-
nected to a Network Termination Device and not connected
directly to an outside POTS line.
CAUTION