Chapter 5 - Setting up the NION
28 Version 1.6.4b.1 June 11, 2012
Note: If security has been enabled, you will need to specify a password before you can change
any of the settings.
Updating the firmware
Firmware on NIONs is managed centrally using NWare. For information on updating
firmware, see Updating firmware on MediaMatrix devices in the NWare User Guide.
Using the front panel
Specifying a name
Each NION has a name that is displayed in the web interface, on the front panel (if fitted) and
in NWare and Dante Controller.
In the factory, an identical name is given to every NION. Therefore, in order to identify
individual units by their names, you must assign a unique name to each unit. If you are using
Dante, this is particularly important, as Dante transmitters and receivers in Dante Controller
are identified by the names assigned to the NIONs.
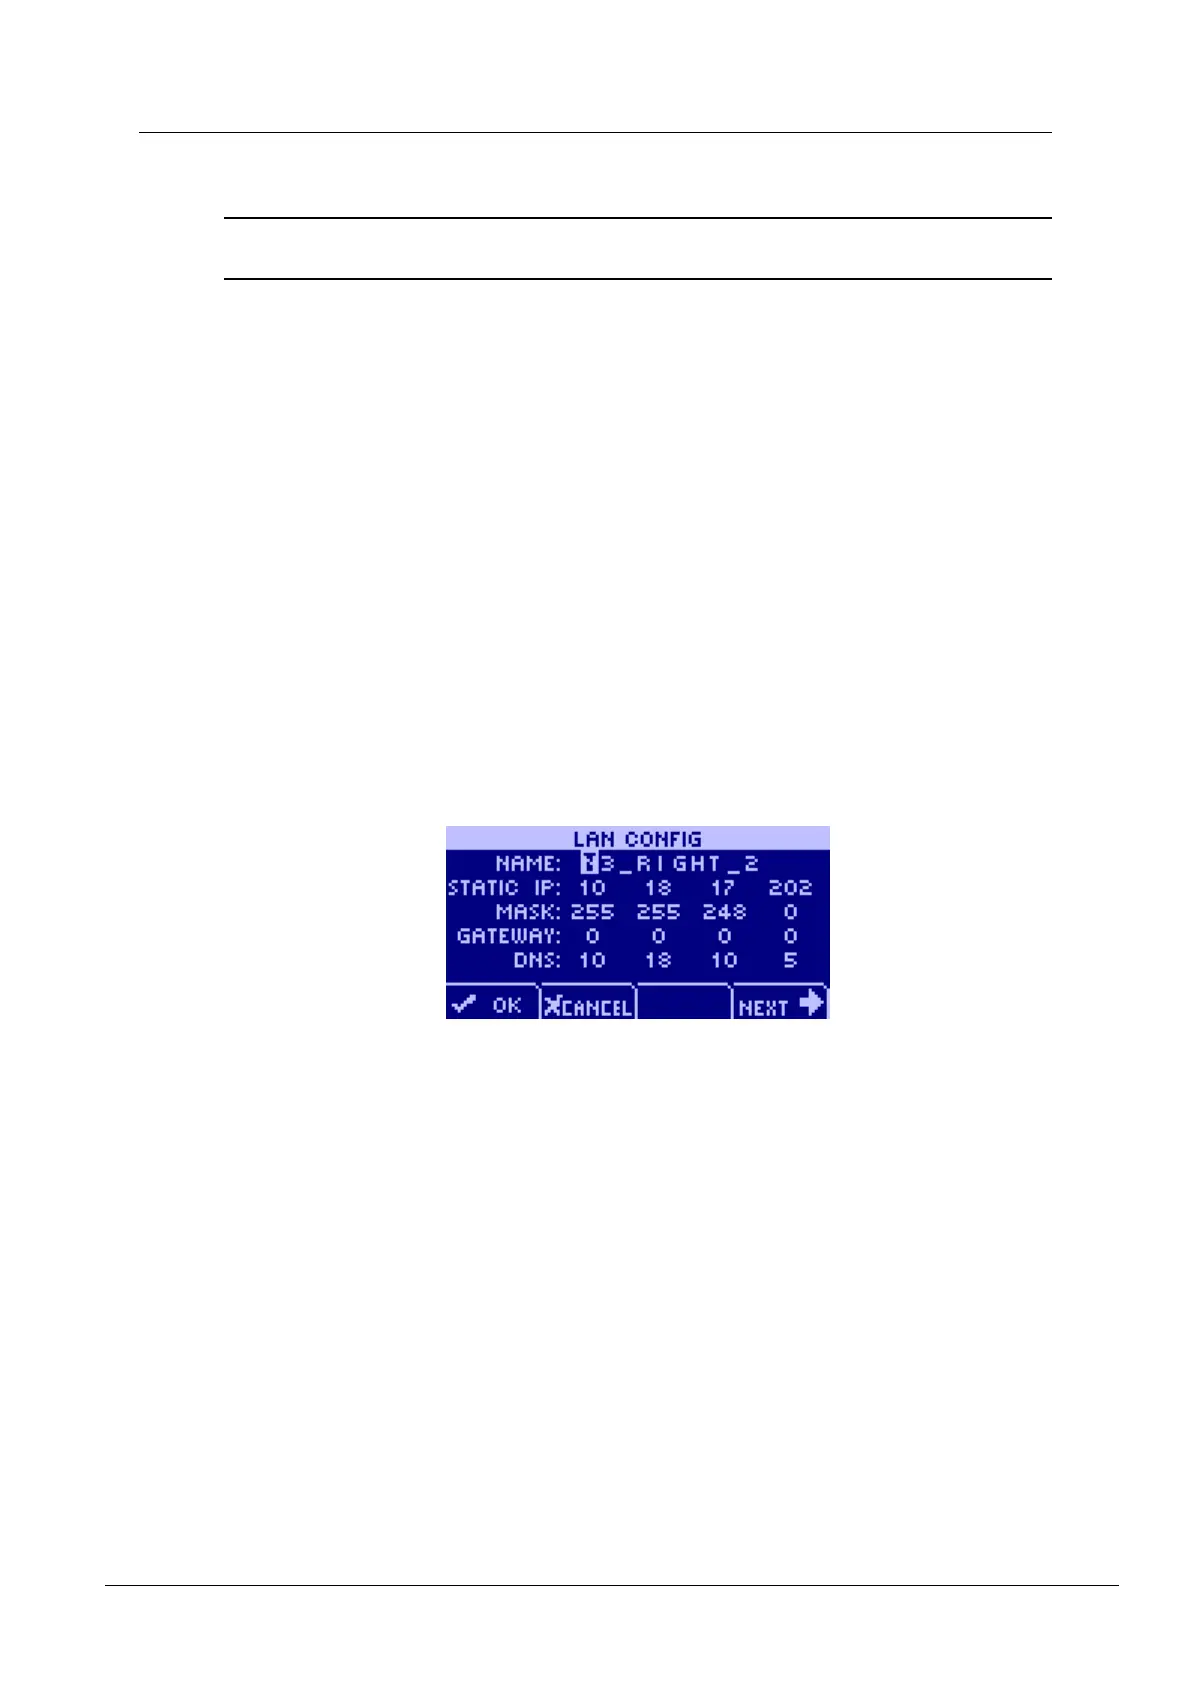
To specify a name
1. From the main menu, select CONFIG to display the first configuration page, LAN
CONFIG.
2. Turn the data wheel clockwise.
The first letter of the NION name will be highlighted.
3. Use the data wheel to specify a unique name for the NION.
4. Press OK.
The POWER screen is displayed.
5. In the ACTION list, select POWER DOWN.
6. Wait 30 seconds and then power up the NION.
This delay allows time for entries in the ARP cache to time out, so the new name you have
specified will be used.
Setting the IP address
DHCP versus static IP

 Loading...