VERTICAL MULTISTAGE PUMPS
12
1. Follow steps 1–8 under Motor Replacement, then proceed
with step 2 below.
2. Remove the four staybolt nuts, flatwashers, and lockwashers
(8, 9A and 9B) from the staybolts (19).
NOTICE: It is not necessary to remove the staybolts when
replacing the stack.
3. Lift the motor bracket (7) off the pump body.
NOTICE: Note the position of the priming plug. The
priming plug must be returned to its original position during
reassembly.
4. Remove and discard upper sleeve gasket (17).
5. Clean gasket seat.
6. Remove and replace round spring ring (PVM2 and PVM4)
or stack spring (PVM8 and PVM16) (13).
7. Pull the old stack (16A through 16L) out of the stainless
steel sleeve (18) by pulling straight up on the pump shaft
(16A).
8. Remove the stainless steel sleeve (18).
9. Remove and discard the bottom sleeve gasket (17).
10. Clean the gasket seat.
11. Remove and discard the O-ring (21A) from the suction/
discharge (21 - PVM2 and PVM4 only).
12. Cast Iron models only: Clean the O-ring seat and install a
new O-ring (21A).
13. Install a new lower sleeve gasket.
14. Install the new stack without the stainless steel sleeve.
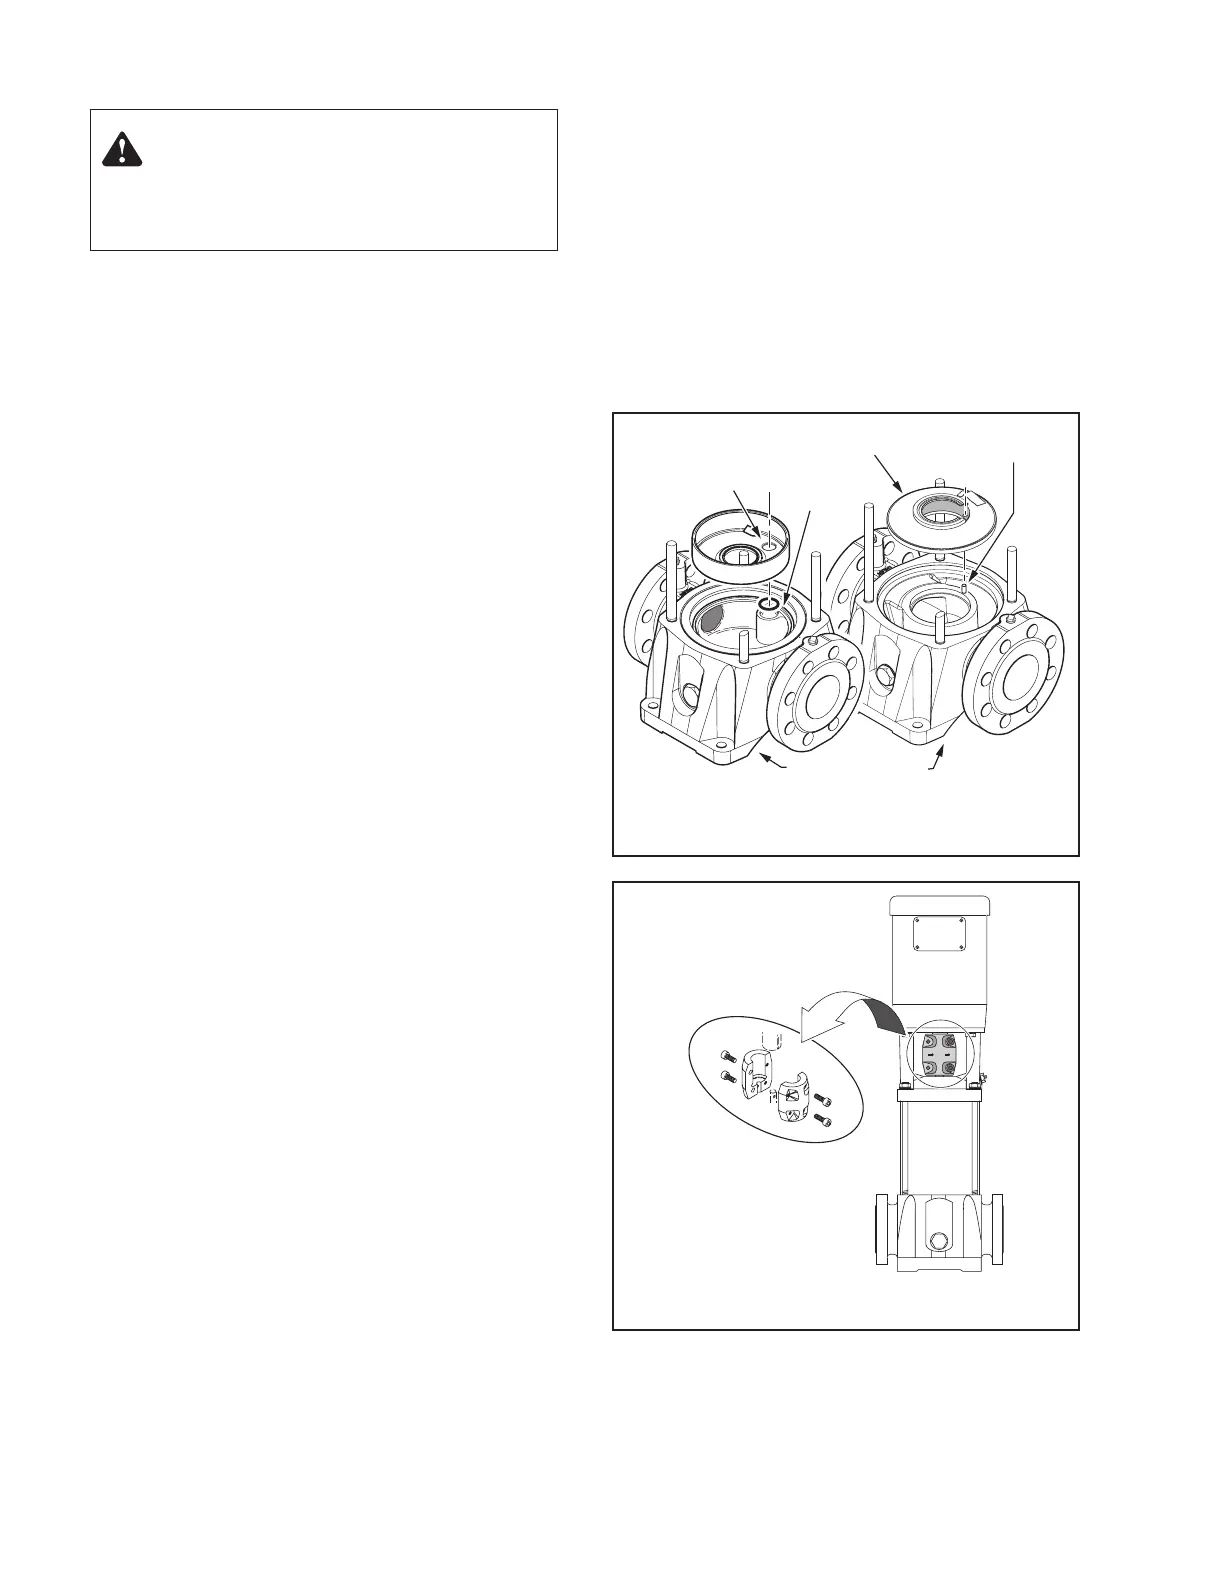
NOTICE: Be sure to align either the small priming hole or
the suction interconnector pin hole (located on the bottom
stage of the stack) properly in the base of the Suction/
Discharge (21). See Figure 11 (not necessary on PVMX
models).
15. Use a rubber mallet to tap the stainless steel sleeve (18) into
place.
16. Install a new mechanical shaft seal (14A and 14B or 15A
through 15G). Refer to Mechanical Seal Disassembly and
Mechanical Seal Reassembly sections.
17. Install a new upper sleeve gasket (17).
18. Install a new round spring ring or stack spring (13).
19. Reinstall the motor bracket (7) on the pump body. Align the
priming plug (6) to its original position.
20. Oil the threads on the staybolts (19).
21. Replace the lockwashers, flatwashers, and staybolt nuts (8,
9A and 9B) and cross-torque the staybolts. See Table VIII
for torque specifications.
22. Reinstall the motor (1) on the motor bracket (7) and turn the
motor to the desired terminal box position.
23. Follow steps 10–21 under Motor Replacement. You have
now finished changing out the impeller stack.
Priming
Hole
Housing
Knob
Suction
Interconnector
Interconnector
Pin
Suction/Discharge
Figure 11. PVM2, PVM4 – Align small priming port.
PVM8, PVM16 – Align interconnector pin. No alignment is
necessary on PVMX models.
Warning: Hazardous Pressure
Do not run pump with discharge valve closed; the water in the
pump may boil, causing risk of explosion and steam burns to
anyone nearby.
Figure 12. Remove the socket head screws and the
coupling halves.

 Loading...


