13. Regeneration Cycle Step Times
Press the Extra Cycle button. Use this display to set the
Regeneration Cycle Step Times. The different regeneration
cycles are listed in sequence based on the valve type selected
for the system, and are identified by an abbreviation in the
upper left-hand corner of the screen. The abbreviations used
are listed below. If the system has been configured with the
“OTHER” valve type, the regeneration cycles will be identified
as R1, R2, R3, R4, R5, and R6. Each cycle step time can be set
from 0 to 199 minutes. Setting a cycle step time to 0 will cause
the control to skip that step during regeneration, but keeps
the following steps available. Use the Up and Down buttons
to adjust the value as needed. Press the Extra Cycle button to
accept the current setting and move to the next parameter.
Abbreviation Cycle Step
BD Brine Draw
BF Brine Fill
BW Backwash
RR Rapid Rinse
SV Service
Range: 0-199 minutes
14. Day of Week Settings
Press the Extra Cycle button. Use this display to set the
regeneration schedule for a system configured as a Day of
Week control. The different days of the week are identified as
D1, D2, D3, D4, D5, D6, and D7 in the upper left-hand corner of
the display. Set the value to “ON” to schedule a regeneration or
“OFF” to skip regeneration for each day. Use the Up and Down
buttons to adjust the setting as needed. Press the Extra Cycle
button to accept the setting and move to the next day. Note that
the control requires at least one day to be set to “ON.” If all 7
days are set to “OFF”, the unit will return to Day One until one
or more days are set to “ON.”
15. Current Day (Display Code CD)
Press the Extra Cycle button. Use this display to set the current
day on systems that have been configured as Day of Week
controls. This setting is identified by “CD” in the upper left-
hand corner of the screen. Use the Up and Down buttons to
select from Day 1 through Day 7.
MASTER PROGRAMMING MODE
CONTINUED
16. Flow Meter Type (Display Code FM)
Press the Extra Cycle button. Use this display to set the type
of flow meter connected to the control. This option setting is
identified by “FM” in the upper left-hand corner of the screen.
Use the Up and Down buttons to select one of the seven
available settings.
t0.7 Fleck 3/4-inch Turbine Meter
P0.7 Fleck 3/4-inch Paddle Wheel Meter
t1.0 Fleck 1-inch Turbine Meter
P1.0 Fleck 1-inch Paddle Wheel Meter
t1.5 Fleck 1-1/2 inch Turbine Meter
P1.5 Fleck 1-1/2 inch Paddle Wheel Meter
P2.0 Fleck 2-inch Paddle Wheel Meter
GEn Generic/Other Meter
17. Meter Pulse Setting (Display Code K)
Press the Extra Cycle button. Use this display to specify the
meter pulse setting for a non-standard flow meter. This option
setting is identified by “K” in the upper left-hand corner of
the screen. Use the Up and Down buttons to enter the meter
constant in pulses per unit volume.
18. End of Master Programming Mode
Press the Extra Cycle button to save all settings and exit
Master Programming Mode.
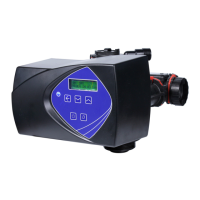
FLECK
5600SXT Downflow Service Manual • 9
 Loading...