ENGLISH
• 4 •
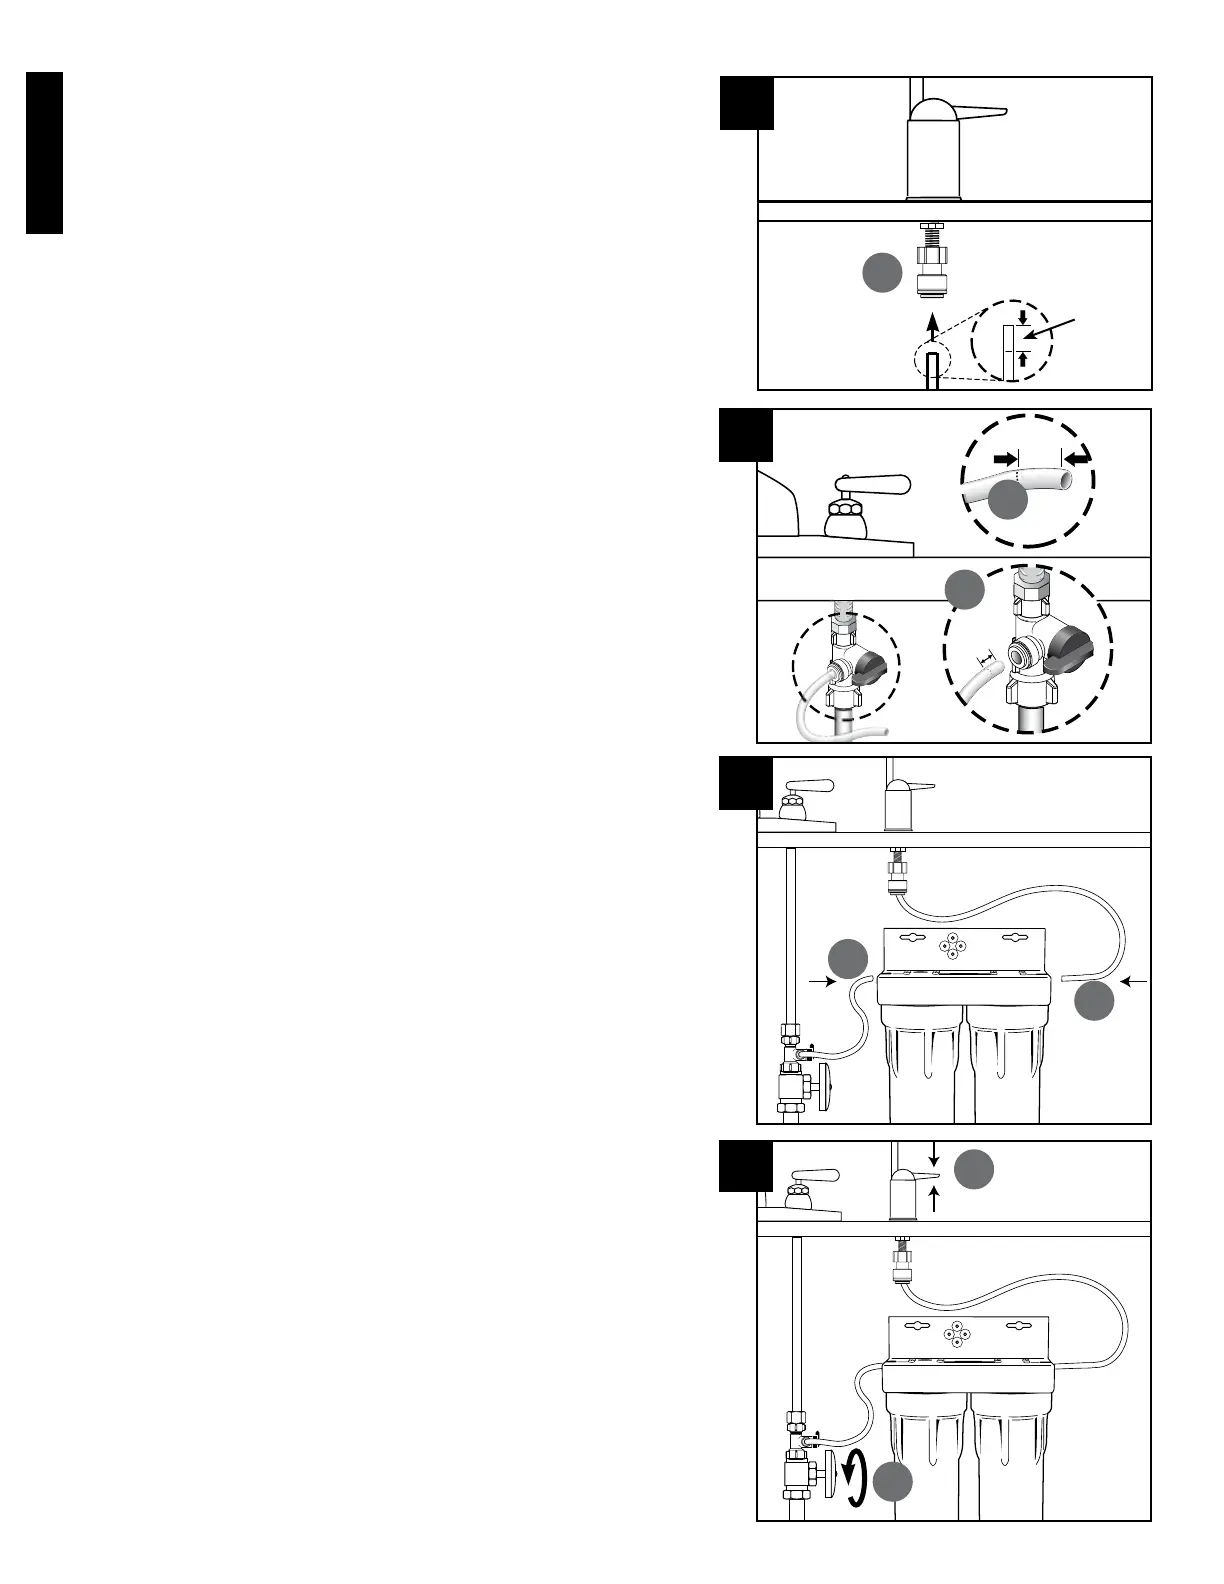
5. Connecting the Faucet
A. Thread ow control onto threaded stem of faucet. (Do not use plumber
tape or sealant.) Tighten ow control hand tight. Finish tightening with
a wrench an additional 1/2 turn, do not overtighten.
B. Insert one end of the 1/4-inch tube, supplied in the installation kit,
into the quick-connect tting collar located on the bottom of the ow
control on the faucet. Push tubing into the tting approximately 5/8-
inch until you come to a hard stop. (Do not bend or crimp tube when
inserting.)
C. Gently pull back on the tube to ensure it is connected properly. If
the tube comes out of tting, cut a small section of the tube off and
reconnect.
NOTE: Disconnecting the tubing from the quick-connect ttings.
Routine maintenance and cartridge replacement will not require that you
disconnect the tubing from the lter system; however, tubing may be
quickly and easily removed from the tting if necessary. First, turn off the
water supply to the lter. Open faucet, then press in the collar around the
tube while pulling the tubing with your other hand.
6. Connecting the Supply Adapter
A. Determine the length of plastic tubing needed to connect the inlet
(left) side of the lter with the supply adapter. Be sure to allow enough
tubing to prevent kinking and cut the tubing squarely. Place a mark 5/8
inch from the end of the tubing.
B. Wet tubing with water and insert into supply adapter 5/8 inch until mark
is ush with tting.
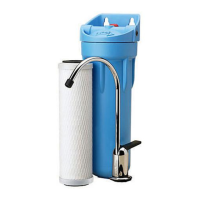
7. Connecting the System
A. Assemble tubing with system as shown in Figure 7, inserting supply
adapter tubing into inlet and faucet tubing into outlet quick-connect
tting approximately 5/8 inch until it stops.
NOTE: In some installations, connecting the system to the water supply
adapter and/or drinking water faucet causes the tubing to enter the quick-
connect tting at a sharp angle. This may exert pressure on the quick-
connect tting and cause it to leak. If sharp angles at the connections
are unavoidable, please contact
OMNIFILTER
Customer Service at
800.279.9404.
8. Putting the System into Operation
A. Slowly turn on cold water supply.
B. Lift up drinking water faucet handle to lock faucet in open position.
Allow water to run for 5 minutes to ush air and carbon nes from lter
cartridges. Check system for leaks before leaving installation. If there
are any leaks, see Troubleshooting.
NOTE: It is recommended that you run the tap at least 20 seconds prior to
using water for drinking or cooking purposes.
NOTE: Initially, ltered water may appear cloudy. If you set a glass of water
on a level surface, you should be able to watch the cloudiness disappear
from the bottom of the glass upwards. This harmless cloudiness results
from the release of trapped air within the cartridge and will disappear
within a few weeks after installation.
NOTE: The drinking water faucet can be operated by pushing the handle
down to ll a glass. Pull up on the handle to lock it in position to ll larger
containers.
INSTALLATION IS NOW COMPLETE.
6
5/8-inch
5/8-inch
B
A
7
A
A
8
B
A
5
5/8-inch
A
 Loading...