• 6 •
C) (5) Screw bottom of housing onto the cap and hand-tighten. DO NOT
OVER-TIGHTEN. Make certain cap standpipe slips into cartridge. (6)
Slowly turn handle on housing 1/4-turn counterclockwise to allow filter
to fill with water. (7) Depress red pressurerelief button to release
trapped air, then rotate handle fully to
“ON” position. Flush cartridge for 15 minutes before use. Check C
for leaks before leaving installation 7 6
TROUBLESHOOTING
Leaks . . . between cap and bottom of filter
housing:
1. Turn off water supply and press the red pressure-relief button. 5
Remove bottom of housing.
2. Clean o-ring and o-ring groove (located directly beneath threads of housing).
Lubricate o-ring with clean silicone or plumber’s grease and replace securely into
groove. Screw bottom of housing onto cap and hand-tighten. DO NOT OVER-
TIGHTEN.
3. Turn on water supply. If leaks persist, or if there are other leaks on the system,
turn off water supply. Call OMNIFILTER Customer Service at 800.279.9404.
on inlet/outlet connections:
1. Turn off water supply. For brass fittings, tighten nut snugly about 1/2-turn
with a wrench.
2. Turn on water supply. If leaks persist, or if there are other leaks on system,
turn off water supply. Call OMNIFILTER Customer Service at:
800.279.9404
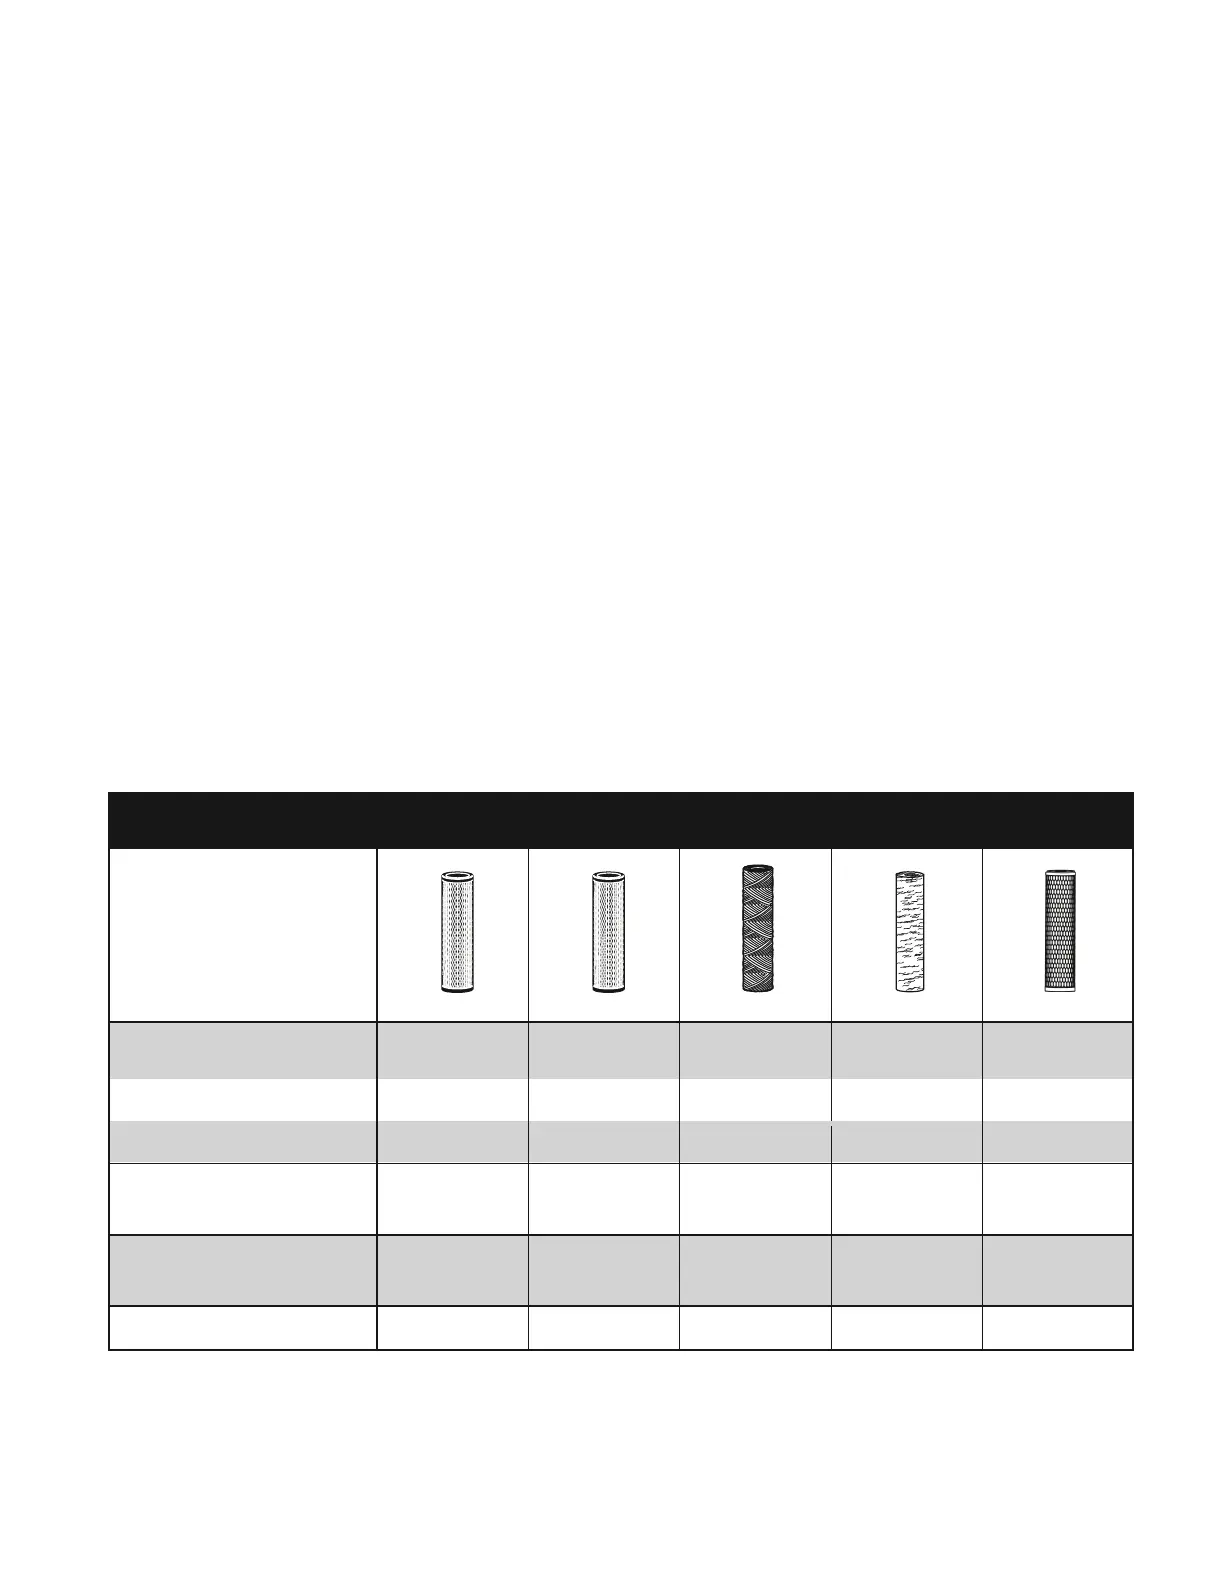
OMNIFILTER REPLACEMENT CARTRIDGES
Reduces Chlorine Taste & Odor
Filter Capacity
3 months
3 months
3 months
2 months
3 months
Recommended Flow Rate 5 gpm 5 gpm 5 gpm 5 gpm 5 gpm
*Nominal: Smaller micron rating equals finer filtration.
 Loading...