2020-05
16
2-D LiDAR Sensor
Installation
Mounting the 2-D LiDAR Sensor
Only mount the sensor in locations that fulfill the following safety-relevant
requirements: no aggressive environments, no direct sunlight, no excessive
fluctuations in temperature and humidity.
1. In addition, note the following when selecting a mounting location:
■ The sensor must not be obstructed visually, e.g., behind a cover.
■ The sensor should be installed so it is protected from rain.
2. Mount the device on the underside using the supplied socket head screws
with washers.
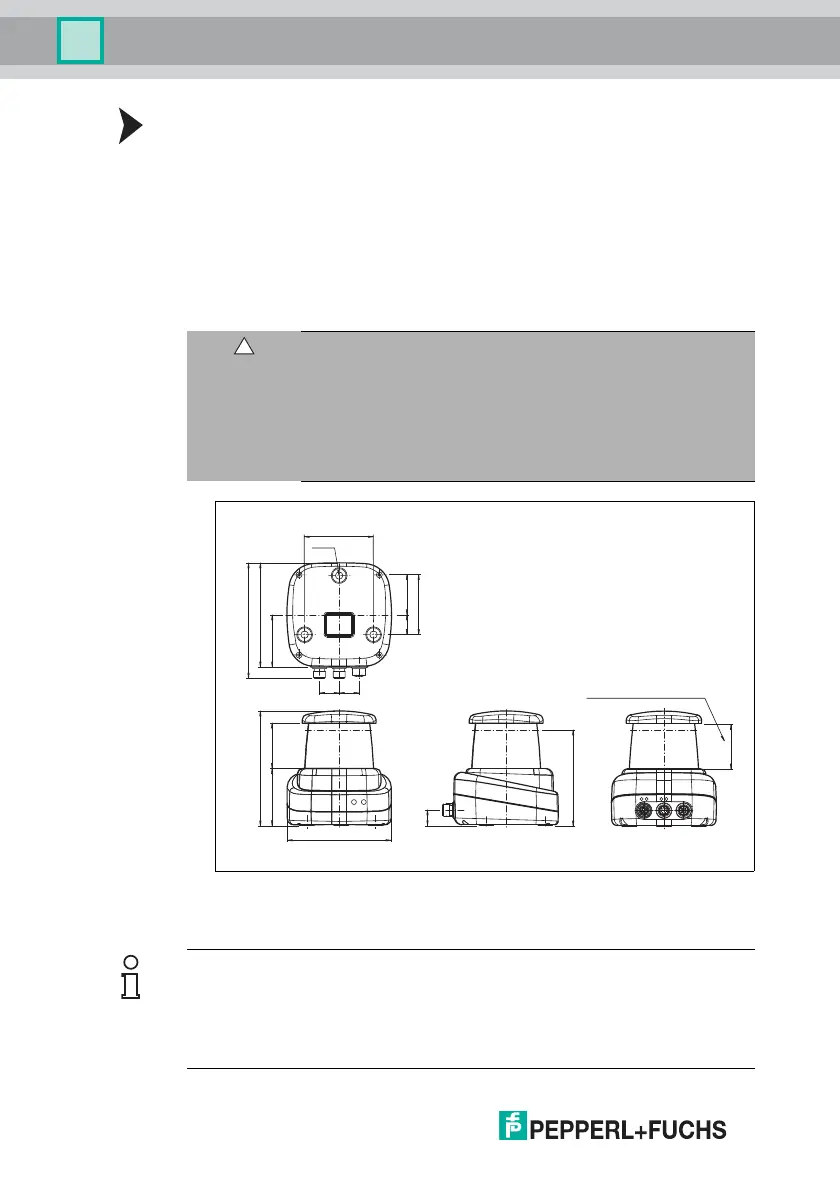
Figure 4.1 Dimensional drawing of R2000 2-D LiDAR sensor
3. Check that the sensor is securely seated.
Caution!
The wrong screw-in depth may result in property damage
If you screw the screws deeper than 8 mm into the base, the
device will be mechanically destroyed.
When mounting, make sure that the screw-in depth on the base is
≥ 5 mm ... ≤ 8 mm.
70
(40)20
60
20
53
106
117.5
4658
116.5
106
16
97.1
3 x M5
20
45
Emitting and receiving area
Complies with 21 CFR
1040.10 and 1040.11 except
for deviations pursuant to
Laser Notice No. 50,
dated June 24, 2007
CLASS 1
LASER PRODUCT
IEC 60825-1: 2007 certified.
Note
Keep the emitting/receiving area clear
When mounting, make sure the emitting area and the receiving area are kept
clear. Covering the emitting/receiving area reduces the performance of the 2-D
LiDAR sensor.

 Loading...