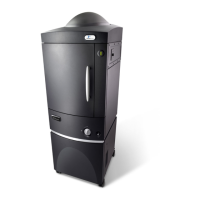
Clarus 500 GC Installation Guide
61
Connect the Gases
The following sections describe how to connect the gas cylinders to the Clarus 500 GC and
how to check the connections for leaks. Use the fittings and copper tubing supplied in the
installation kit (P/N 0332-8000).
Gas Cylinder Connections
Use the following procedure to make the gas cylinder connections:
1. Using a large adjustable wrench (at least 1¼ in.), attach a dual-stage regulator, or two
single-stage regulators in series, to each gas cylinder. The regulator outlet fitting must
be a 1/8-in. Swagelok type.
CAUTION
The following applies to manual pneumatics configurations only:
1. Dual-stage regulation is required with the Clarus 500 GC. It permits
steady gas delivery at high or low flows and provides precise control
of gas pressure throughout the discharge of virtually the entire
contents of a compressed gas cylinder. It is not necessary for PPC
units.
2. If your Clarus 500 GC is equipped with a TCD and you are operating
more than one GC from the same carrier gas tank, and/or operating
the TCD at high sensitivity, install an additional single-stage
regulator (0 – 90 psig) before you install the gas to the TCD.
3. If your Clarus 500 GC is equipped with an ECD, you can control the
flow of make-up gas by installing an additional 30-psig single-stage
regulator before the ECD needle valve.
4. If your Clarus 500 GC is equipped with a NPD, we recommend
installing a toggle valve in the hydrogen line that enters the Clarus
500 GC. This allows you to turn off the hydrogen when the NPD is
not in use without changing the regulator setting on the Clarus 500
GC.
If your Clarus 500 GC is equipped with a FPD, we recommend installing
a toggle valve in the air line that enters the Clarus 500 GC. This allows
you to turn off the air when the FPD is not in use without changing the
regulator setting on the Clarus 500 GC.
 Loading...