4. .Remove the oil level gauge to check the oil level.
Maintain the oil level between the ADD and FULL
marks on the side of the oil level gauge.
i06972463
Engine Valve Lash - Check
Ensure that the engine cannot be started while
this maintenance is being performed. To help pre-
vent possible injury, do not use the starting motor
to turn the flywheel.
Hot engine components can cause burns. Allow
additional time for the engine to cool before
measuring/adjusting valve lash clearance.
NOTICE
Only qualified service personel should perform this
maintenance. Refer to the Service Manual or your au-
thorized Perkins dealer or your Perkins distributor for
the complete valve lash adjustment procedure.
Operation of Perkins engines with incorrect valve
lash can reduce engine efficiency, and also reduce
engine component life.
The initial valve lash adjustment on new engines,
rebuilt engines, or remanufactured engines is
recommended only on engine ratings 330 kW
(442 hp) and greater. The adjustment is necessary
due to the initial wear of the valve train components
and to the seating of the valve train components.
This maintenance is recommended as part of a
lubrication and preventive maintenance schedule to
help provide maximum engine life. For engine ratings
less than 330 kW (442 hp), the initial valve lash
adjustment is not necessary.
Note: All engine ratings must have the engine valve
lash performed at 2500 hours.
Ensure that the engine is stopped before measuring
the valve lash. To obtain an accurate measurement,
allow the valves to cool before this maintenance is
performed.
During valve adjustment, visibly inspect the valve
train of wear or damage.
Refer to Systems Operation, Testing and Adjusting,
“Engine Valve Lash - Inspect/Adjust” for more
information.
i06133832
Fuel System - Prime
NOTICE
Do not allow dirt to enter the fuel system. Thoroughly
clean the area around a fuel system component that
will be disconnected. Fit a suitable cover over discon-
nected fuel system component.
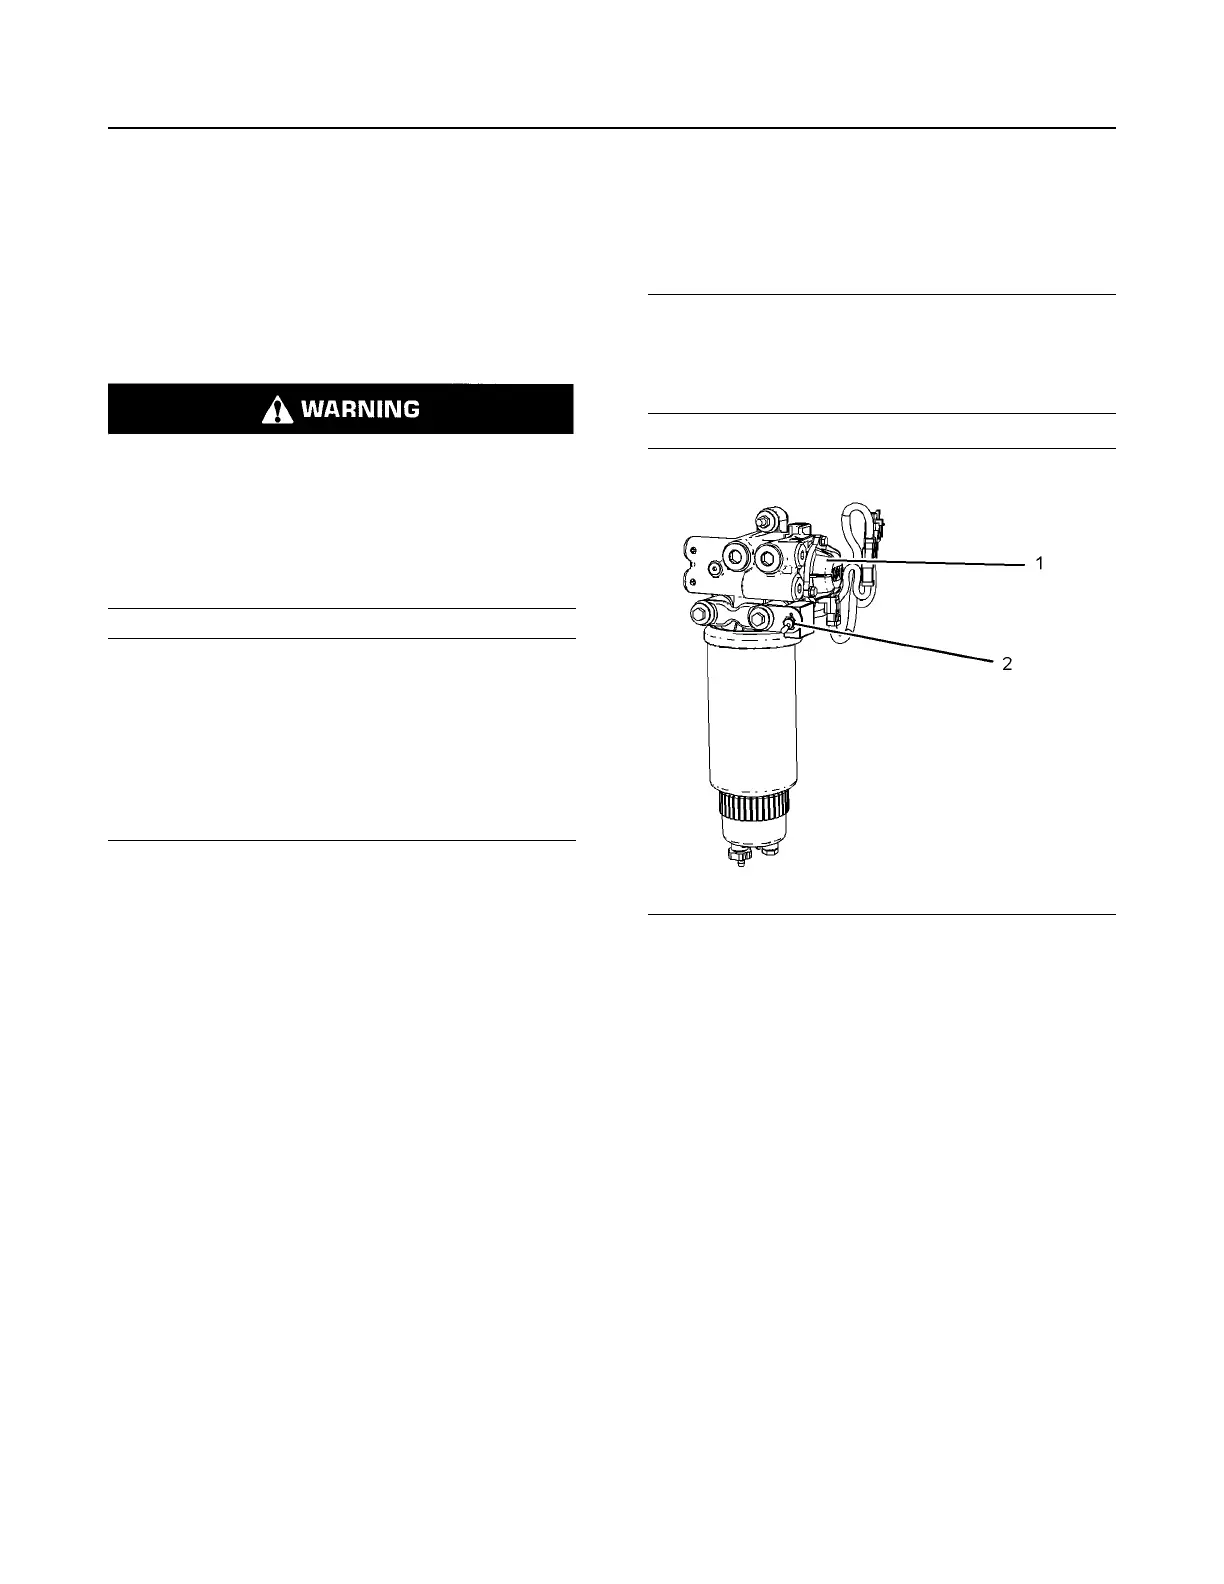
Illustration 87 g03820371
(1) Fuel priming pump
(2) Fuel priming switch
1. The fuel system can be primed from the keyswitch
or from a remote mounted switch (2).
2. Turn the fuel priming switch (2) to the ON position.
Hold the fuel priming switch in the ON position for
2 minutes.
3. Verify that the water separator is full of fuel.
4. If the water separator is not full of fuel, turn the fuel
priming switch OFF and then turn the engine start
switch ON. This action will cycle the fuel priming
pump again.
5. When the water separator is full of fuel, attempt to
start the engine. If the engine starts and the
engine runs rough or the engine misfires, operate
at low idle until the engine is running smoothly. If
the engine cannot be started, or if the engine
continues to misfire or smoke, repeat Step 1.
108
SEBU9071-06
Maintenance Section
Engine Valve Lash - Check