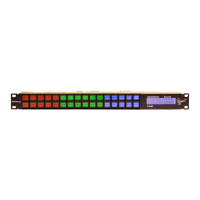
Smart 32 Remote Control Panel User Guide
Publication 81-9059-0727-0, Rev. A
April 2014
Proprietary Information of
PESA 3-3
Every Smart 32 panel has a 2 port Ethernet switch built-in. You may use
the open connector as a connection point for another device. Often, this
feature is used to daisy-chain Smart 32 panels. Be aware, however, that if
the directly connected panel is removed or loses power, the downstream
device will also lose connection to the Ethernet.
• Connect supplied 12VDC power supply to a source of AC power and attach the output
connector of the supply to its rear panel mating plug as shown by Figure 3-1.
• Mount Smart 32 Remote Control Panel in an equipment rack or other desired location.
• Add panel to controller configuration file in accordance with Chapter 5 of the PERC3000 User
Guide, Rev D. A Smart 32 panel will not communicate with system controller or operate the
router until it is added to the controller configuration.
• If you are changing the IP address of a panel already on the network, you MUST restart the
Smart 32 panel after the controller configuration file is uploaded.
In order for a Smart 32 control panel to be functional, the following conditions must be met:
• It must have Ethernet communication with the PERC3000 System Controller device.
• It must be assigned a unique hardware panel ID entered through rotary switches on the rear of
the control panel.
• It must be assigned a unique IP Address on the Ethernet network.
• It must be configured through Cattrax into the system controller configuration file.
Complete procedures required to generate a controller configuration file and the steps to set-up and add
a control panel to it are included in Chapter 5 of the PERC3000 User Guide.