Pfaff360
The sewing
hook
of
the Pfaff 360 is timed
in
the same
way
as
the Pfaff 260
hook.
It
should be kept
in
mind, however,
that
the sewing
hook
of
the Pfaff 360
is
mounted permanently on the short transverse shaft
and,
hence, cannot
be
turned
in
setting the needle
bar
rise. For this reason, to time the sewing hook,
loosen the lower driving belt sprocket
and
rotate the long hook drive shaft ac-
cordingly.
Under no circumstances must the position
of
the
upper
driving belt
sprocket
be changed on the arm shaft. Although this procedure would
be
much
simpler, it would disturb the balance
of
this shaft.
The set screws on the
lower driving
belt
sprocket con
be
reached through
one
of
the
apertures
at
the bock
of
the machine base. For a better view
of
the ports
to be adjusted
,.
remove gri
ll
e 8
(Fig.
83).
If
for
one
reason
or
another
this procedure should prove impractical, proceed
as
follows: Strip grille 8
(Fig.
83),
loosen motor set screws 4,
and
loosen the
set screw on driving
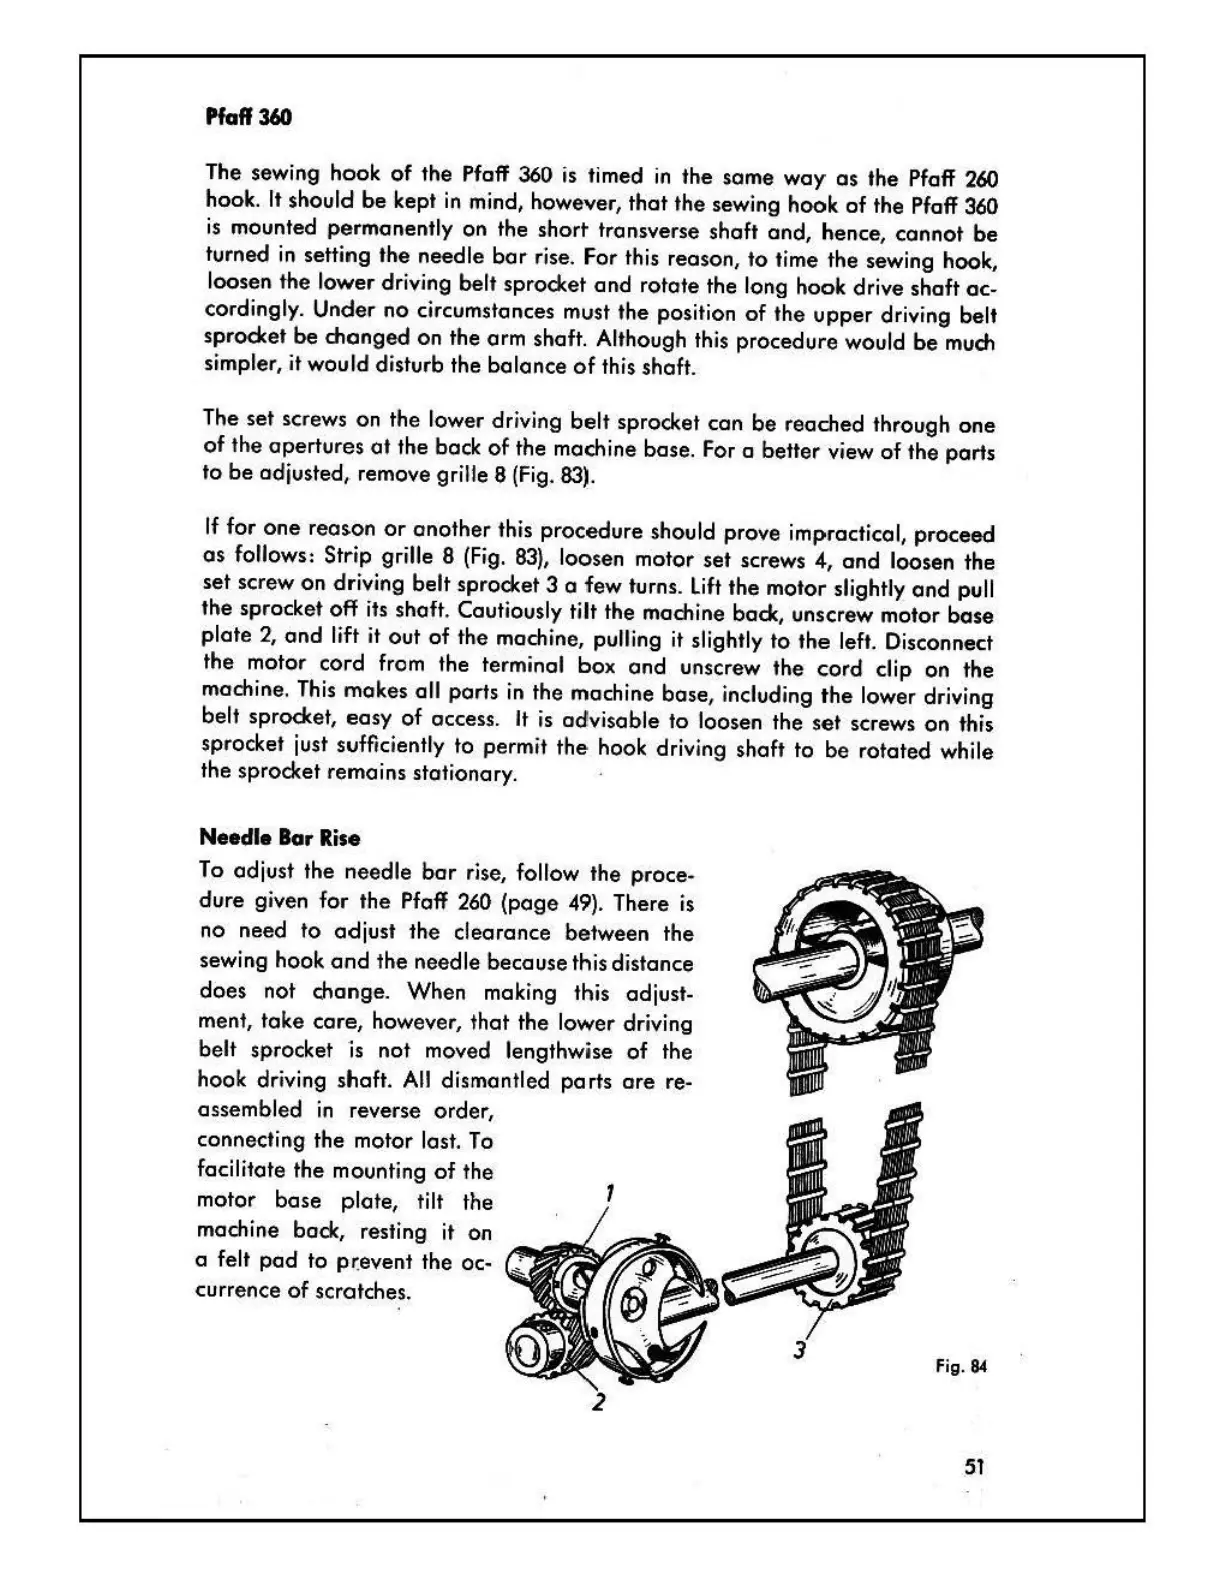
belt sprocket 3 a few turns. lift the motor slightly
and
pull
the sprocket off its shaft. Cautiously tilt the machine back, unscrew motor
base
plate 2,
and
lift it out
of
the machine, pulling it slightly to
the
left. Disconnect
the motor cord from the
terminal box
and
unscrew the
cord
clip on the
machine.
This
makes all ports
in
the machine bose, including
the
lower driving
belt sprocket,
easy
of
access. It is advisable to loosen the set screws on this
sprocket just
sufficiently to permit
the
hook driving shaft to be
rotated
while
the sprocket remains stationary.
Needle
Bar
Rise
To
adjust the needle
bar
rise, follow
the
proce-
dure given for the Pfaff 260
(page
49). There is
no need to adjust
the
clearance between
the
sewing hook
and
the needle because this distance
does
not change. When making this adjust-
ment, toke
care,
however, that
the
lower driving
belt sprocket
is
not
moved lengthwi
se
of
the
hook
dr
iving shaft.
All
dismantled ports
are
re-
assembled
in
reverse order,
connecting the motor
lost. To
facilitate the mounting
of
the
motor
base
plate, tilt the
machine back, resting it on
o
felt
pad
to p(event the oc-
currence
of
scratches.
Fig.
84
.
51