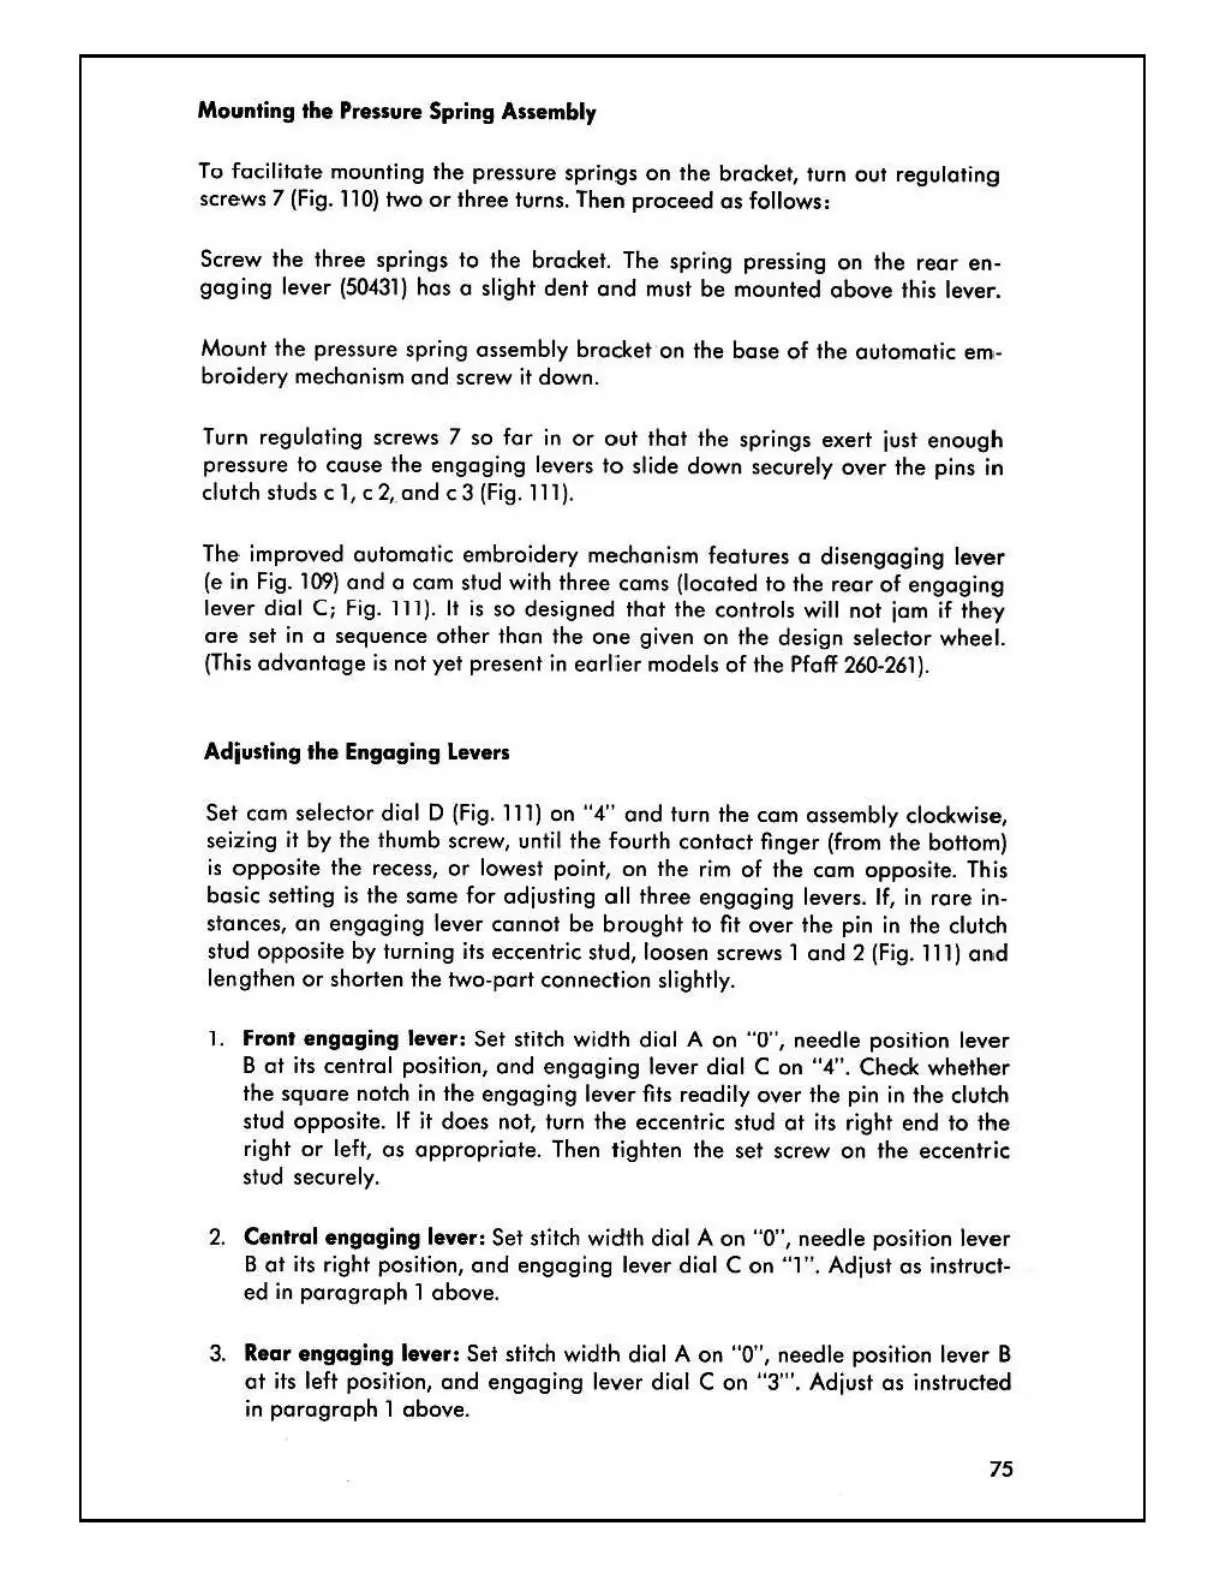
Mounting the
Pressure
Spring Assembly
To facilitate mounting the pressure springs
on
the bracket, turn out regulating
screws 7 (Fig.
11
0)
two
or
three turns. Then
proceed
as
follows:
Screw the three springs
to
the bracket. The spring pressing
on
the
rear
en-
gaging
lever
(50431)
has
a slight
dent
and
must
be
mounted
above
this lever.
Mount the pressure spring
assembly
bracket
on
the bose
of
the automatic em-
broidery mechanism
and
screw
it
down.
Turn
regulating screws 7 so for
in
or
out
that
the springs exert just
enough
pressure
to
cause
the
engaging
levers
to
slide down securely
over
the pins in
clutch studs c 1, c
2,
.
and
c 3 (Fig.
11
1
).
The
improved automatic embroidery mechanism features a
disengaging
lever
(e
in
Fig
.
109)
and
a cam stud with
three
cams (located
to
the
rear
of
engaging
lever dial
C;
Fig.
11
1).
It
is
so
des
igned
that
the contro
ls
will
not
jam if they
are
set
in
a sequence
other
than the
one
given
on
the
design selector wheel.
(This
advantage
is
not
yet present
in
earlier
models
of
the Pfaff 260-261).
Adiusting the Engaging levers
Set
cam
selector dial D (Fig.
111)
on
"4"
and
turn the com assembly clockwise,
seizing it by the thumb screw, until the fourth
contact
finger (from the bottom)
is
opposite
the recess, or lowest point,
on
the
rim
of
the
cam
opposite. This
basic
setting
is
the same
for
adjusting
all
three
engaging
levers.
If
,
in
rare
in-
stances,
an
engaging
lever
cannot
be
brought
to
fit over the pin
in
the clutch
stud
opposite
by turning its eccentric stud, loosen screws 1
and
2 (Fig.
111)
and
lengthen
or
shorten the two-port connection slightly.
1. Front engaging lever: Set stitch width dial A
on
"0"", needle position lever
B
at
its central position,
and
engaging
lever dial C
on
"4". Check
whether
the
square
notch
in
the
engaging
lever fits readily
over
the pin
in
the clutch
stud opposite.
If
it
does
not, turn
the
eccentric stud
at
its right
end
to
the
right
or
left,
as
appropriate.
Then tighten the
set
screw
on
the eccentric
stud
securely.
2.
Central engaging lever: Set stitch width dial A
on
"0", needle position lever
B
at
its right position,
and
engaging
lever dial C
on
"1 ". Adjust
as
instruct-
ed
in
paragraph
1
above.
3. Rear engaging lever: Set stitch width dial A
on
"0", needle position lever B
at
its left position,
and
engaging
lever dial C
on
"3"'. Adjust
as
instructed
in
paragraph
1 above.
75