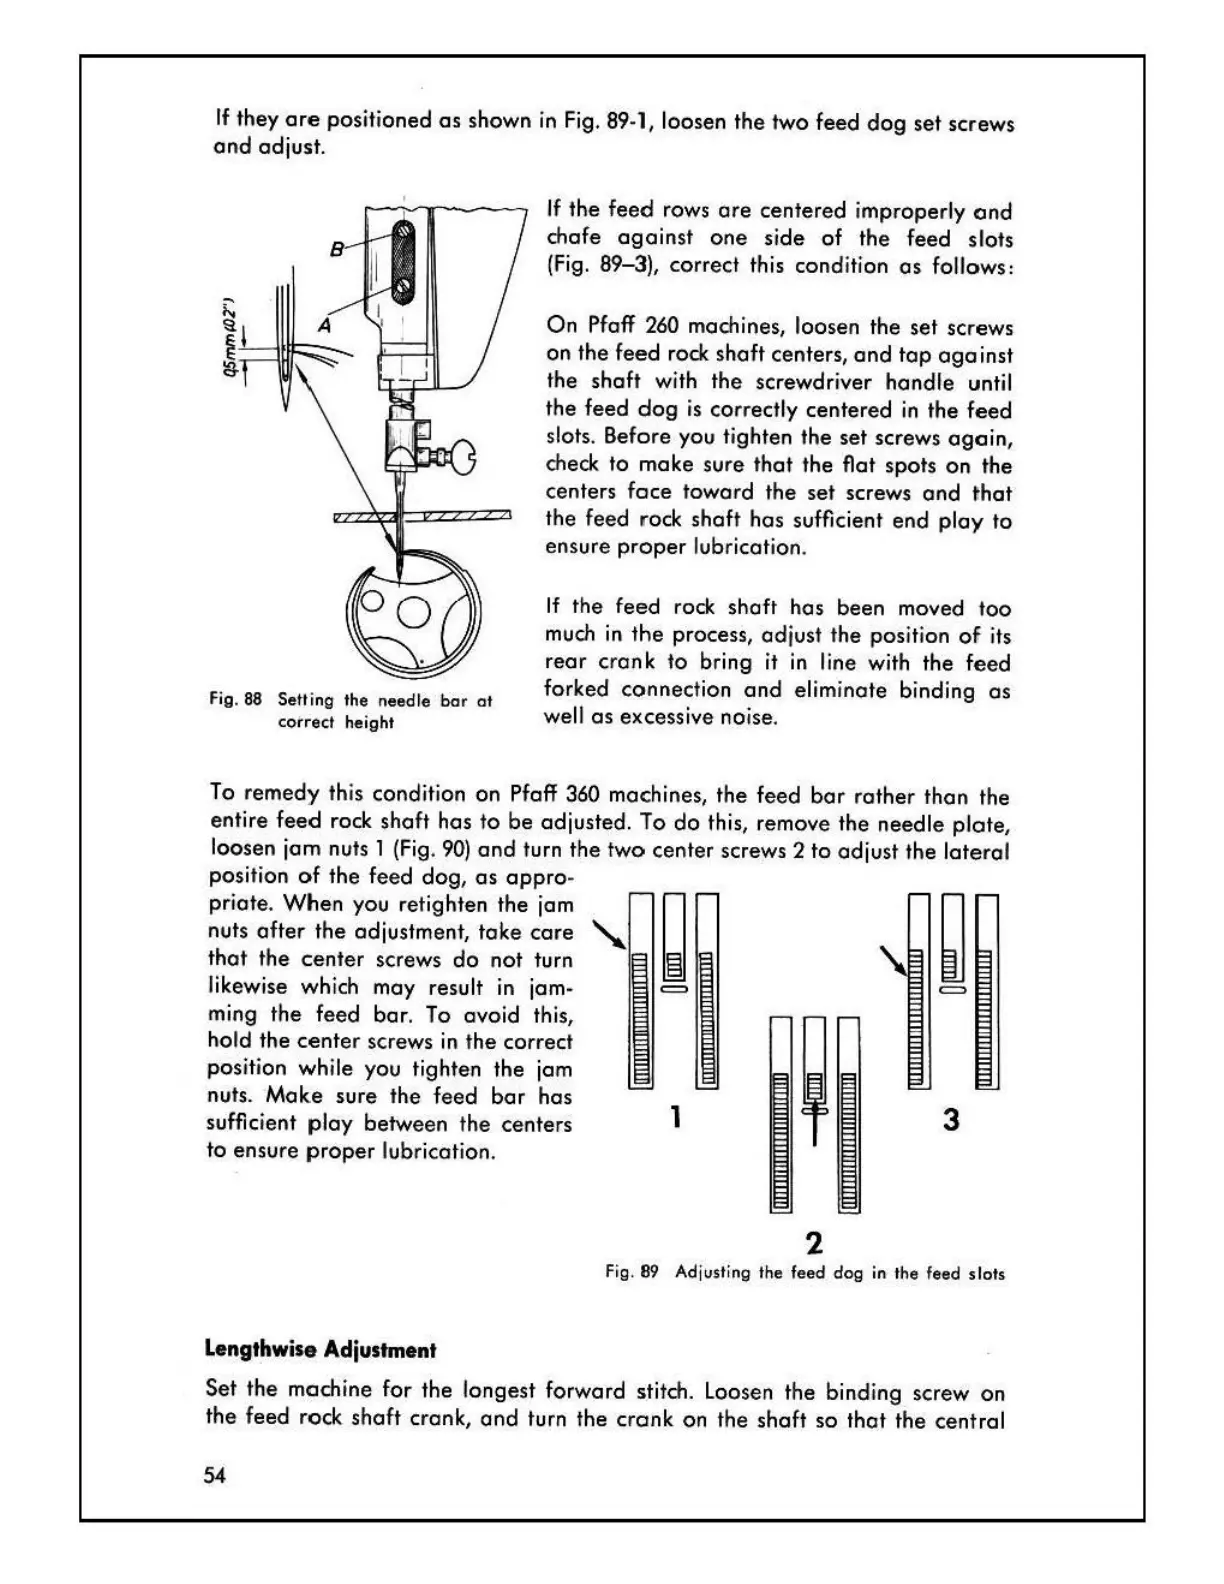
If
they
are
positioned
as
shown in Fig. 89-1, loosen
the
two
feed
dog
set
screws
and
adjust.
Fig. 88 Setting the needle
bar
of
correct height
If
the
feed
rows
are
centered
improperly
and
chafe
against
one
side
of
the
feed
slots
(Fig. 89-3), correct this condition
as
follows:
On
Pfaff 260 machines, loosen
the
set
screws
on
the
feed
rock
shaft
centers,
and
top
against
the
shaft
with
the
scr
ewdr
iver
handle
until
the
feed
dog
is
correctly
centered
in
the
feed
slots. Before you tighten
the
set
screws
again,
check
to
make
sure
that
the
Aot
spots
on
the
centers
face
toward
the
set
screws
and
that
the
feed
roc
k
shaft
ha
s sufficient
end
p
loy
to
ensure
proper
lubrication.
If
the
feed
rock
shaft
has
been
moved
too
much in
the
process,
adjust
the
position
of
its
rear
crank
to
bring it
in
line with
the
feed
forked
connect
ion
and
eliminate binding
as
well
as
excessive noise.
To
remedy
this condition
on
Pfaff 360 machines,
the
feed
bar
rather
than
the
entire
feed
rock
shaft
has
to
be
adjusted.
To
do
this, remove
the
needle
plote,
loosen
jam
nuts 1
(F
ig.
90)
and
turn
the
two
center
screws 2
to
adjust
the
latera
l
position
of
the
feed
dog,
as
appro-
priate.
When
you retighten
the
jam
nuts
after
the
adjustment,
take
care
that
the
center
screws
do
not
turn
likewise which may result in jam-
ming
the
feed
bar.
To
avoid
this,
hold
the
center
screws in
the
correct
position while you tighten
the
jam
nuts.
Make
sure
the
feed
bar
has
sufficient
play
between
the
centers
to
ensure
proper
lubrication.
Lengthwise
Adjustment
=
1
3
2
Fig. 89 Adjusting the feed dog
in
the feed slots
Set
the
machine
for
the
longest
forward
stitch. Loosen
the
binding screw on
the
feed
rock
shaft
crank,
and
turn
the
crank
on
the
shaft
so
that
the
central
54