2:6
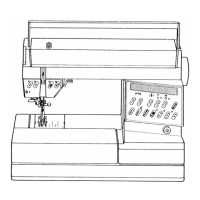
D
E
C
B
F
A
C
B
A
Preparations
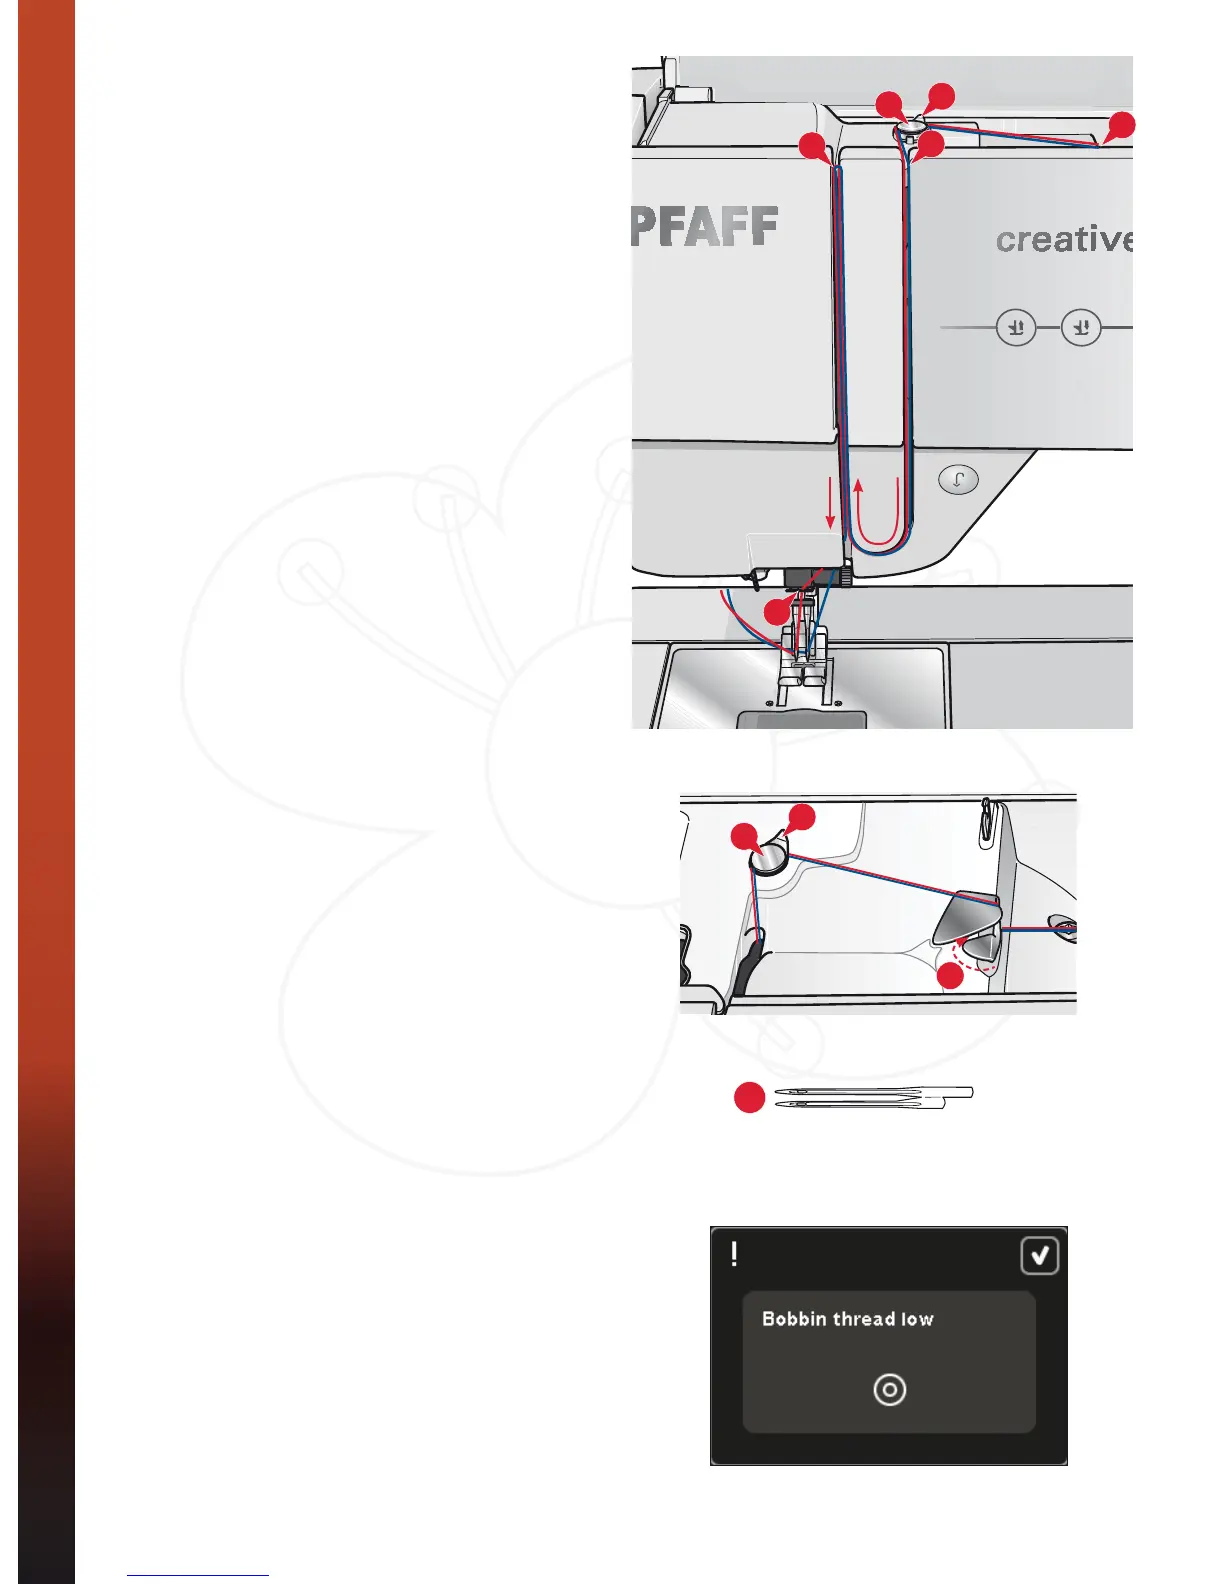
Threading for twin needle
Replace the sewing needle with a twin needle. Make
sure that the presser foot is raised and the needle is
in the up position.
3ODFHWKHWKUHDGRQWKHVSRROSLQDQGÀWDVSRRO
cap of the right size. Raise the auxiliary spool
SLQ6OLGHRQDODUJHVSRROFDSDQGDIHOWSDG
Place the second thread on the spool pin.
Note: Hold threads with both hands to prevent them from
slacking while threading. This ensures that the threads
will be positioned properly in the threading path.
3XOOWKHWKUHDGVLQWRWKHWKUHDGJXLGHE\SXOOLQJ
WKHPIURPWKHIURQWWRWKHEDFN$0DNH
VXUHWKHWKUHDGVFOLFNLQWRSODFH7KHQSXOOWKH
threads underneath the bobbin winder thread
JXLGH%RQWKHSUHWHQVLRQGLVF&
7KUHDGGRZQWKURXJKWKHULJKWKDQGWKUHDGLQJ
VORWDQGWKHQXSZDUGVWKURXJKWKHOHIWKDQG
threading slot. Make sure that you pass one
thread to the left and one thread to the right
VLGHVRIWKHWHQVLRQGLVN)
%ULQJWKHWKUHDGVIURPWKHULJKWLQWRWKHWDNHXS
OHYHU'DQGGRZQLQWKHOHIWKDQGWKUHDGLQJ
slot. Make sure that one thread is inside the
QHHGOHWKUHDGJXLGH(DQGWKHRWKHURQH
outside. Make sure that the threads do not
become twisted together.
7KUHDGWKHQHHGOHV
Note: Activate twin needle and select the correct twin
needle width in Settings menu. This will limit the width
of all stitches for that needle size to prevent damage to
presser foot and needle.
Note: The weight and irregular surface of specialty
threads such as metallic increases the amount of friction
on the thread. By reducing the tension, the risk of needle
breakage is prevented.
Note: Do not use asymmetrical twin needles (G), since it
may damage your sewing machine.
Thread sensor
,IWKHQHHGOHWKUHDGEUHDNVRUEREELQWKUHDGLV
UXQQLQJORZWKHPDFKLQHVWRSVDQGDSRSXS
DSSHDUVRQWKHVFUHHQ,IQHHGOHWKUHDGEUHDNV
5HWKUHDGWKHPDFKLQHDQGWRXFK2.LQWKHSRSXS
,IEREELQWKUHDGLVUXQQLQJORZ<RXFDQFRQWLQXH
VHZLQJZLWKRXWFORVLQJWKHSRSXSEHIRUHWKH
EREELQWKUHDGUXQVRXWFRPSOHWO\7KLVJLYHV\RX
an opportunity to plan where to stop sewing and
change the bobbin. When the bobbin is replaced
ZLWKDIXOORQHWRXFK2.LQWKHSRSXS
G