4-6
4.1.2 Polarization Index Test
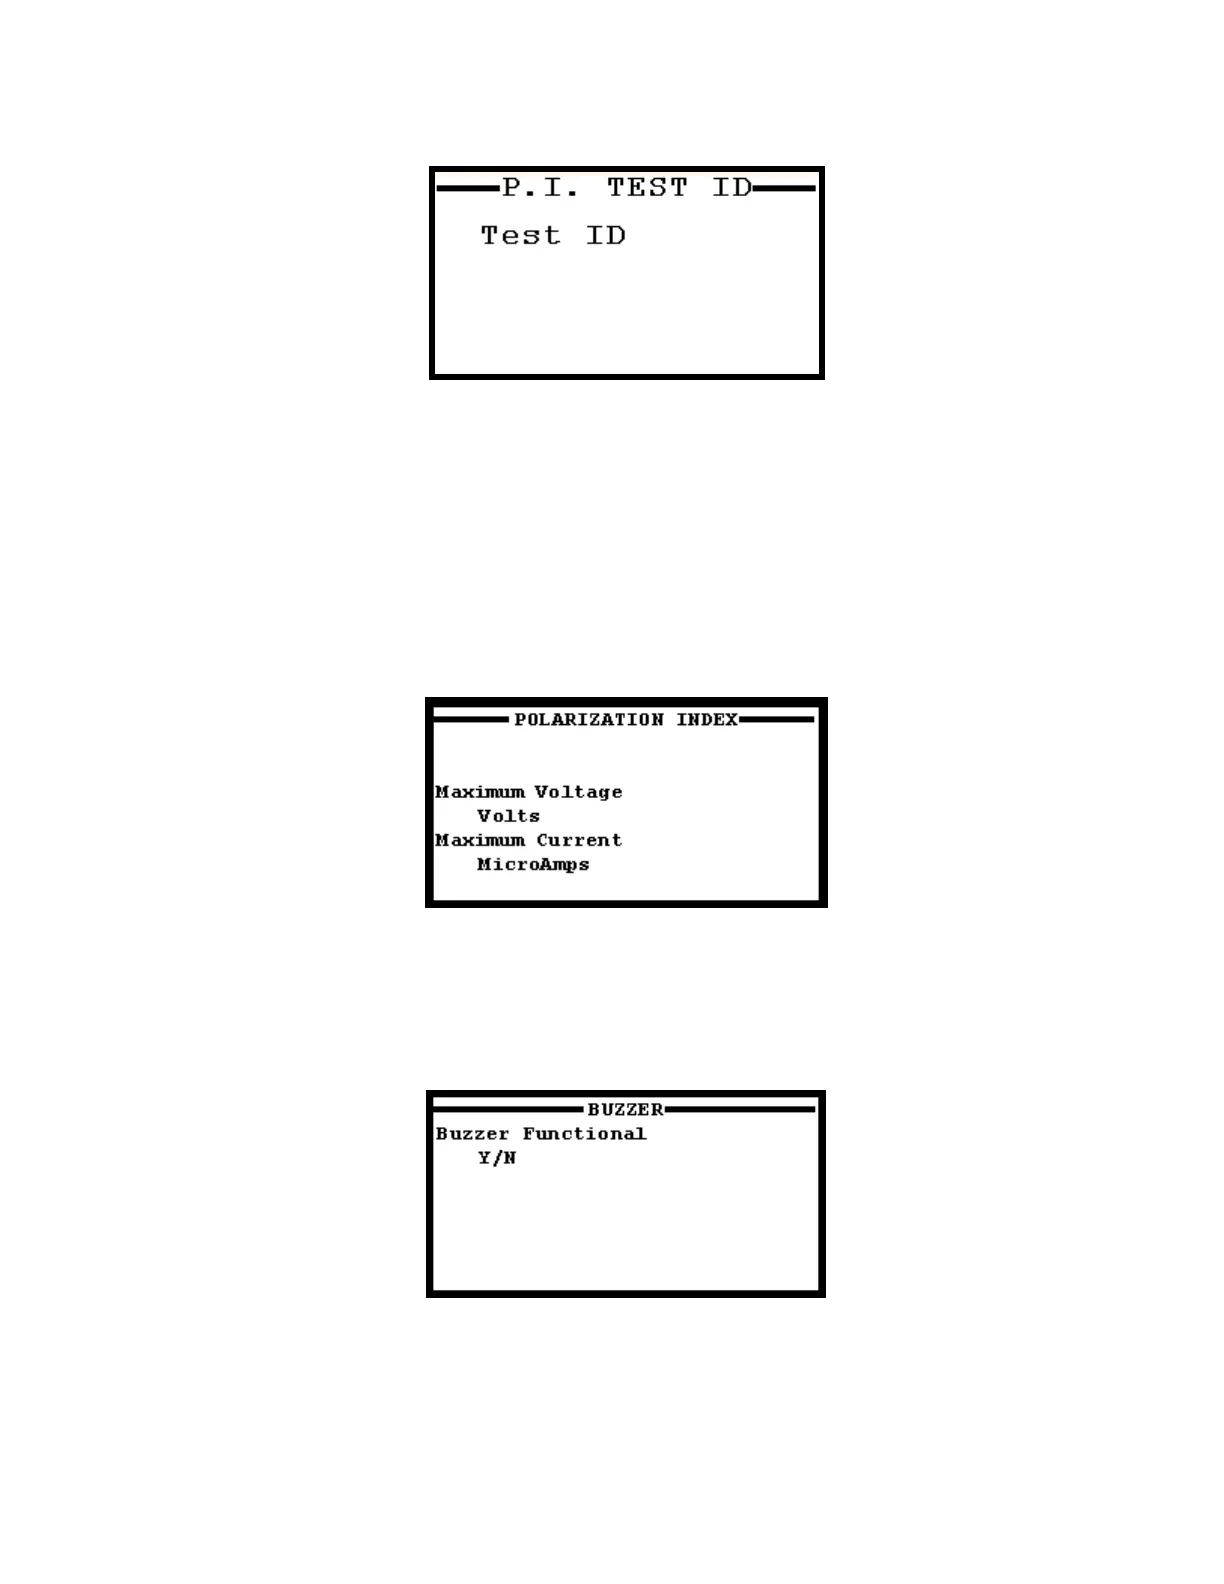
FIGURE 12: Polarization Index Test ID Screen
Enter an alphanumeric test identification (or leave blank) and press enter.
When testing objects with large capacitance, it may take a considerable amount of time for the charging
current to approach zero. Therefore it also may take considerable time before the IR test returns a true
resistance reading. The Polarization Index records the current over a 10-minute interval by taking a reading
every 60 seconds. By making multiple current measurements over time the problem of the time dependant
currents is minimized. Instead of looking for an absolute resistance reading the PI test looks for a trend. The
final PI ratio is automatically calculated at the end of the test and a hardcopy of the test results may be printed
out or saved to an SD card. PI values above 2 indicate good insulation, values between 1 and 2 indicate
marginally acceptable insulation, and values less than 1 indicate poor insulation.
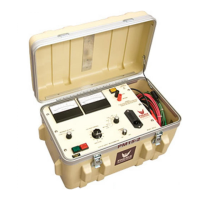
FIGURE 13: Polarization Index Setup Screen
At the Polarization Index (P.I.) Setup Screen (Figure 13), enter maximum volts and MicroAmps; the P.I. test
runs for ten minutes, so maximum time is not displayed to be entered. Then press Enter to proceed through
the Buzzer Option Screen. (Figure 14)
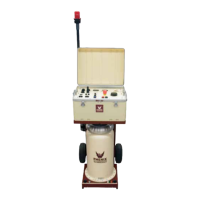
FIGURE 14: Buzzer Option Screen
Choose whether to enable HV warning buzzer then press enter to bring up the HV ON Waiting Screen to
apply high voltage (Figure 15).