EasyManua.ls Logo

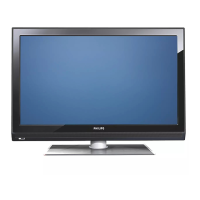
Philips 42PF9731D User Manual

Philips 42PF9731D
74 pages
To Next Page IconTo Next Page
Page #1 background imageLoading...
Page #1 background image
Safety warnings . . . . . . . . . . . . . . . . . . . . . . . . . 2
Getting started . . . . . . . . . . . . . . . . . . . . . . . . . 3
Use of the remote control RC4401/4420/01 . . 5
Use of the option key . . . . . . . . . . . . . . . . . . . . 8
Keys at the right side of the TV . . . . . . . . . . . . 8
Introduction: Digital TV . . . . . . . . . . . . . . . . . . . 9
Switch the TV on . . . . . . . . . . . . . . . . . . . . . . . 9
First time installation . . . . . . . . . . . . . . . . . . . . 9
How to navigate through the menus . . . . . . . . 12
Use of the TV menu settings . . . . . . . . . . . . . . 14
Adjust picture menu settings . . . . . . . . . . 16
Adjust sound menu settings . . . . . . . . . . . 19
Enjoy Ambilight . . . . . . . . . . . . . . . . . . . . . 21
Adjust feature menu settings . . . . . . . . . . 24
How to search for and store TV channels . 28
Rearrange the channel number list . . . . . . 31
Manual network installation . . . . . . . . . . . 32
Set your preferences . . . . . . . . . . . . . . . . 32
Select your connections . . . . . . . . . . . . . . 33
Select a Decoder channel number . . . . . . 34
Reset the Factory settings . . . . . . . . . . . . 34
How to upgrade the TV software . . . . . . 35
Create your favourite list . . . . . . . . . . . . . . . . 36
EPG (Electronic Programme Guide) . . . . . . . . 37
Multimedia Browser . . . . . . . . . . . . . . . . . . . . 39
Teletext . . . . . . . . . . . . . . . . . . . . . . . . . . . . . 43
To make video and audio connections . . . . . . 46
Side panel overview . . . . . . . . . . . . . . . . . 47
Rear panel overview . . . . . . . . . . . . . . . . . 48
Connect
a VCR or DVD recorder . . . . . . . . . . . . . . 49
two VCRs or VCR and DVD recorder . . . 50
a satellite receiver . . . . . . . . . . . . . . . . . . 50
a DVD player, HD receiver
or game console . . . . . . . . . . . . . . . . . .. 51
a DVD player or HD receiver . . . . . . . . . . 51
a DVD player, a satellite or HD receiver . .52
a PC . . . . . . . . . . . . . . . . . . . . . . . . . . . . . 53
a Home Cinema amplifier . . . . . . . . . . . . . 54
Use the Common Interface slot . . . . . . . . . . . 55
Select connected equipment . . . . . . . . . . . . . . 56
Record with your recorder . . . . . . . . . . . . . . 56
Audio- and video equipment keys . . . . . . . . . . 57
Troubleshooting . . . . . . . . . . . . . . . . . . . . . . . 58
Annex 1 - Philips TV software upgrade with
portable memory . . . . . . . . . . . . . . . . . . . 60
Annex 2 - Philips TV-Slideshow Format with
background music . . . . . . . . . . . . . . . . . . . 63
Annex 3 - Philips TV - Portable memory
and USB issues . . . . . . . . . . . . . . . . . . . . . 65
Annex 4 - Issues referring to connected
peripherals with a HDMI connector . . . . . 66
Index . . . . . . . . . . . . . . . . . . . . . . . . . . . . . . . 67
Recycling . . . . . . . . . . . . . . . . . . . . . . . . . . . . 68
Product information . . . . . . . . . . . . . . . . . . . . 68
Contents
EN
1
If this instruction manual does not give an answer or if ‘Troubleshooting’ does not solve your TV
problem, you can call your Local Philips Customer or Service Centre. See the supplied Worldwide
guarantee booklet.
Please, have the Model and Product number which you can find at the back or the bottom of your television
set or on the packaging, ready, before calling the Philips customer support service.
Model: 37-42PF9731D/10; 42PF9831D/10
Product No: ....................................
About this User Manual
This manual contains all information you will need to initially install and operate your new TV.
Also read the help texts which are being displayed at the bottom of the screen.
2504.4 en 13-12-2006 08:29 Pagina 1
Downloaded From TV-Manual.com Manuals

Other manuals for Philips 42PF9731D

Questions and Answers:

Philips 42PF9731D Specifications

Picture/Display IconPicture/Display
aspect ratio16:9
brightness550 cd/m²
dynamic screen contrast4500:1
viewing angle horizontal176º
viewing angle vertical176º
diagonal screen size42 inch
panel resolution1366 x 768p
Sound IconSound
output power RMS2x15W
sound systemVirtual Dolby Digital
built-in speakers4
Power IconPower
ambient temperature range5 °C to 40 °C
mains powerAC 110 -240 V +/- 10%
power consumption263 W
standby power consumption0.6 W
Weight and Dimensions IconWeight and Dimensions
set dimensions (W x H x D)43.1 x 31.3 x 4.5 inch
set dimensions with stand (H x D)32.6 x 11.4 inch
product weight67.9 lb
box dimensions (W x H x D)50.9 x 41.9 x 12.7 inch
weight including packaging116.9 lb

Summary

About this User Manual

Safety Warnings

General Safety Precautions

Covers general safety advice for TV placement, ventilation, and avoiding hazards.

Screen Care Instructions

Guidelines for cleaning and protecting the TV screen from damage.

Stationary Image Precautions

Advice on avoiding screen burn-in from static images.

Electromagnetic Field (EMF) Information

Philips' commitment to EMF safety standards and product emissions.

Pixel Characteristics Explained

Information on structural properties of display pixels, not malfunctions.

Getting Started

Before Connecting Peripherals

Important warning about connecting power before all connections are made.

Rear Panel Overview

Diagram and description of the TV's rear connection panel.

Getting Started (Continued)

Side Panel Overview

Diagram and description of the TV's side connection panel.

Connecting the Antenna

Instructions for inserting the aerial plug into the TV socket.

Connecting the Mains Power

Guide for connecting the TV's mains cord to the wall socket.

Remote Control Battery Installation

Instructions for inserting batteries into the remote control.

Remote Control Operation

Standby and Mode Selection

Using the Standby and TV/DVD/STB/VCR/AUX keys.

DEMO and Colour Key Functions

Activating demo mode and using colour keys for Teletext.

OPTION Key Usage

Accessing Quick Menu and Electronic Programme Guide (EPG).

Cursor and OK Key Navigation

Using cursor keys for menu navigation and OK for selection.

BROWSE/MENU and Teletext Control

Opening main menu and switching Teletext on/off.

Remote Control Operation (Continued)

Volume and Mute Control

Adjusting volume using '+' and '-' buttons and the mute function.

Channel Selection Methods

Browsing channels with '+P-' and direct entry with digit keys.

Previous Channel and Peripheral Selection

Switching between channels and selecting equipment.

Ambilight and MODE Settings

Turning Ambilight on/off and cycling through modes.

CANCEL and Information Keys

Cancelling digital services and displaying on-screen information.

Remote Control Operation (Continued)

Dual Screen and PIP Functionality

Activating and managing Dual Screen and Picture-in-Picture modes.

Defining PIP Screen Position

Adjusting the position of the Picture-in-Picture subscreen.

FAV Key for Favourite Lists

Displaying and managing favourite channel lists.

OPTION Key Functions

Quick Access Menu Options

Accessing settings like Picture Format, Equalizer, and Clock.

TV Set Buttons

Using TV Set Controls

Operating basic TV functions without the remote control.

Introduction to Digital TV

Switching the TV On

Procedure for powering on the TV and initial indicator lights.

First Time Installation Procedure

Guidance on the initial setup process upon first use.

First Time Installation (Continued)

Selecting On-Screen Language

Choosing the language for TV menus and digital audio/subtitle.

Completing Initial TV Installation

Setting country and performing automatic channel scanning.

First Time Installation (Continued)

Settings Assistant for TV Configuration

Guided setup for picture, sound, and Ambilight preferences.

Navigating Through Menus

Using the MENU/BROWSE Key

Accessing the main menu and its primary functions.

Navigating Menu Categories

Selecting top-level menu items like Television or Multimedia.

Selecting Menu Items

Highlighting and entering specific menu options.

Navigating Through Menus (Continued)

Panel Navigation and Content Display

Interacting with left/right panels for menu selection and content.

TV Menu Settings

Adjusting Viewing and Listening Settings

Overview of ways to change TV settings.

Settings Assistant for Easy Configuration

Using the assistant for simplified picture, sound, and Ambilight setup.

TV Menu Settings (Continued)

Using Standard Settings

Resetting viewing and listening to predefined factory settings.

Individual Picture, Sound, and Ambilight Settings

Fine-tuning specific settings for picture, sound, and Ambilight.

Adjusting Picture Menu Settings

Contrast Adjustment

Modifying the intensity of bright parts in the picture.

Brightness Adjustment

Controlling the overall light output, affecting darker areas.

Colour Saturation

Adjusting the vividness of colours to personal preference.

Hue Compensation

Adjusting colour variations for NTSC transmissions.

Sharpness Adjustment

Enhancing the detail and clarity of fine picture elements.

Tint Adjustment

Adjusting warm (red) and cool (blue) colour tones.

Picture Menu Settings (Continued)

Custom Tint Settings

Fine-tuning white point and black level for custom tint.

Pixel Plus Feature

Enhancing picture quality by optimizing pixels.

Digital Natural Motion

Reducing flicker and smoothing motion for clearer pictures.

ClearLCD Functionality

Improving motion sharpness and contrast.

Dynamic Contrast Adjustment

Automatically adjusting contrast in dark and bright areas.

Picture Menu Settings (Continued)

DNR (Digital Noise Reduction)

Filtering image noise for better quality with weak signals.

MPEG Artefact Reduction

Smoothing transitions in digital content for improved clarity.

Colour Enhancement

Automatically controlling colour for more vivid results.

Active Control Feature

Continuous measurement and correction for optimal picture.

Light Sensor Function

Automatic picture and Ambilight adjustment based on room lighting.

Picture Format Selection

Adjusting picture size to match broadcast format.

Adjust Sound Menu Settings

Equalizer Settings

Changing frequency response to match personal sound taste.

Volume Adjustment

Controlling the overall sound output level.

Balance Adjustment

Adjusting right/left speaker output for stereo reproduction.

Digital Audio Language Selection

Choosing preferred audio language for digital broadcasts.

Sound Menu Settings (Continued)

Dual I/II Sound Options

Selecting Dual I or Dual II sound transmission.

Mono/Stereo Sound Selection

Choosing Mono or Stereo sound for TV channels.

Surround Mode Options

Selecting modes for spatial or surround sound reproduction.

Headphone Volume Control

Adjusting sound level for headphones.

AVL (Automatic Volume Leveler)

Automatically adjusting volume differences between channels.

Delta Volume Correction

Correcting permanent volume differences between channels/sources.

Auto Surround Feature

Automatically switching to best surround sound mode.

Enjoying Ambilight

Ambilight On/Off Control

Switching the ambient lights on or off and downlight options.

Brightness Adjustment

Controlling the light output of the Ambilights.

Ambilight Settings (Continued)

Ambilight Mode Selection

Choosing constant or dynamic background lighting modes.

Ambilight Colour Selection

Selecting or adjusting the ambient light colour.

Ambilight Settings (Continued)

Custom Colour Configuration

Customizing Ambilight colour using palette and saturation.

Separation Effect Control

Defining stereo effect spread for Ambilight lamps.

Colour Boost Feature

Amplifying colours for a more dynamic Ambilight effect.

Balance Adjustment

Adjusting colour and light intensity on picture sides.

Ambilight in Standby Mode

Using Ambilight for ambiance when the TV is in standby.

Adjust Feature Menu Settings

PIP Format Selection

Choosing the preferred format for PIP or Dual Screen display.

Subtitle Display Options

Managing Teletext and DVB-T subtitles display.

Digital Subtitle Language

Temporarily selecting preferred subtitle language for digital broadcasts.

Feature Menu Settings (Continued)

Sleeptimer Configuration

Setting a time period for the TV to automatically switch to standby.

Child Lock Functionality

Locking channels and external sources to prevent child viewing.

Feature Menu Settings (Continued)

Set/Change Access Code

Setting or changing the personal 4-digit access code for lock functions.

On Timer Setup

Automatically switching the TV to a specified channel at a set time.

Feature Menu Settings (Continued)

Common Interface Slot Usage

Accessing common interface applications for scrambled DTV signals.

Demo Mode for Feature Preview

Getting an idea of the TV's features through demonstration.

Searching and Storing TV Channels

Installation Menu Navigation

Overview of the Installation menu structure and options.

Selecting Language Preferences

Setting menu, audio, and subtitle languages.

Searching and Storing TV Channels (Continued)

Selecting Your Country

Choosing the country for correct channel numbering and DVB-T support.

Setting the Time Zone

Selecting local time zone for accurate clock display.

Storing TV and Radio Channels

Performing automatic installation and updating channels.

Searching and Storing TV Channels (Continued)

Digital Test Reception

Checking signal quality and strength for digital frequencies.

Analogue Manual Installation

Manually tuning and storing analogue channels one by one.

Rearranging Channel Number List

Reshuffling Channel Order

Changing the order of stored TV channels.

Renaming Channels

Changing or assigning names to channels and external inputs.

Uninstalling and Reinstalling Channels

Removing stored channels or reinstalling previously uninstalled ones.

Setting Your Preferences

Selecting TV Location (Home/Shop)

Choosing location affects preset settings flexibility.

Teletext 2.5 Feature

Enabling enhanced Teletext features for better display.

On Screen Display (OSD) Options

Selecting volume bar and information display modes.

Displaying Programme Titles

Showing programme titles as transmitted.

Selecting Your Connections

Assigning Peripheral Equipment Inputs

Selecting the type of equipment connected to specific inputs.

Digital Audio Input Configuration

Connecting digital audio sources and assigning them.

Decoder Channel Number Setup

Resetting Factory Settings

Upgrading TV Software

USB Device Software Upgrade

Procedure for upgrading TV software using a USB memory device.

Automatic Software Announcement

Receiving notifications about available software upgrades.

Creating Favourite Channel Lists

Selecting Channels from Favourite List

Choosing channels from an existing favourite list.

Selecting Another Favourite List

Switching between different favourite channel lists.

Creating or Modifying Favourite Lists

Adding/removing channels from up to four favourite lists.

Favourite Channel Lists (Continued)

Filtering All Channels List

Selecting only TV or radio channels from the full list.

Electronic Programme Guide (EPG)

Accessing the EPG Screen

Opening the EPG and acquiring programme data.

Viewing TV Programmes by Type (UK)

Selecting and viewing TV programmes based on availability.

EPG Operation (Continued)

Using EPG Features and Reminders

Watching, marking reminders, and navigating EPG data.

Managing Preferred EPG Channels

Marking channels for EPG data acquisition.

Acquiring EPG Data

Updating programme guide information for selected channels.

Multimedia Browser

Viewing Content from Memory Card/USB

Accessing photos, videos, and music from external devices.

Inserting Memory Card or USB Device

Connecting memory cards or USB devices to the TV.

Multimedia Browser (Continued)

Removing Memory Card/USB Device

Safe removal procedures for memory cards and USB devices.

Card Data Protection Guidelines

Important precautions for handling and protecting memory cards.

Multimedia Browser (Continued)

Multimedia Browser Menu Navigation

Selecting USB devices and browsing content types.

Navigating Multimedia Content Files

Browsing, selecting, and playing files or directories.

Multimedia Browser (Continued)

Screen Function Keys

Using keys for file descriptions, transitions, and display modes.

Remote Control Multimedia Keys

Function keys for playback control like play, pause, rewind.

Viewing Content via Media Servers

Accessing personal multimedia files from a PC over a network.

Teletext Operations

Selecting Teletext Pages

Entering page numbers or using the -P+ key for navigation.

Previous Teletext Page

Recalling the previously viewed teletext page.

TOP Teletext Broadcasts

Accessing an overview of available teletext subjects.

Selecting Teletext Subpages

Navigating through different subpages of a teletext page.

Picture/Teletext Display Modes

Switching between full teletext and split screen modes.

Teletext Operations (Continued)

Hypertext Navigation

Jumping to page numbers or searching for specific words.

Enlarging Teletext Pages

Cycling through teletext page sizes using the OPTION key.

Teletext Menu Options

Controlling teletext display, subpage cycling, and language.

Teletext Operations (Continued)

Digital Text Services (UK Only)

Accessing dedicated digital text and interactive services.

Text Info Display

Viewing programme information broadcasted on digital channels.

Making Video and Audio Connections

HDMI Connection Guide

Connecting equipment via HDMI for digital video and audio.

Component Video Connection Guide

Connecting component video sources like DVD players.

Digital Audio Connection Guide

Connecting digital audio sources to the TV.

Scart Connection Guide

Connecting devices using a Scart connector.

S-Video Connection Guide

Connecting equipment via S-Video for improved picture quality.

Video Connection Guide

Connecting standard video sources.

RF/Coaxial Connection Guide

Connecting antenna or cable sources via RF/Coaxial.

Video and Audio Connections - Side Panel

Connecting Cameras, Camcorders, and Games

Connecting AV equipment to the TV's side panel.

Headphone Connection and Volume

Plugging in headphones and adjusting volume.

USB and Memory Card Connection

Connecting USB devices and memory cards for multimedia.

Video and Audio Connections - Rear Panel Overview

Rear Panel Input Overview

Diagram showing all rear panel connectors and typical devices.

Connecting VCRs and DVD Players

Examples of rear panel connections for VCRs and DVD players.

Connecting Receivers and Consoles

Examples of rear panel connections for satellite receivers, HD receivers, game consoles.

Connecting PCs and Amplifiers

Examples of rear panel connections for PCs and Home Cinema amplifiers.

Connecting Decoders

Examples of rear panel connections for decoders.

Connecting VCR or DVD Recorder

Using Eurocable Connections

Connecting VCR/DVD recorder with a eurocable and aerial cables.

Aerial Cable Only Connection

Connecting VCR/DVD recorder using only aerial cables.

Connecting Decoder and VCR

Connecting a decoder and VCR using a eurocable.

Connecting Two VCRs or VCR/DVD Recorder

Eurocable Connections for Two Devices

Connecting two VCRs or a VCR/DVD recorder using eurocables.

Aerial Cable Only for Two Devices

Connecting two VCRs or a VCR/DVD recorder using only aerial cables.

Connecting a Satellite Receiver

Eurocable Connection for Satellite Receiver

Connecting a satellite receiver using a eurocable.

Component Video Connectors for Receivers

Connecting satellite receivers using component video connectors.

Connecting DVD Player, HD Receiver, or Game Console

HDMI Connector Setup

Connecting equipment via HDMI for digital video and audio.

Connecting DVD Player or HD Receiver (DVI)

DVI Connector Setup

Connecting DVD players/HD receivers with DVI via HDMI.

Connecting DVD Player, Satellite Receiver, or HD Receiver (Component Video)

Component Video Connection Details

Detailed steps for connecting component video sources.

Connecting a PC

PC Connection via VGA Connector

Connecting a PC using a VGA cable for video and audio.

PC Connection via DVI Connector

Connecting a PC with DVI via HDMI, including digital/analogue audio.

PC to Home Network Connection

Connecting a Home Cinema Amplifier

Digital Home Cinema Amplifier Connection

Connecting digital amplifiers via DIGITAL AUDIO OUT.

Analogue Home Cinema Amplifier Connection

Connecting analogue amplifiers via AUDIO OUT or EXT connectors.

Using the Common Interface Slot

Inserting a CA Module

Instructions for inserting a Conditional Access module for DTV.

Selecting Connected Equipment

Recording with Your Recorder

Audio and Video Equipment Keys

Normal vs. Expert Mode Selection

Switching between normal and expert modes for remote control.

Troubleshooting Guide

No Picture Issues

Solutions for missing picture, including cable and source checks.

Poor Picture Quality

Addressing issues like poor colour, ghost images, or bad reception.

No Sound Issues

Troubleshooting steps for lack of sound, including volume and mute.

HDMI Connection Interruptions

Resolving sound/picture interruptions with HDMI connections.

DVI to HDMI Sound Issues

Troubleshooting sound problems with DVI to HDMI connections.

No Digital Channels

Advice on checking digital terrestrial signal availability.

Subtitle Display Issues (UK)

Resolving issues with subtitles not reappearing after digital text.

Troubleshooting Guide (Continued)

Remote Control Malfunctions

Addressing issues where the remote control is not functioning.

Connected Equipment Remote Issues

Resolving problems with the remote control of connected equipment.

Multimedia Playback Issues

Troubleshooting no photo/music playback or poor quality.

VGA Picture Synchronization

Resolving unstable or unsynchronized VGA picture display.

General Picture/Sound Problem Solving

Basic steps like power cycling for unresolved issues.

Red Blinking LED Indicator

Interpreting the red blinking LED and its potential causes.

Black Bars on HD Channels

Adjusting picture format to resolve black bars on HD content.

No EPG Data Available

Understanding reasons for missing EPG data.

Annex 1: TV Software Upgrade

Introduction to Software Upgrade

Philips' commitment to product improvement via software updates.

Verifying Current TV Software Version

Checking the current software version before upgrading.

Preparing USB Memory for Upgrade

Steps for downloading and preparing software files on USB.

Annex 1: TV Software Upgrade (Continued)

Performing the TV Software Upgrade

Instructions for executing the software upgrade via USB.

Annex 1: TV Software Upgrade (Continued)

Local Software Upgrade Procedure

Upgrading software from the USB portable memory.

Annex 2: Philips TV-Slideshow Format

Introduction to Slideshow Creation

Guide on creating Philips slideshow files with background audio.

Slideshow General Rules

Rules for ASCII XML syntax and content referencing.

Slideshow General Format

XML syntax structure for creating slideshow files.

Annex 2: Philips TV-Slideshow Format (Continued)

Supported XML Tags for Slideshows

Description of XML tags used in slideshow file creation.

Annex 3: Portable Memory and USB Issues

Digital Content and Portable Memory Issues

Supported memory cards and common issues with digital content.

Digital Camera Connection Issues

Troubleshooting USB connections with digital cameras.

USB Memory Device Compatibility

Requirements for USB devices and potential detection problems.

Annex 4: HDMI Connector Issues

HDMI Display Modes Supported

List of TV and monitor display modes supported by HDMI.

HDMI Sound Interruption Troubleshooting

Resolving sound interruptions using HDMI connections.

Recycling Information

Product Packaging Recycling

Guidance on recycling product packaging according to local authorities.

Old Product Disposal

Instructions for environmentally sound disposal of old electrical products.

Battery Disposal

Information on disposing of batteries according to local regulations.

Product Information

Connected Planet Overview

What is Connected Planet?

Introduction to accessing digital files from a PC.

Requirements for Connected Planet

Necessary components for enjoying Connected Planet features.

Installing Philips Media Manager

Step 1 for setting up Connected Planet software.

Installing Philips Media Manager (PMM)

Selecting Installation Language

Choosing the language for the Media Manager installation.

Selecting PMM Menu Language

Choosing the language for the PMM interface.

Changing PMM Server Name

Customizing the name displayed for the PMM server.

Philips Media Manager (PMM)

Adding Files to Media Manager

Steps for adding music, pictures, or movies to the manager.

Identifying Your PC Configuration

PC Configuration A (Router-based)

Setup for PCs connected via a router network.

PC Configuration B (Single PC)

Setup for PCs directly connected to the TV.

Connecting and Configuring Your TV

Configuring TV for Configuration A

Connecting TV to a router-based network.

Configuring TV for Configuration B

Connecting TV directly to a PC using a crossed cable.

Viewing Multimedia Content

Accessing Browse Menu and PC

Switching on TV, accessing browse menu, and selecting PC.

Navigating Multimedia Files and Folders

Browsing through pictures, music, videos, and folders.

Related product manuals