PHI 5000 04 DIAGNOSTIC MODE
7/8
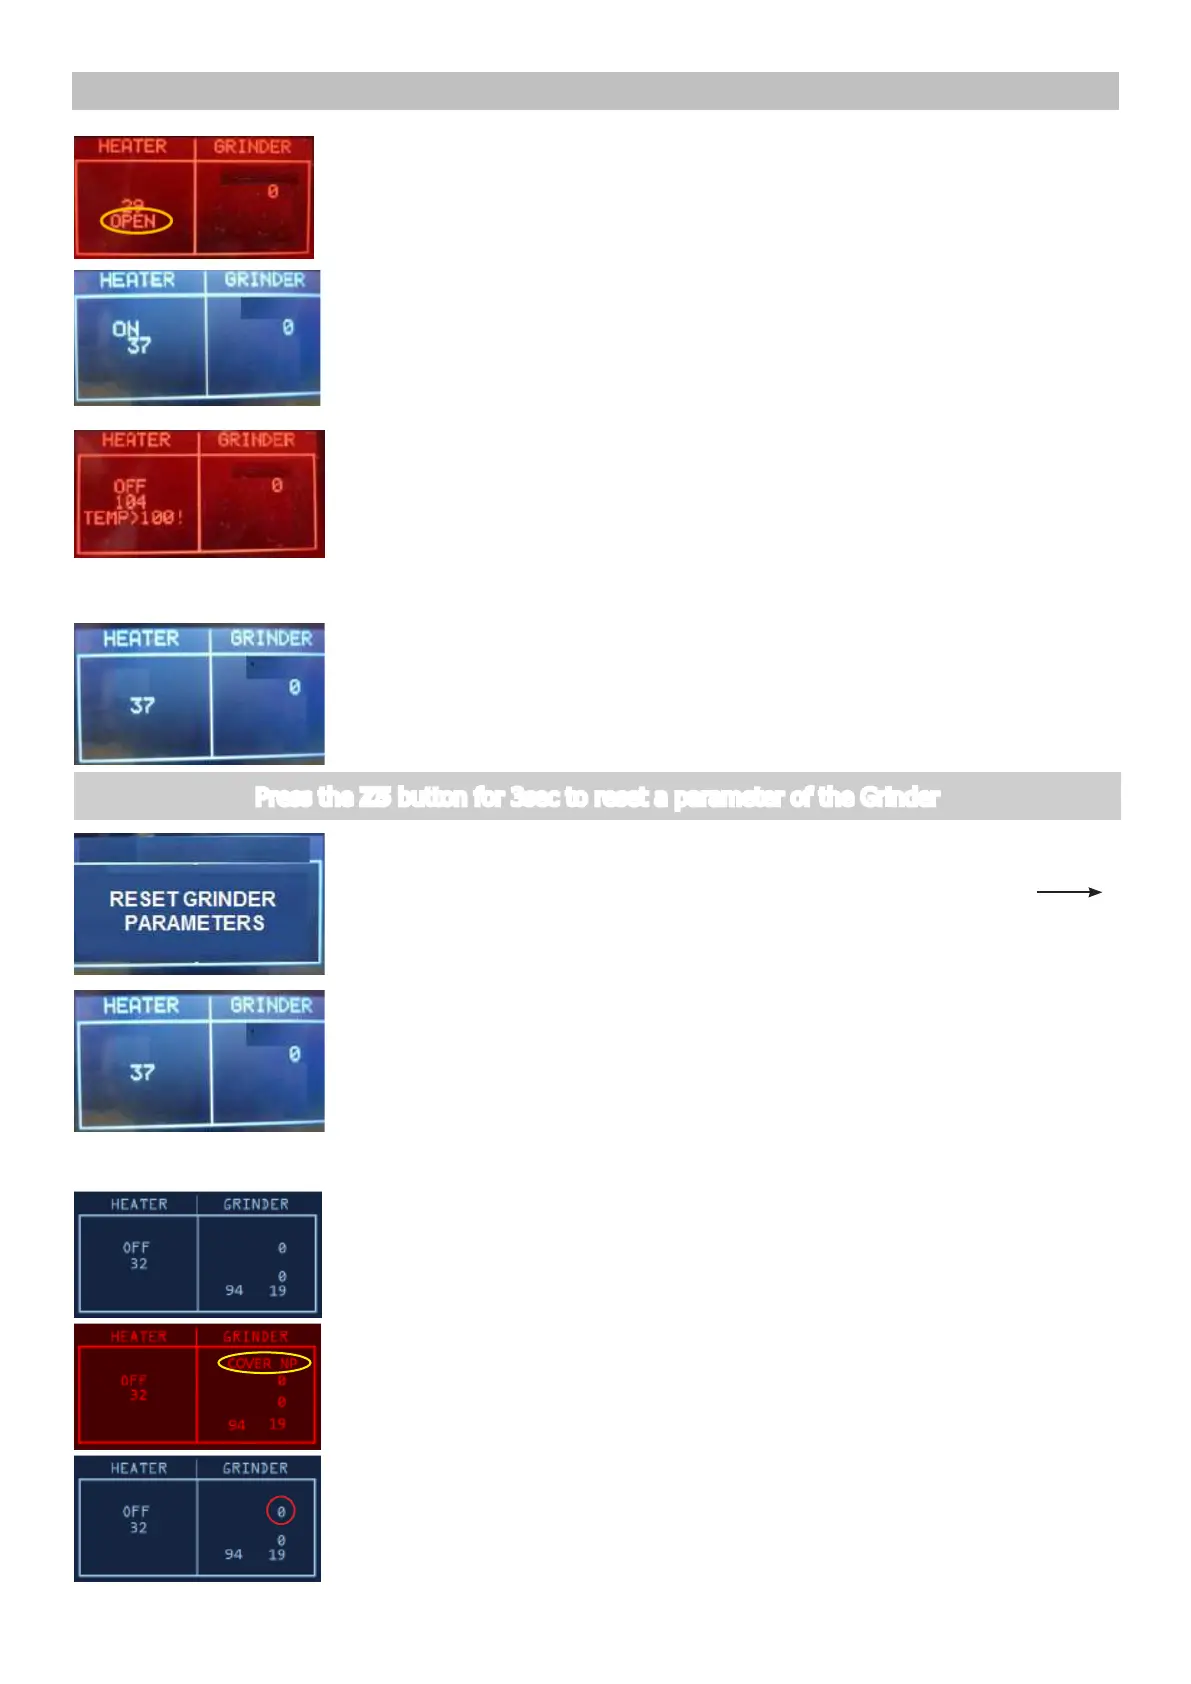
Press the Z1 button to switch on the Heater
The absorbed current ( Amperometer on the main supply) is OK, the
indication HEATER changes from “OFF” to “ON” and the temperature
starts increasing.
If temperature is over 100°C, the backlight change from WHITE to
RED. This is a ALERT message to avoid heating the HEATER element over
dangerous temperature.
ERROR: the absorbed current is KO or the temperature does not
increase; check the wiring from the heater to the CPU/POWER
board (JP19) and the wiring of the NTC temperature-sensor (JP13).
ERROR: In the indication HEATER appears “OPEN”, the NTC
temperature-sensor is detached or broken, the display backlight
changes from white to red; check the wiring from the NTC
temperature-sensor to the CPU/POWER board (JP13).
4.2. Grinder Tuning
Press the Z5 button for 3sec to reset a parameter of the Grinder
Start condition
The aging parameter of the grinder is setted to his initial value a
screen with the text “RESET GRINDER PARAMETERS” is showed for 3sec.
ERROR: The display doesn’t change
Start condition
The grinder rotates and in the indication GRINDER the number increas-
ing up to 40. The other numbers inside the GRINDER box are not impor-
tant for this test.
Press the Z4 button to switch on the grinder
IMPORTANT NOTE: If the COFFEE BEANS Cover is not inserted the Grind-
er test cannot be performed. If this input is not in the right position, a
warning message will be shown and the display turns to RED.
120V