16 EN
4 Remove all packaging materials of the new lter.
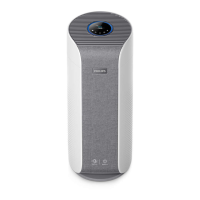
5 Put the new lter into the appliance.
6 Install the top cover of the lter (
1
), and then install the top cover of the water tank (
2
).
6 Storage
1 Turn o the appliance and unplug it from the power socket.
2 Clean the appliance, humidication lter and the surface of the purication lter (see chapter
“Cleaning and maintenance”).
3 Let all parts air dry thoroughly before storing.
4 Wrap the lters in air tight plastic bags.
5 Store the appliance, lters in a cool, dry location.
6 Always thoroughly wash your hands after handling the lters.
7 Troubleshooting
This chapter summarizes the most common problems you could encounter with the appliance. If you
are unable to solve the problem with that information below, contact the Consumer Care Center in
your country.
Problem Possible solution
The appliance does
not work properly.
•
Check if the back cover is properly installed. If not, for safety reason, the
appliance will stop working.
•
The lter replacement alert has been on continuously but you have
not replaced the corresponding lter. As a result, the appliance is now
locked. In this case, replace the lter and tap and hold the button for 3
seconds to reset the lter lifetime counter.
There is no air
humidication.
•
Make sure that the water tank is lled with water and the water tank is
placed on the appliance correctly.
•
The advanced cold evaporation system in 2-in-1 air
humidication&purier produces healthy moist air from the outlet
without any visible water mist. Water vapor is invisible to the human eye.
•
When used in a dry environment, the moisture released by the 2-in-1
humidication&purier will be absorbed surrounding objects such
as walls and furniture, which can prolong the humidication time. To
achieve optimal humidication, it is recommended to close doors and
windows.
 Loading...