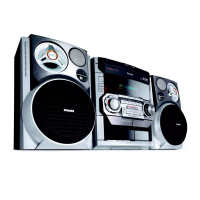
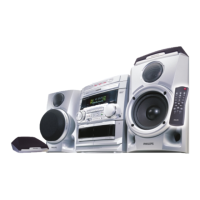
Do you have a question about the Philips FW-C390 and is the answer not in the manual?
Lists features and boards used across different product versions.
Covers mains voltage, frequency, power consumption, and dimensions.
Details output power, frequency response, and sound features.
Specifies FM, MW, and LW tuning ranges, sensitivity, and selectivity.
Lists tape speed, wow/flutter, bias, and frequency response.
Covers frequency response, output level, signal/noise, and distortion.
Details tuning range, grid, IF frequency, and sensitivity for LW band.
Describes the setup for FM tuner measurements.
Outlines the measurement setup for AM tuners.
Specifies the setup for Compact Disc measurements.
Details the measurement setup for the tape recorder section.
Provides guidelines for safely handling electronic components.
Advises on protecting against ESD damage during repairs.
Safety notice regarding laser radiation when the unit is open.
Instructions for connecting FM antenna and rear panel connections.
Guidance on connecting external audio equipment.
Steps for inserting batteries into the remote control.
Details power connection and important operational warnings.
Describes the function of various buttons on the system and remote.
Explains how to operate controls remotely.
Covers UK mains plug, Italia, Norge safety notes, and general cautions.
Instructions for cleaning components and demagnetising heads.
Provides solutions for common problems like no disc, poor reception, and tape issues.
Steps to remove the cassette cover.
Procedures for disassembling the CDC module and front panel.
Steps to remove the front board assembly.
Instructions for disassembling the rear section of the unit.
Steps to remove the ETF tape module.
Advice on safely disconnecting modules and handling fragile flex cables.
Instructions for activating and deactivating the demonstration mode.
Details how to enter service play mode and lists common error codes.
Illustrates the primary signal flow through the system's components.
Shows the wiring connections between different modules of the system.
Maps pin connections for the FTD display.
Provides the circuit diagram for the Key-CDC interface.
Shows the component layout for the Key-CDC interface.
Illustrates the electronic circuit of the front panel.
Shows the physical placement of components on the front panel.
Illustrates the layout of ICs on the front panel PCB.
Shows the circuit diagram for the headphone section.
Details the component layout for the karaoke function.
Provides the circuit diagram for the karaoke section.
Lists miscellaneous and capacitor parts for the front board.
Lists resistor values and specifications for the front board.
Lists remaining electronic components for the front board.
Overall block diagram of the ECO6 Tuner Board.
Details components and detection methods for different tuner versions.
Specifies tuning adjustments for varicap alignment across different bands.
Details miscellaneous, resistors, capacitors, diodes, transistors, and ICs.
Block diagram for the ECO6 Tuner Board (Cenelec version).
Information on components and detection for Cenelec tuner versions.
Tuning adjustments for varicap alignment on Cenelec tuner versions.
Lists miscellaneous, resistors, capacitors, diodes, transistors, and ICs for Cenelec tuner.
Details wiring and variations for the tape module.
Block diagram of the ETF7 Tape Module.
Lists connector pin assignments for the tape module.
Covers tape deck electronics and necessary adjustments.
Shows component and chip layouts for the non-Dolby board.
Circuit diagram for the analog audio path.
Circuit diagram for the tape mechanism servo control.
Lists electrical components for the ETF7 module.
Details the control logic for tape deck motors and solenoids.
Explains the different operational modes of the tape mechanism.
Describes the roles of key ICs and signal processing within the tape mechanism.
Covers Dolby noise reduction circuitry and level adjustment procedures.
Pin assignments for connectors between AF Board and other modules.
Pin assignments for connectors to the Front Board.
Pin assignments for tape deck head connections.
Pin assignments for Deck A head connections.
Procedures for adjusting motor speed and checking wow/flutter.
Covers azimuth, frequency response, and bias current adjustments.
Shows component placement on the ETF7 Non-Dolby board.
Illustrates the analog audio signal path of the tape module.
Circuit diagram for controlling tape mechanism motors and solenoids.
Exploded view of the tape mechanism motor assembly.
Lists and illustrates mechanical parts for the play mechanism.
Lists and illustrates mechanical parts for the record/playback mechanism.
Lists and illustrates mechanical parts for the autoreverse record/playback mechanism.
Lists miscellaneous, capacitors, and resistor components for the ETF7 Non-Dolby board.
Lists remaining electrical components for the ETF7 Non-Dolby board.
Provides important service information and cautions for the CD changer.
Overall block diagram of the 3CDC-LLC-MCD1 CD changer.
Critical warnings regarding capacitor discharge and ESD protection during replacement.
Procedure for manually opening the CD changer tray in case of failure.
Steps for safely removing the CD changer tray.
Instructions for correctly reassembling the CD changer tray.
Image showing the CD changer in a service-accessible state.
Diagram showing signal flow between CD mechanism and mainboard.
Shows the copper traces on the CD changer's copperside.
Shows component placement on the CD changer's componentside.
Details the circuitry for digital audio output.
Explains the control logic for carousel and drawer motors.
Diagram for optional CD-Text interface functionality.
Copper traces on the CD changer's copperside.
Component placement on the CD changer's componentside.
Details circuits for laser power, servo control, and HF amplification.
Explains the signal processor functions and changer control logic.
Exploded view and parts list for the CD changer loader.
Exploded view and parts list for the CD changer drawer.
Shows the bottom view of the CD changer drawer with parts.
Shows the top view of the CD changer drawer with parts.
Lists miscellaneous, capacitors, and resistor components for the CD changer module.
Lists resistor values for the CD changer module.
Lists coils, diodes, transistors, and ICs for the CD changer module.
Explains the amplifier IC and Super Class G operation.
Details the principle and benefits of Super Class G amplification.
Describes the standby power feature and its operation.
Explains the generation of DC voltages for the amplifier.
Shows the block diagram of the mains power supply board.
Illustrates the block diagram of the P2001 power amplifier board.
Shows the copperside layout of the voltage selector and transformer section.
Details the low power supply regulators and their connections.
Shows the component placement on the copperside of the power board.
Circuit diagram for the P2001 power board.
Lists the main features and functions of the AF9 board.
Details feature variations across different product versions.
Continuation of AF9 board features like Mic Mixing, DPL, Line Out.
Continuation of feature variations across product versions.
Illustrates the placement of chip components on the AF9 board.
Shows the physical layout of components on the AF9 board.
Details the circuit for selecting audio sources.
Circuit diagram for headphone amplification and I²C expansion.
Circuit diagram for digital audio output and interconnections.
Shows component and chip layout for the video out section.
Circuit diagram for the video output functionality.
Lists electrical parts for the AF9 board.
Lists remaining electrical components for the AF9 board.
Exploded view of the main unit showing mechanical parts.
Lists accessories and screw types for the main unit.
Detailed list of mechanical parts for the main unit.
Lists accessories and screw types used in the main unit assembly.
| Tuner Bands | FM, MW |
|---|---|
| Number of Discs | 1 |
| Bluetooth | No |
| Disc Playback | CD-R/RW |
| Connectivity | AUX |
| Speaker Type | 2-Way |
| Power Output | 2 x 20W RMS |