EN 24
3139 785 325404.
Dismantling Instructions & Service Positions
4.2 Dismantling of the Speaker Box Assembly
1) It is necessary to remove the Rear Cover and all the
main unit components (PC Boards together with the
Brackets) to dismantle the Speaker Box Assembly without
interference. Remove the Rear Cover fi rst. Then remove
the HDMI assembly. After that, remove the Rear Frame
assembly together with the Motor Board and the Front
Board. Finally, remove the DVD assembly. (Follow the
procedures in article 4.1)
2) Remove 2 screws and detach the Door Panel Frame
(Refer to “2.2.3 Service hints for dismantling of the main
unit” in Chapter 2).
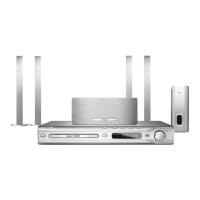
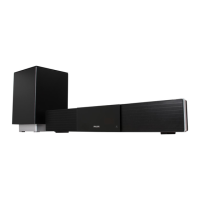
3) Remove 12 screws (6 screws on the front as shown
in fi gure 17 and 6 screws on the Rear Cabinet as
shown in fi gure 18) and detach the frame door and disc
compartment assembly (122 +124 + 123 + 101 + 143 +
101 +112 in Main Unit Exploded View) from the Speaker
Box Assembly.
Figure 4-17
Figure 4-18
Q
R
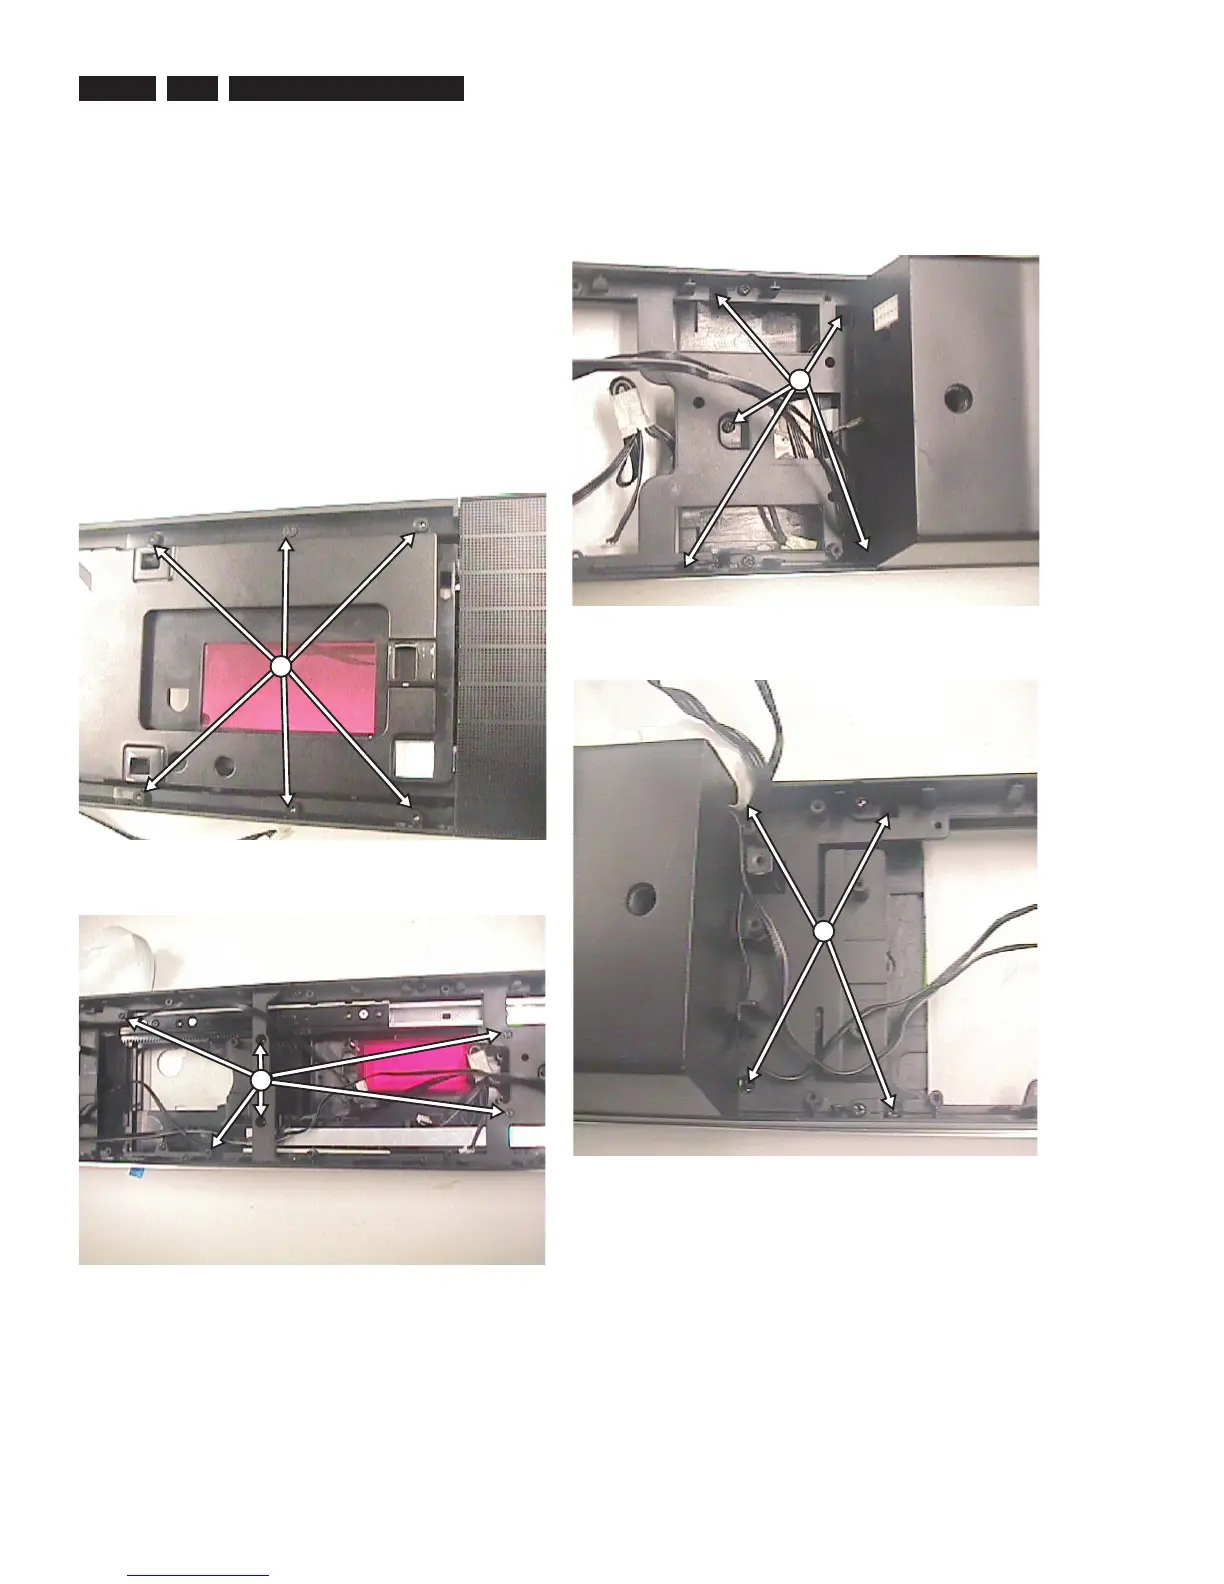
4) Remove 9 more screws from the Rear Cabinet (5 screws
on the right and 4 screws on the left as shown in fi gure
19-a and 19-b) to detach 2 Speaker Grilles together with
their Holders and the Grommets.
Figure 4-19-a
Figure 4-19-b
S
T
 Loading...