EN 26
3139 785 325404.
Dismantling Instructions & Service Positions
4.2.1. Dismantling of the right Speaker Module and
the interface board
In order to dismantle the Right Speaker Module (Right
Speaker Rear Cabinet + Right Speaker Front Panel + Right
Speaker Units), it is necessary to unscrew the screws hidden
inside the Speaker Cabinet. It is also necessary to detach the
Right Metal Partition so that the Right Speaker Module would
be readily detached without interference.
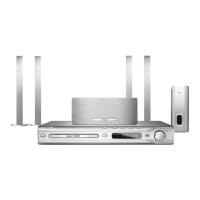
1) Remove 4 screws. Take out the centre speaker and
remove 2 more screws inside the speaker cabinet as
shown in fi gure 23-a.
Figure 4-23-a
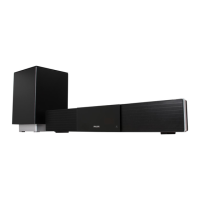
2) Remove 4 screws. Take out the surround speaker and
remove 2 more screws inside the speaker cabinet as
shown in fi gure 23-b.
Figure 4-23-b
W-1
W-2
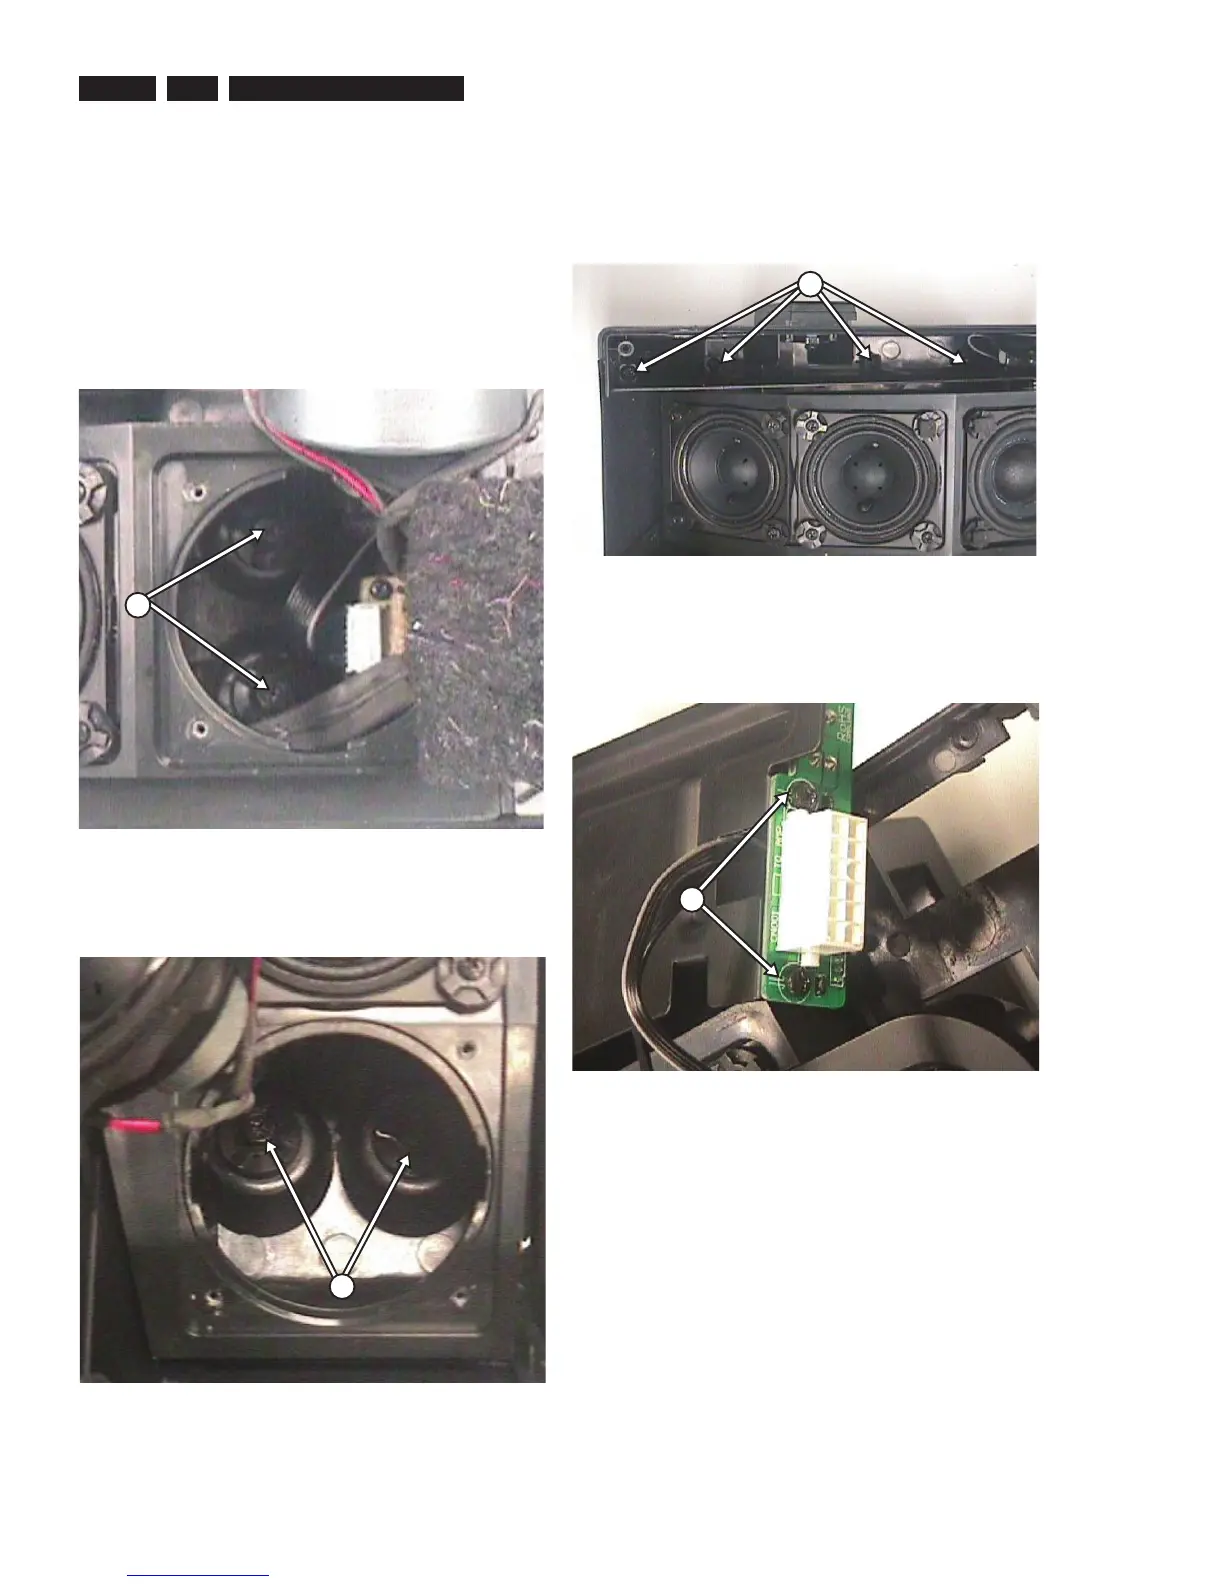
3) After taking out the speakers and removing the screws,
the Right Metal Partition should be detached by removing
4 screws as shown in fi gure 24.
Figure 4-24
4) Dismantle the Right Speaker Module from the Rear
Cabinet. To detach the interface board from the Right
Metal Partition, unscrew 2 screws as shown in fi gure 25.
Figure 4-25
X-1
X-2
 Loading...