EN 28
3139 785 325404.
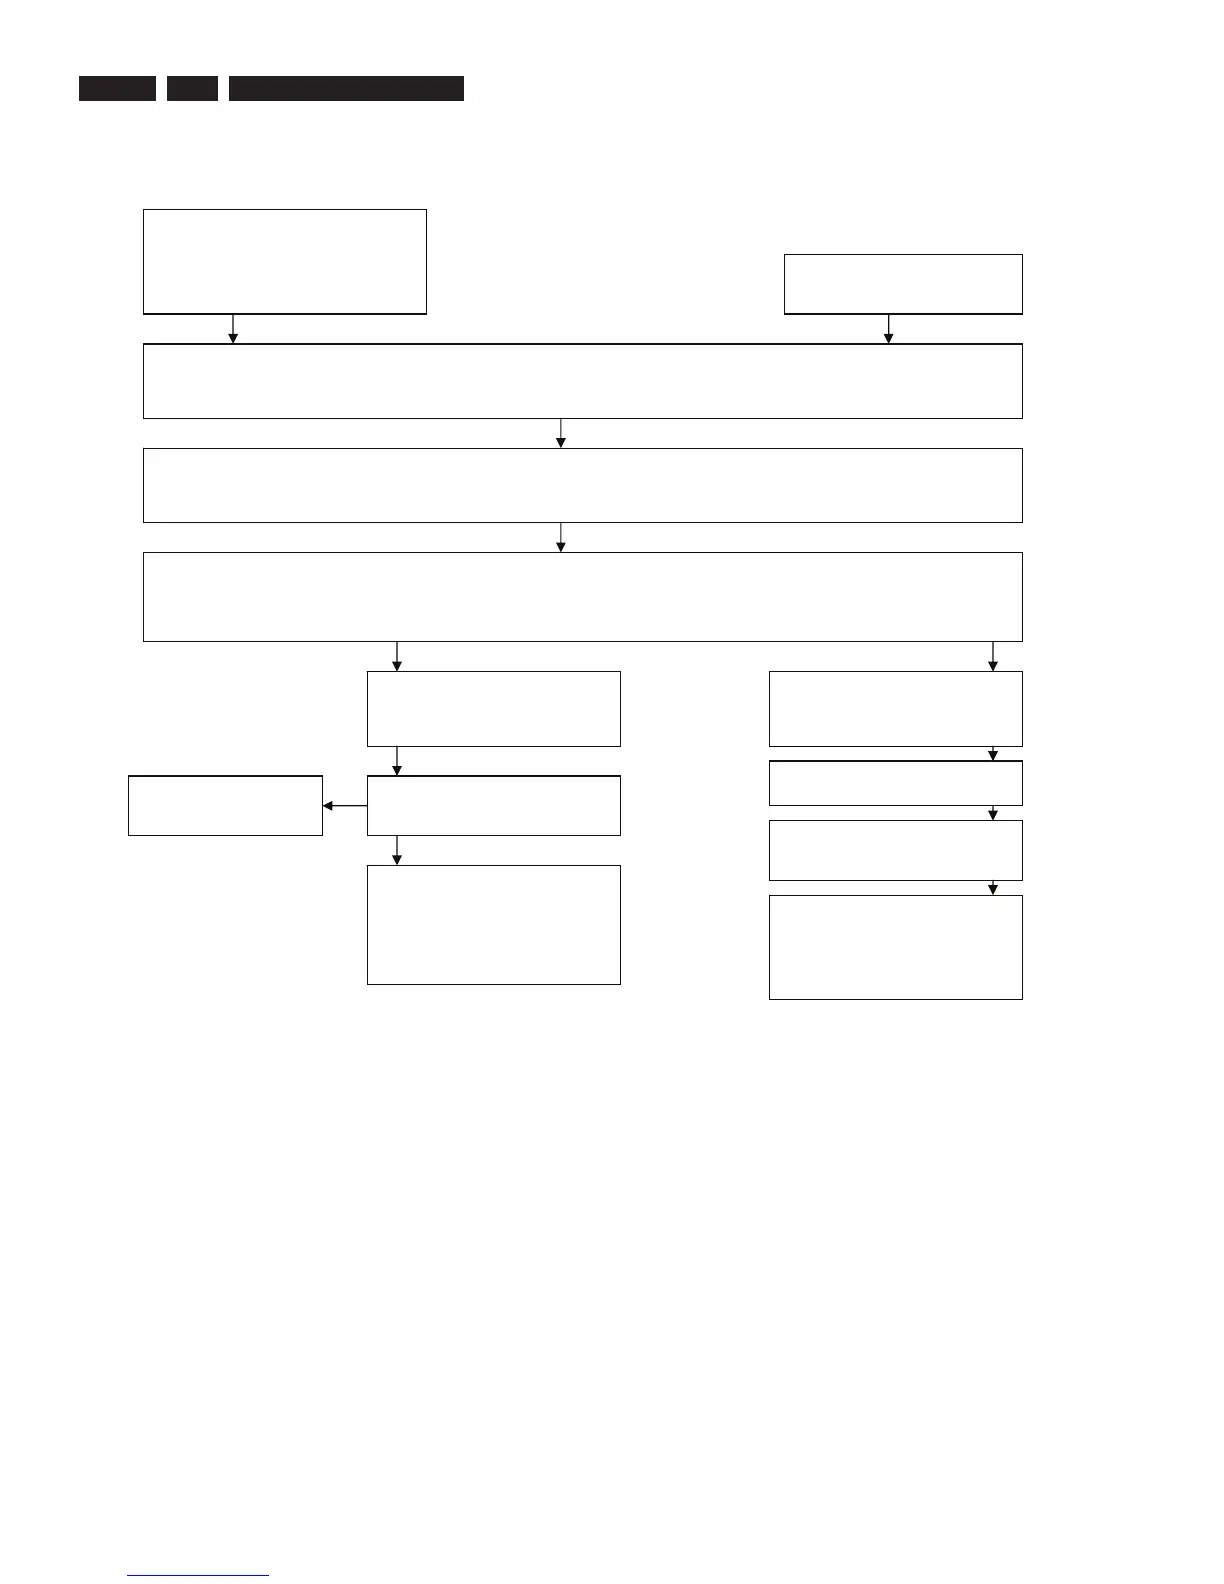
Dismantling Instructions & Service Positions
Summary of Dismantling Instructions (4.2, 4.2.1, 4.2.2)
Rear Cover
PC Boards on the Rear Frame
Rear Frame
PC Boards on the lower level, DVD
Mechanism
Ref: 4.1
Door Panel and Door Panel Holder
120+121
Ref: 2.2.3
Frame Door and Disc Compartment Assembly
122+124+123+101+143+101+112
Remove 12 screws (6 screws on the front, and 6 screws on the Rear Cabinet)
Ref: 4.2
Left/Right Speaker Grills, Grill Holders and Grommets
Remove 9 screws (Left 4 screws, Right 5 screws)
Ref: 4.2
Cabinet Front Assembly
Remove 4 screws at the Front (Left 2 screws, Right 2 screws)
Remove 10 screws on the Rear Cabinet
Insert Screwdriver, Force Open
Ref: 4.2
Surround and Center Speakers
Remove 8 screws
Take out Speakers
Ref: 4.2.1
Surround and Center Speakers
Remove 8 screws
Take out Speakers
Ref: 4.2.2
IPOD cover, IPOD and USB boards
Ref: 4.1.4
Interface Board
Remove 2 screws
Ref: 4.2.1
Right Metal Partition
Remove 4 screws
Ref: 4.2.1
Left Metal Partition
Remove 5 screws
Ref: 4.2.2
Right Speaker Module
Remove 4 screws (inside
the speaker cabinet, seen
when speakers are taken
out)
Ref: 4.2.1
Left Speaker Module
Remove 4 screws (inside
the speaker cabinet seen
when speakers are taken
out)
Ref: 4.2.2
 Loading...