EN 29
3139 785 32540
Dismantling Instructions & Service Positions
4.
4.3 Dismantling of the Subwoofer Power Box
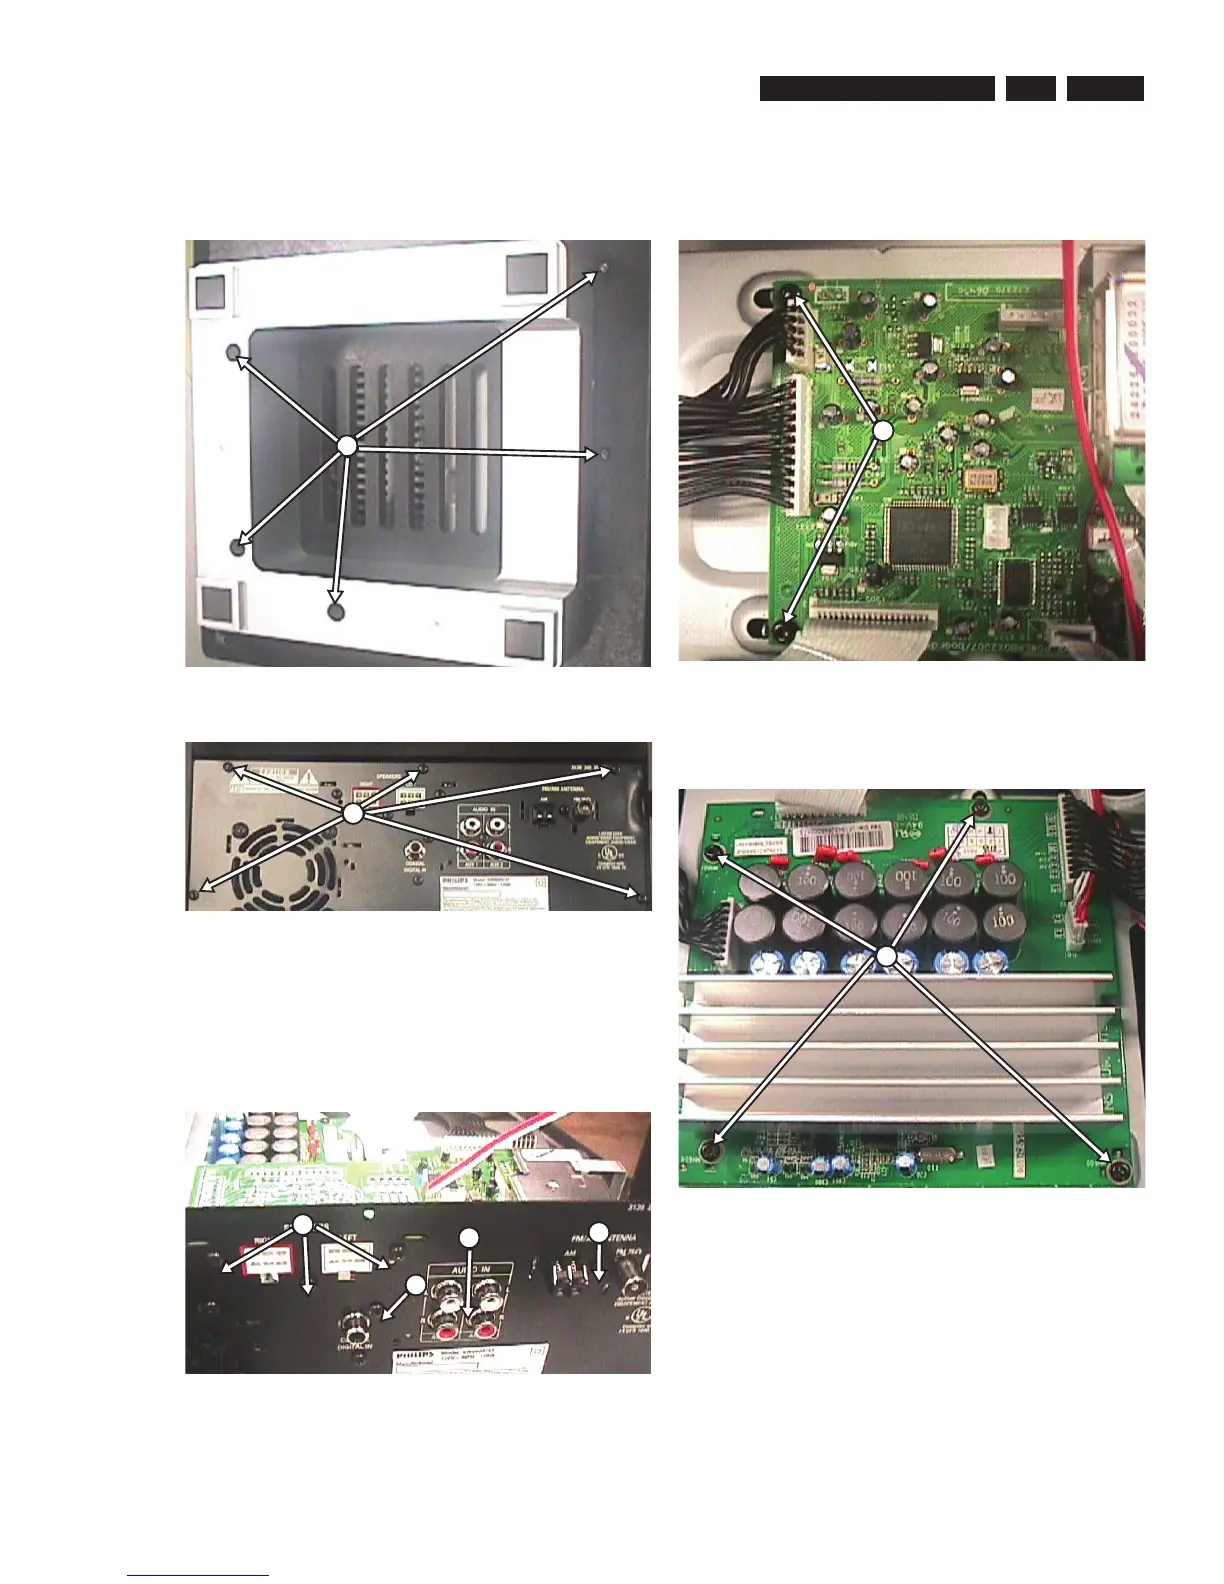
1) Loosen 5 screws at the base of the Subwoofer (as shown
in fi gure 14) and remove 5 screws at the back (as shown
in fi gure 15). Then pull out the Power Box Assembly.
Subwoofer Figure 4-14
Subwoofer Figure 4-15
2) Remove1 screw for Tuner 1020, 3 screws for Speaker
Board 1060, and 1 screw for AIO board 1050 to detach
them from the Rear Plate 230. Remove 1 screw attached
to the Rear Plate 230 and 2 screws attached to the
bracket 236 for dismantling of the Audio Board 1040.
Mounting Screws are shown in fi gure 16 and fi gure17.
Subwoofer Figure 4-16
M
N
O
O
O
O
Subwoofer Figure 4-17
3) Remove 4 screws for dismantling of the Amplifi er Module
1010 as shown in fi gure 18.
Subwoofer Figure 4-18
O
P
 Loading...