Service Modes, Error Codes, and Fault Finding
EN 8 L01.2E AB5.
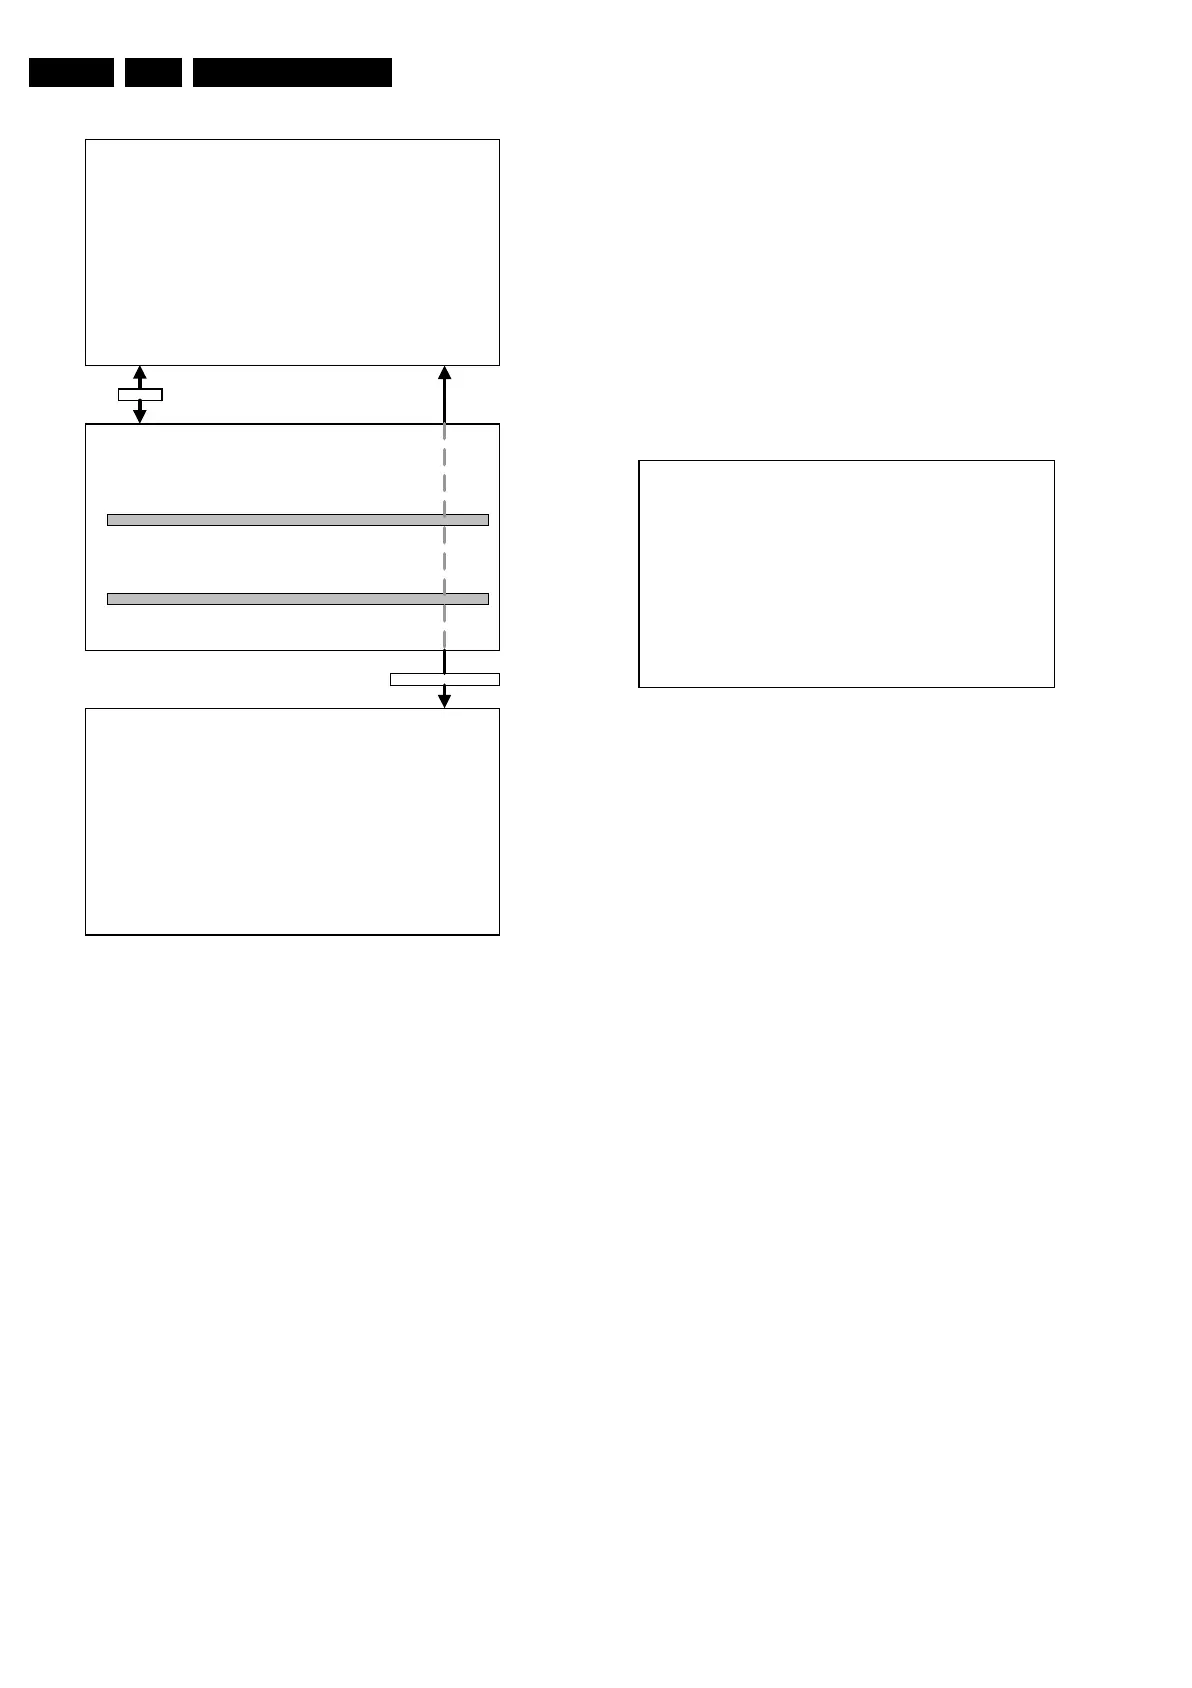
Figure 5-3
How to navigate
Use one of the following methods:
• When you press the MENU button on the remote control,
the set will switch between the SDM and the normal user
menu (with the SDM mode still active in the background).
Return to the SDM screen with the OSD/STATUS button.
• When you press the OSD/STATUS button on the remote
control, the menu will show or hide the error buffer. This
feature is available to prevent interference during
waveform measurements.
• On the TV, press and hold the 'VOLUME down' and press
the 'CHANNEL down' for a few seconds, to switch from
SDM to SAM and reverse.
How to exit
Switch the set to STANDBY by pressing the power button on
the remote control transmitter (if you switch the set 'off' by
removing the Mains voltage, the set will return in SDM when
Mains voltage is re-applied). The error buffer is cleared.
5.2.2 Service Alignment Mode (SAM)
Purpose
• To perform alignments.
• To change option settings.
• To display/clear the error code buffer.
Specifications
• Operation hours counter.
• Software version.
• Option settings.
• Error buffer reading and erasing.
• Software alignments.
How to enter
Use one of the following methods:
• Use a standard customer RC-transmitter and key in the
code ‘062596’ directly followed by the OSD/STATUS
button [i+] or
•Via ComPair.
The following screen is visible, with SAM at the upper right side
for recognition.
Figure 5-4
1. LLLL This is the operation hours counter. It counts the
normal operation hours, not the standby hours.
2. AAABCD-X.Y This is the software identification of the main
micro controller
• A = the project name (L01).
• B = the region: E = Europe, A = Asia Pacific, U =
NAFTA, L = LATAM.
• C = the software diversity: D= DVD, F= full TXT, M=
mono, T= 1 page TXT.
• D = the language cluster number.
• X = the main software version number.
• Y = the sub software version number.
3. SAM Indication of the actual mode.
4. Error buffer Five errors possible.
5. Option bytes Seven codes possible.
6. Clear Erase the contents of the error buffer. Select the
CLEAR menu item and press the CURSOR RIGHT key.
The content of the error buffer is cleared.
7. Options To set the Option Bytes. See chapter 8.3.1 for a
detailed description.
8. AKB Disable (0) or enable (1) the ‘black current loop’ (AKB
= Auto Kine Bias).
9. Tuner To align the Tuner. See chapter 8.3.2 for a detailed
description.
10. White Tone To align the White Tone. See chapter 8.3.3 for
a detailed description.
11. Geometry To align the Geometry. See chapter 8.3.4 for a
detailed description.
12. Audio To align the Audio. See chapter 8.3.5 for a detailed
description.
How to navigate
Use one of the following methods:
• In SAM, select menu items with the CURSOR UP/DOWN
key on the remote control transmitter. The selected item
will be highlighted. When not all menu items fit on the
screen, move the CURSOR UP/DOWN key to display the
next/previous menu items.
• With the CURSOR LEFT/RIGHT keys, it is possible to:
– (De)activate the selected menu item.
– Change the value of the selected menu item.
AAABCDEE X . Y SDM
ERRXXXXXXXXXX
MENU
SDM
Ma i n ^
• Picture > Brightness
• Sound Co l our
• Feat ur es Cont ras t
• I ns ta l l Sharpness
Co l ou r Temp
Store
v
OSD
ST
TUS
SDM
CL 16532020_060.pdf
220501
LLLL AAABCD X . Y SAM
ERR XX XX XX XX XX
XXX XXX XXX XXX XXX XXX XXX
CLEAR CLEAR ?
OPT I ONS >
AKB 0 / 1
TUNER >
WH I T E T ON E >
GEOMETRY >
AUD I O >
CL 16532020_061.eps
150401