R
EMOTE
C
ONTROL
B
UTTON
D
ESCRIPTIONS
9
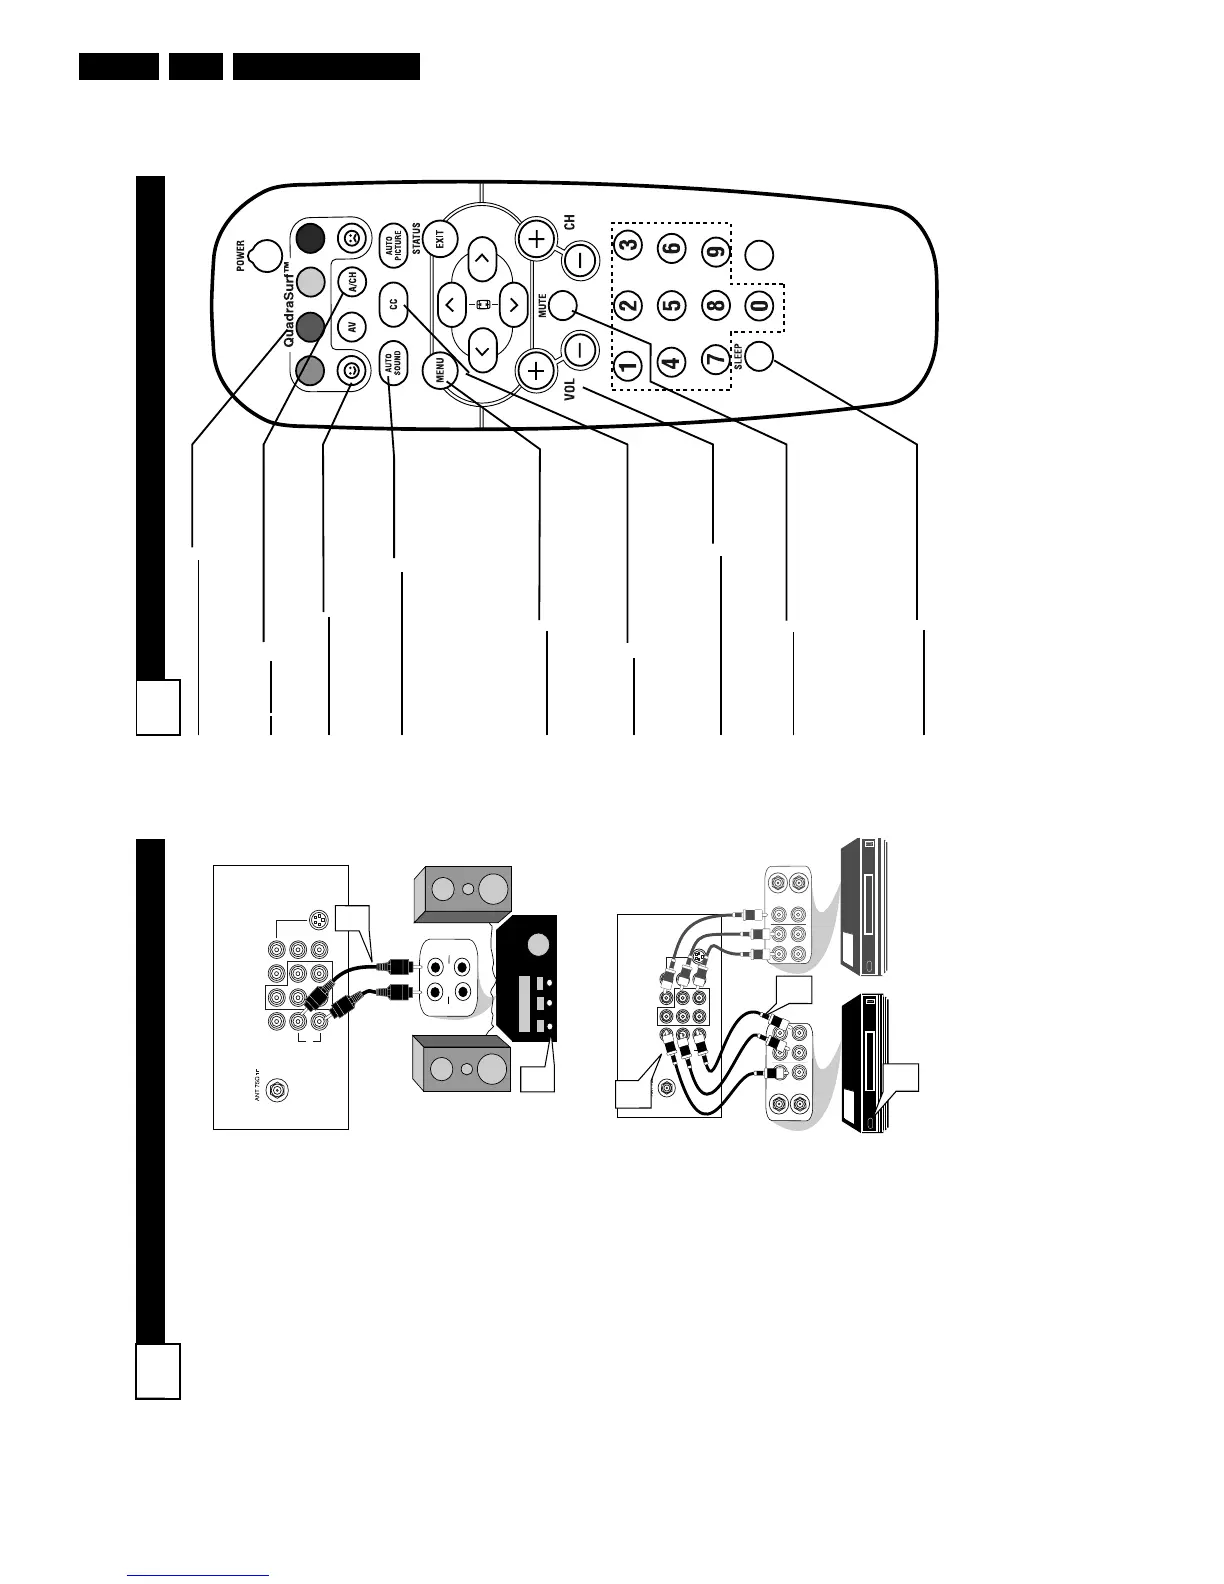
QUADRASURF Buttons
(Red, Green, Yellow, Blue) Allows you to
store and surf up to 10 channels you
choose for each colored button.
A
V Button
Press to select an accessory signal input
from the front AV Inputs.
SMILEY
Button
Press to add channels to the
“QuadraSurf” lists. Works with all col-
ored buttons.
AUT
O SOUND Button
Press repeatedly to choose from different
factory pre-defined sound settings.
Choose from Personal (how you set the
Sound Menu options), Voice (for pro-
gramming with speaking only), Music
(for musical type programs such as con-
certs), or Theatre (used when watching
movies).
MENU
Button
Press to display the on-screen menu. Also
can be used to back out of the on-screen
menu until it disappears from the TV’s
screen.
CC Button
Press to activate the Closed Captioning
options. Repeatedly pressing the CC but-
ton will scroll the available options on the
TV screen.
V
OL(ume) + or - Buttons
Press the VOL + button to increase the
TV’s sound level. Press the VOL – button
to decrease the TV’s sound level.
MUTE Button
Press the mute button to eliminate the
sound being heard from the TV. “MUTE”
will be displayed on the TV’s screen.
Press again to restore the TV’s volume to
it’s previous level. pressing this button for
3-4 seconds will activate the Demo Mode.
(See panel 30 for more details.)
SLEEP
Button
Press the Sleep button to set the TV to
automatically turn itself off after a set
period of time. Press repeatedly to select
15, 30, 45, 60, 90, 120, 180, or 240 min-
utes.
VOL
M
ONITOR
O
UT
(
PUT
) C
ONNECTIONS
8
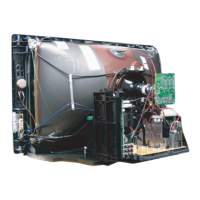
T
he Audio/Video (Monitor) Output
jacks are great for recording with
a VCR or used to connect an exter-
nal audio system for better sound
reproduction.
AUDIO SYSTEM
CONNECTION:
1
Connect one end of the
R(ight) and L(eft) AUDIO
(Monitor Out) jacks on the TV
to the R and L audio input jacks
on your amplifier or sound sys-
tem. Set the audio system’s vol-
ume to a normal listening level.
2
Turn the TV and audio sys-
tem ON. To adjust the volume
on the audio system, you will
need to change the volume at
the external audio system, not
the television.
SECOND VCR CONNECTION:
NOTE: Refer to panel number 4 for
the proper hookup of the first VCR.
Follow the instructions on how to
tune to the AV1 channel to view a
pre-recorded tape.
The following steps allow you to
connect a second VCR to record
the program while your watching
it.
3
Connect one end of the yellow
Video Cable to the Monitor
Out VIDEO plug. Connect the
other end to the VIDEO IN plug
on the second VCR.
4
Connect one end of the red
and white Audio cable from
the Monitor Out AUDIO L and
R plugs on the TV to the
AUDIO IN plugs on the VCR.
5
Turn the Second VCR ON,
insert a VHS tape and it’s
ready to record what’s being
viewed on the TV screen.