Directions for Use
EN 13L04L AA 3.
P
ICTURE
M
ENU
C
ONTROLS
15
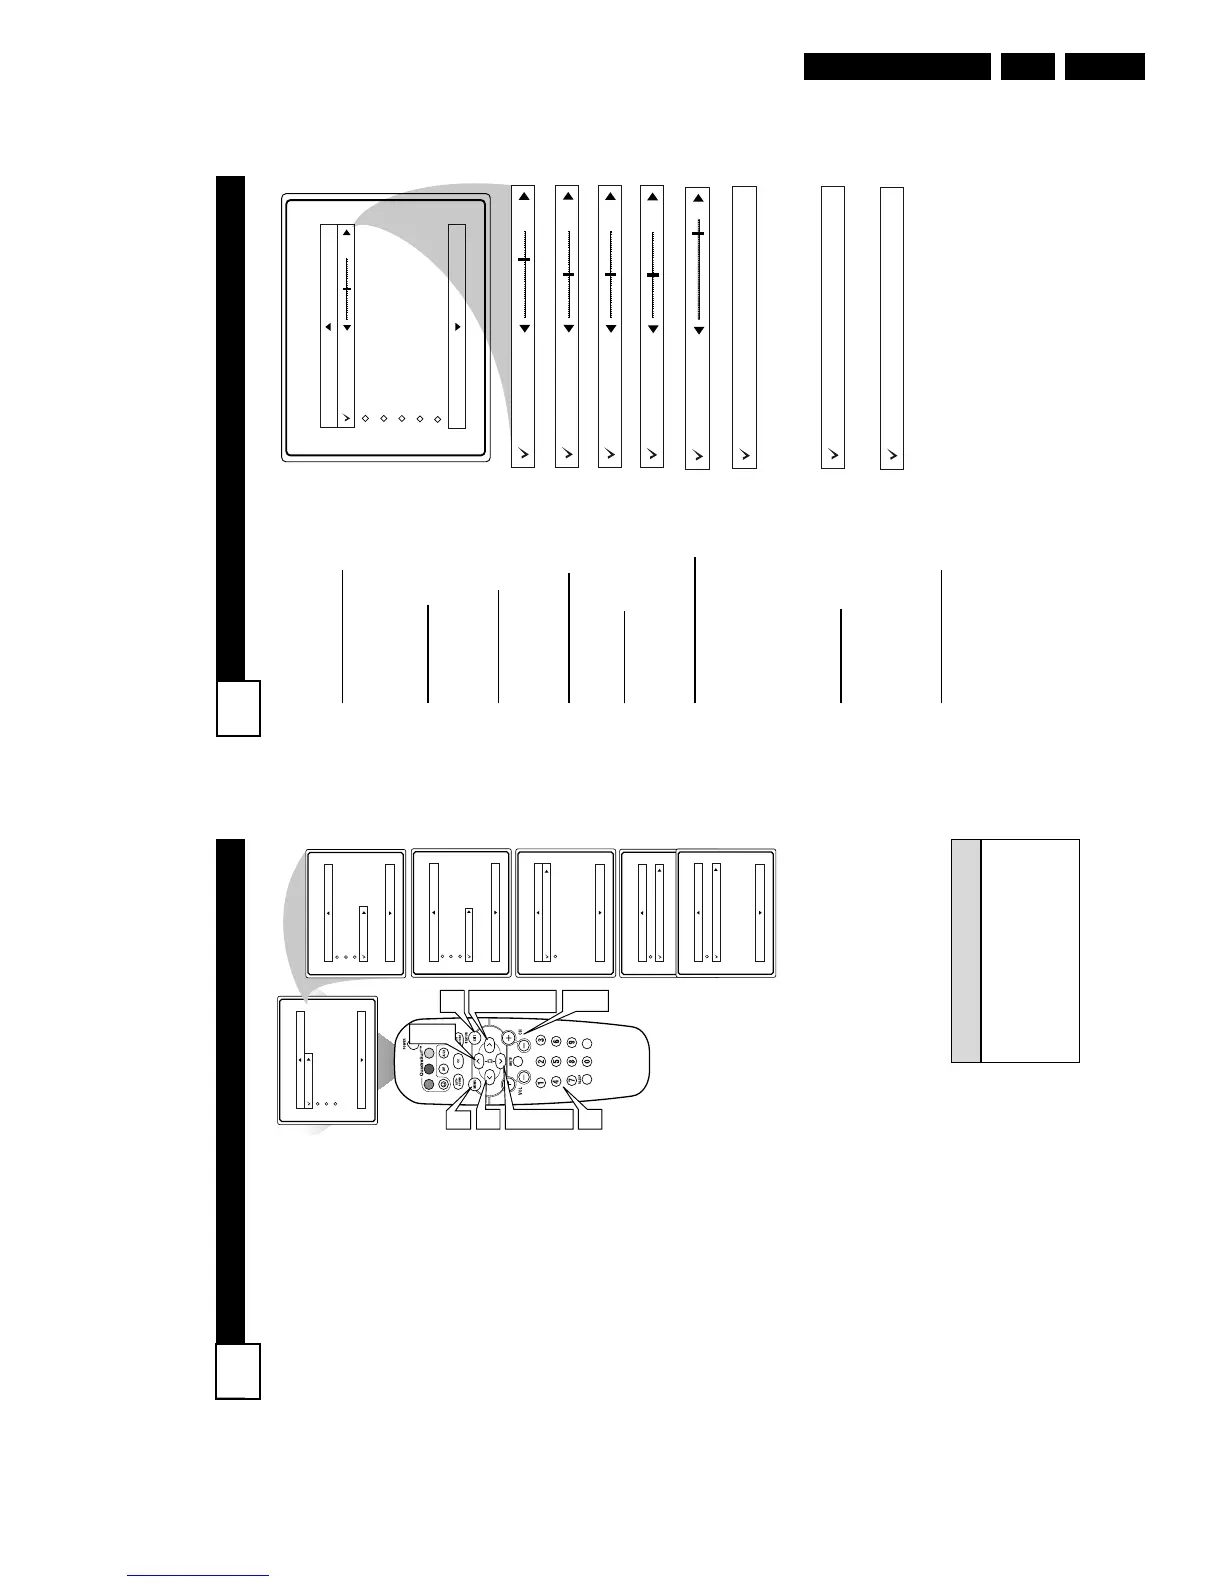
Picture
Brightness
Color
Picture
Sharpness
Tint
Color Temp.
50
Brightness
65
Color
50
Picture
50
Sharpness
50
Color Temp.
Normal
Warm
or
Cool
DNR
On
Off
Tint
0
Contrast +
On
Off
T
o adjust your TV picture controls,
select a channel and use the
Picture Menu Controls listed below:
1
Brightness Control - Press the
CURSOR RIGHT 2 or LEFT
1 buttons until the darkest
parts of the picture are as bright
as you prefer.
2
Color Control - Press the
CURSOR RIGHT 2 or LEFT
1 buttons to add or eliminate
color.
3
Picture Control - Press the
CURSOR RIGHT 2 or LEFT
1 buttons until lightest parts of
the picture show good detail.
4
Sharpness Control - CURSOR
RIGHT 2 or LEFT 1 buttons
to improve detail in the picture.
5
Tint Control - Press the CUR-
SOR RIGHT 2 or LEFT 1
buttons to obtain natural skin
tones.
6
Color Temp Control - Press
the CURSOR RIGHT 2 or
LEFT 1 buttons to select
Normal, Cool, or Warm picture
preferences. (Normal will keep
the whites, white; Cool will
make the whites, bluish; and
Warm will make the whites, red-
dish.)
7
DNR Control - Press the
CURSOR RIGHT 2 or LEFT
1 buttons to turn DNR On or
Off. Dynamic Noise Reduction
helps to eliminate “noise” from
the picture.
8
Contrast + Control - Press the
CURSOR RIGHT 2 or LEFT
1 buttons to toggle the control
On or OFF. The Contrast + con-
trol helps to “sharpen” the pic-
ture quality. The black portions
of the picture become richer in
darkness and the whites become
brighter.
C
HANNEL
E
DIT
14
C
hannel Edit makes it easy for you to
ADD or DELETE channels from the
list of channels stored in the TV’s memory.
1
Press the MENU button on the
remote control to show the on-
screen menu.
2
Press the CURSOR UP3 or
DOWN 4 buttons to scroll though
the on-screen menu until the word
Install is highlighted.
3
Press the CURSOR RIGHT 2
button to display the Install menu
features.
4
Press the CURSOR UP3 or
DOWN 4 buttons to scroll through
the Install features until the words
Channel Edit are highlighted.
5
Press the CURSOR RIGHT 2
button to display the Channel Edit
options.
6
With the Channel Edit options
displayed, and Channel highlight-
ed; you can use the cursor buttons to
scroll through all available channels
that you wish to add (skipped OFF)
or delete (Skipped ON) from the
TV’s memory. You can also use the
NUMBERED buttons to go directly
to a specific numbered channel that
you want to add or skip. Or, you can
also use the CH+ or CH- to quickly
scan through the channels that have
not been skipped.
7
Using the CURSOR DOWN 4
button, scroll the menu to highlight
the word SKIPPED.
8
Now use the CURSOR RIGHT 2
to toggle between On or Off. If
ON is selected the channels is
skipped when scrolling channels
with the CH+ or CH- buttons. If
OFF is selected the channels is not
skipped when scrolling channels
with the CH+ or CH- buttons.
9
When finished, press the STA-
TUS/EXIT button to remove the
menu from the screen.
VOL
Channel Edit
Channel
Skipped
12
Main
Picture
Sound
Features
Install
Brightness
Color
Picture
Sharpness
Tint
More...
Main
Picture
Sound
Features
Install
Language
Tuner Mode
Auto Program
Channel Edit
Install
Language
Tuner Mode
Auto Program
Channel Edit
Channel
Skipped
Channel Edit
Channel
Skipped
On
Channel Edit
Channel
Skipped
Off
9
2
4
7
3
5
8
6
1
2
4
6
8
6
6
An “X” appearing in front of
any channel will indicate that
channel has skip on. When the
CH + or CH - buttons are used,
those channels will be skipped.
HELPFUL HINTS