Do you have a question about the Philips S9311 and is the answer not in the manual?
Instructions to reduce the risk of electric shock when using the shaver.
Instructions to reduce risks of burns, fire, electric shock, or injury.
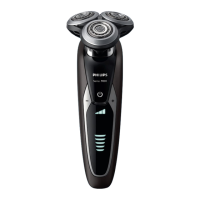
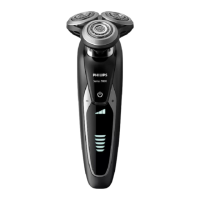
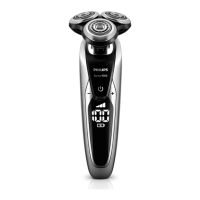
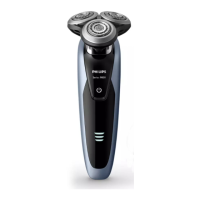
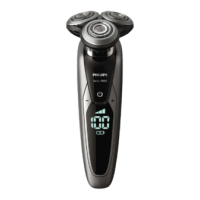
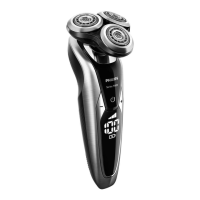
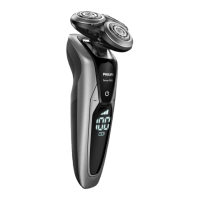
Advanced shaving head technology for better contour following.
Details about the shaving head, chambers, and cutting action.
Description of the shaver's power control button.
Customizable speed settings for different skin and hair types.
Overview of various indicator lights on the shaver.
Integrated attachment for grooming sideburns and moustaches.
Power adapter compatibility with global voltage standards.
Accessory included for convenient travel storage.
Specifications for battery charging time and duration.
Feature for rapid charging for short use.
Ability to shave without being tethered to a power source.
Information about the product's warranty duration.
Introduction to the cleaning and charging station.
Description of the system's cap, holder, and buttons.
Details of the charging, ready, and cleaning indicators.
Information about the cleaning cartridge and release mechanism.
How the display shows the shaver's charging status.
Indication when the battery has reached full charge.
How the display shows the current battery power level.
Alert for when the battery is nearly depleted.
Information on speed settings shown on the display.
Indicator signaling the need to replace shaving heads.
Notification for clogged shaving heads requiring cleaning.
Reminder to clean the shaver after use.
How to lock the shaver to prevent accidental activation.
Key notes on charging, temperature, and cord usage.
Step-by-step instructions for connecting and charging.
Connecting the SmartClean System power cord to the outlet.
Opening the top cap of the cleaning station.
Placing the shaver into the holder in the correct orientation.
Securing the shaver into the SmartClean System.
How the shaver indicates it is charging.
Final steps and indicators for a full charge.
Advice on adapting to the new shaving system over 3 weeks.
Details of the satisfaction guarantee and refund process.
Icon indicating the shaver's suitability for wet shaving.
Clarification of the product's intended application.
Recommendation to trim beard if not shaved for 3+ days.
Initiating the shaving operation.
How to stretch skin and use shaving movements.
Concluding the shaving process.
Instructions for cleaning the shaver after use.
Placing the shaver in the SmartClean System.
Moisturizing the skin before wet shaving.
Using shaving aids for wet shaving.
Ensuring smooth glide by rinsing the shaving unit.
Turning on the shaver for wet shaving.
Shaving technique using foam or gel.
Drying the face and cleaning the shaver.
Instructions for using the trimmer attachment.
Removing the main shaving head from the shaver.
Connecting the precision trimmer to the shaver.
Activating the shaver for trimming.
Guiding the trimmer for desired hairline.
Performing the trimming action on facial hair.
Concluding the trimming operation.
Cleaning instructions for the trimmer attachment.
Removing the trimmer from the shaver.
Restoring the shaver to its original configuration.
Placing the shaver in its protective holder.
Steps to engage the shaver's travel lock.
Steps to disengage the shaver's travel lock.
Basic recommendations for shaver cleanliness.
Precautions regarding motor operation during cleaning.
Detailed instructions for cleaning the shaver heads.
Method for cleaning the shaving unit under tap water.
Warning to test water temperature to avoid burns.
How consistent cleaning improves shaving results.
Observation about water exiting the shaver base during rinse.
Detaching the upper part of the shaving unit.
Washing the shaving unit with warm tap water.
Allowing the shaving unit to dry completely.
Putting the shaving unit back onto the shaver.
Safety warnings for handling the cleaning cartridge.
Restriction to use only Philips Norelco compatible parts.
Guidance on when to replace the cleaning cartridge.
Recommendation to prevent evaporation of cleaning solution.
Clarification of the SmartClean System's cleaning capabilities.
Details about the power plug's voltage conversion.
Instructions for placing the system on a stable surface.
Positioning the SmartClean System correctly.
How to lift the upper part of the SmartClean System.
Preparing the new cleaning cartridge.
Inserting the new cartridge into the system.
Reattaching the top section of the SmartClean System.
Description of the cleaning and drying cycles.
Condition for the SmartClean System to operate correctly.
Plugging the SmartClean System into a power outlet.
Accessing the shaver holder within the system.
Ensuring proper placement and seal.
Removing water from the shaver before placement.
Inserting the shaver into its designated spot.
Ensuring the shaver is properly connected for cleaning.
Visual cue for the shaver's charging state.
Starting the cleaning process with the ON/OFF button.
The blinking symbol indicating the cleaning phase.
The approximate time the cleaning phase takes.
Symbols indicating the drying phase and its duration.
Consequences of pressing the ON/OFF button during cycles.
How to resume the cycle if power is interrupted.
Reminder about the replacement indicator for the cartridge.
Indicators signifying a complete cleaning and drying cycle.
Taking the cleaned shaver out of the SmartClean System.
Automatic power-down after cycle completion.
Placing the shaver back in the system for head protection.
Initial step for manual deep cleaning of the shaver.
Disassembling the shaver head assembly.
Detaching the component that secures the shaving rings.
Taking off the rings that hold the shaving heads.
Separating the shaving heads and internal cutters.
Caution against mixing parts to maintain performance.
Washing individual cutting components.
Correctly reinserting cutters into combs.
Putting the shaving head components back together.
Securing the shaving head assembly with retaining rings.
Completing the reassembly process for all rings.
Finalizing the assembly of the shaver head unit.
Caution against placing the shaving head holder on surfaces.
Connecting the trimmer to the shaver body.
Activating the shaver for trimmer cleaning.
Washing the trimmer with warm tap water.
Allowing the trimmer to air dry thoroughly.
Advice on lubricating trimmer teeth every six months.
Recommendation to replace the shaving unit annually.
Specifying the correct model for replacement heads.
Notification system for when to replace the shaving unit.
Detaching the shaving unit for replacement.
Taking off the holder for the retaining rings.
Unfastening the rings holding the shaving heads.
Removing old shaving heads and discarding them.
Placing the new shaving heads into the holder.
Securing the new shaving heads with retaining rings.
Completing the reassembly for all shaving head components.
Finalizing the assembly of the shaver head unit.
How to reset the shaver after replacing the unit.
Note on the absence of user-serviceable parts.
When to replace the cleaning cartridge.
Pressing the button to detach the old cartridge.
Disposing of the used cleaning cartridge.
Instructions for proper disposal of used cartridges.
Preparing the new cleaning cartridge for use.
Inserting the new cartridge into the SmartClean System.
Reattaching the top section of the SmartClean System.
First step before cleaning the SmartClean System.
Method for cleaning the system and shaver.
Temperature setting for cleaning washable components.
Prohibition against placing system parts in a dishwasher.
Storing the shaver in a travel pouch or SmartClean System.
Ensuring shaver is off and cord is removed.
Advice on storing the power cord safely.
Avoiding hazardous locations for the SmartClean System.
Information on obtaining help via website or phone.
Support resources accessible 24/7.
Instructions for disposing of the rechargeable Lithium-Ion battery.
How to find local resources for battery recycling.
Recommended shaver heads for optimal performance.
Available cleaning cartridge packs (2-pack, 3-pack).
Where to buy additional shaver accessories.
What the two-year warranty covers and its terms.
Conditions and damages not covered by the warranty.
Consequences of using non-authorized repair services.
Procedure for requesting warranty assistance.
Exclusion of damage incurred during product shipment.
Consumer rights and state-specific warranty differences.
Explanation of product markings, listings, and trademarks.
| Type | Rotary |
|---|---|
| Number of Heads | 3 |
| Contour-following | Yes |
| Personal Comfort Settings | Yes |
| AquaTec | Yes |
| Wet & Dry | Yes |
| Cleaning System | SmartClean system |
| Battery Type | Lithium-ion |
| Charging Time | 1 hour |
| Automatic voltage | 100-240 V |
| Precision mode | Yes |
| Travel lock | Yes |
| SmartClick | Yes |
| Cleaning | Automatic |
| Display | Yes |
| Run time | 50 minutes |
| Quick charge | 5 minutes for 1 shave |
| Usage Time | 50 min |