onlinecomponents.com
IBSL SYS PRO UM E
1-36 6057AC01
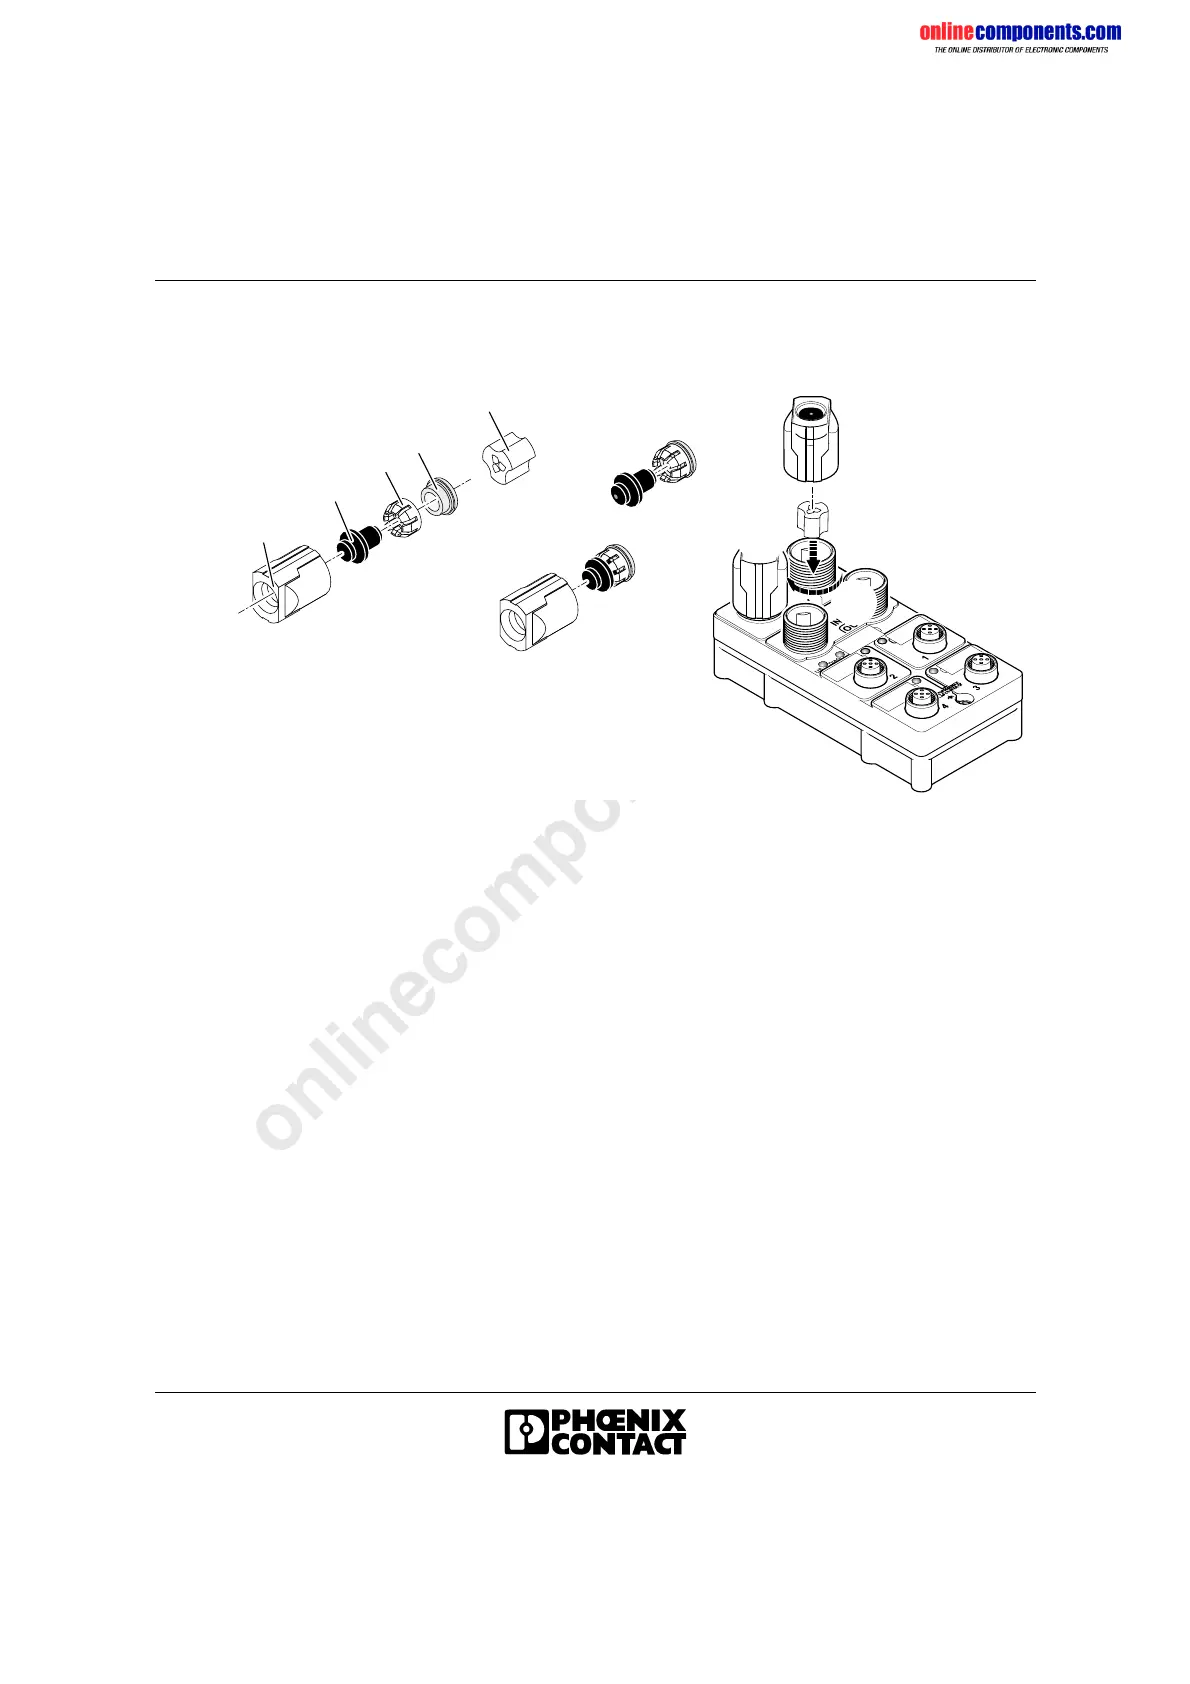
1.8.7 Mounting Filler Plugs
Figure 1-30 Mounting filler plugs
1 Cap nut
2 Filler plug
3 Compression ring
4 Grommet
5 3-pos. splice ring
• Push the compression ring onto the grommet and then attach both
parts to the filler plug (Figure 1-30, B).
• Once assembled, push these into the cap nut (Figure 1-30, C).
• Place the splice ring in the unused socket for the outgoing actuator
supply. Attach the threaded joint with the assembled filler plugs
(Figure 1-30, D1) and tighten the cap nut (Figure 1-30, D2).
1
2
3
4
5
A
B
C
D
6 0 5 7 A 0 3 0
D 2
D 1
 Loading...