17
5.4. Menu point „routes“
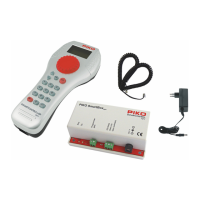
The PIKO SmartController
light
can memorize up to 16 routes.
By pressing [3] on page 2 of the conguration menu, you reach the routes menu.
Here you can enter switching sequences for the routes. They will be automatically saved on the PIKO
SmartController
light
.
By pressing [1] you can enter the number of the route (1 - 16) you want to change. The number has to
be entered with the number keys and conrmed with the [↩] -key.
By pressing [2] you can enter the individual steps (1 - 10) of the route. The steps have to be entered
with the number keys and conrmed with the [↩] -key.
By pressing [3] you can enter the addresses for the magnetic accessories assigned to the steps 1-10.
The addresses have to be entered with the number keys and con-rmed with the [↩] -key.
After pressing [4] you can use the [▲] - and [▼] – keys to choose the switch direction “red” or “green”
for the respective address of the magnetic accessory. Afterwards you have to conrm your choice with
the [↩] -key.
By pressing [0] you can leave the routes menu. All entered routes are automatically memorized.
5.5.Menupoint“turnoutconguration“
By pressing [4] on page 2 of the conguration menu, you reach the “turnout conguration” menu.
Here you can assign symbols to your turnout addresses.
You can create up to four turnout lists, in which you can save up to eight turnout addresses in random
order. Besides the symbols you can also assign two-digit descriptions to these addresses.
After pressing [1] in the turnout conguration menu you can use the [▲] and [▼] keys to switch
between “ALL” (the PIKO SmartController
light
now uses all turnout ad-dresses (1 – 2.000) in ascending
order) or “LIST” (the PIKO SmartController
light
now uses the four turnout lists with up to eight turnout
addresses).
Conrm your selection with the [↩] key.
By pressing [2] (only when “LIST” is activated) you can dene the position (1 - 32) of the turnout
addresses within the four turnout lists using the number keys. Conrm your selection with the [↩] key.
By pressing [3] you can choose the turnout address you want to congurate. You enter the address by
using the number keys and conrming it with the [↩] key.
By pressing [4] (only when “LIST” is activated) you can assign a two-digit description to the address.
You can change the position of the cursor by turning the encoder wheel.
Afterwards press the encoder wheel down for conrmation.
Now you can choose the rst digit by again turning the encoder wheel.
Press the encoder wheel again to conrm your choice. Repeat the steps for the sec-ond digit.
When both digits are selected, conrm your choice by pressing [↩].
By pressing [5] you can assign a symbol to the turnout address. Use the [▲] and [▼] keys to choose a
symbol from the list and conrm your choice with the [↩] key.
By pressing [0] you can leave the turnout conguration menu.
ATTENTION: You can assign different symbols to the addresses in the “ALL” and “LIST” mode.
5.6. The loco mode
In loco mode you can activate and control locomotives. You can activate loco mode from every menu
by pressing the [lok] key.
The control of the speed and driving direction of every loco also works while being in the turnout or
routes mode.